The Hotspotty team was gracious enough with their time to walk me through some significant improvements of their Helium tool.
Bottom Line Up Front: If you run a fleet of hotspots, using the newest version of Hotspotty will make managing payments FAR easier, will improve your deployments at scale, and will help you assess the impact of PoCv11.
Do you need this if you’re not running a fleet? While it’s still useful, the payments & assessment features won’t have as much impact on you.
At the end of the day, no matter if you’re got one hotspot or ten thousand, the winning formula is:
Do a good job, accurately report what you’ve done and you’re most likely to earn the most possible.
-zee Gristleking
Quick disclaimer: I randomly selected hotspot and wallet addresses for the examples in this blog post. With one exception, I have no idea who these people are. All of this is public information, but none of it is connected to any official Gristle King work or clients.
With that out of the way, let’s dig in. I’d recommend signing up for an account at Hotspotty and having a separate window open with your Hotspotty account while we go through this.
You can watch the interview I did with them on this new version, here:
We’ll start with a few definitions, then go into the workflow recommended by Hotspotty
Hotspot — This is a physical hotspot that has been added to the blockchain and has a three word name (Rhythmic Red Rooster, etc)
Location — This is where your Hotspot physically is. That should be within 150m of where you’ve asserted it on the blockchain (using the Helium app). You may have “mis-asserted” for privacy reasons or to clear a hex. Locations can also be used as “proposed” locations where you’re thinking of putting a hotspot.
Contact - This is a person associated with the Install. They could be the installer, a host, a partner in your business, a referrer, or something else. Each Contact can have a different (or none at all) commission applied.
Install — This ties together the above three things: The Hotspot itself, its physical Location, and the Contacts associated with it.
I’ll warn you up front; Hotspotty is NOT the simplest way to manage just a few hotspots, and can be overwhelming/overkill if you’re not running a fleet of ’em. If, however, you ARE running a fleet, well, Hotspotty is an excellent tool.
So the workflow goes like this: Order Hotspot–>Create Payment Structure–>Assess Locations–>Identify Contacts–>Receive Hotspot–>Create an Install.
An Install connects the Hotspot, the Location, and the Contact. The order can jumble around a bit depending on what you’re doing, as you’ll see. Let’s start at the beginning.
First, you order your Hotspots.
While you’re waiting for the Hotspots to arrive, you’ve got a few things to do in Hotspotty. One is to create the structure for what you’re doing, starting with your commission structure.
Are you going to pay a 20% commission or a 50% one? Is there a standard installer fee you’re going to pay? Do you have partners you need to split this with? Each one of those splits is associated to a Label in Hotspotty.
Let’s go into Hotspotty’s Settings and get this set up. Make sure you’re in the Workspace (not the Map), then look for Settings on the top right.
Once in Settings, look for Commissions on the little menu on the left, then set up templates for what you’ll pay out. I added Host, Referral, and Partner.
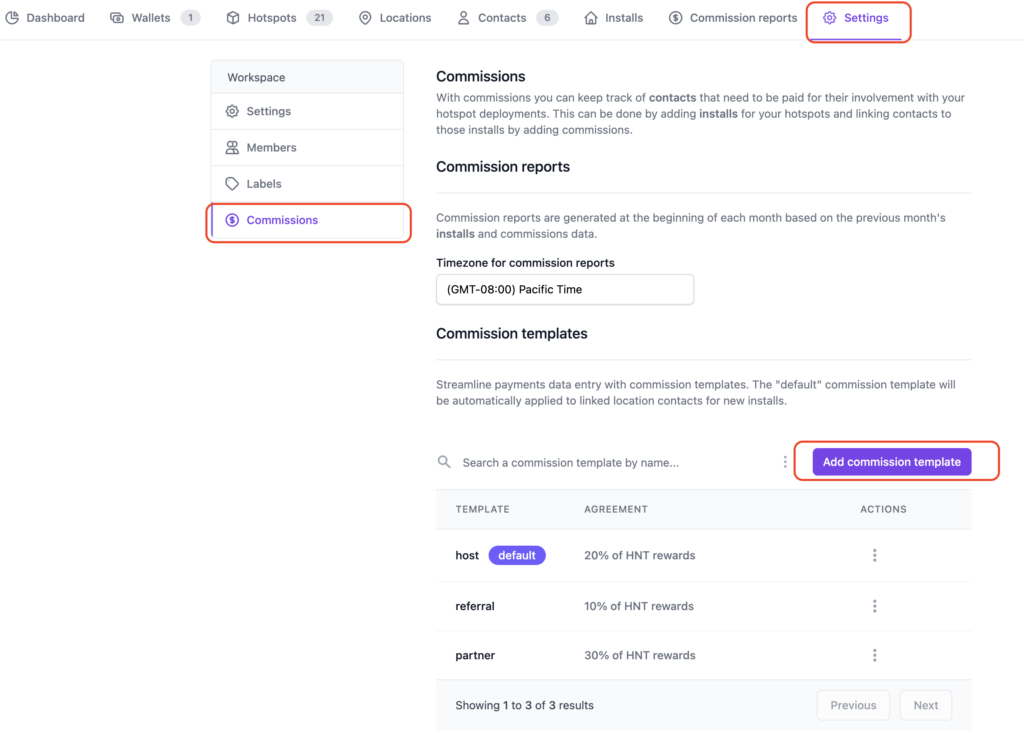
Now you know WHAT you’re going to pay, you’ve got choices as to your next steps. You can add Contacts or you can add Locations. I’ll start with Contacts, but what you do will depend on your scenario.
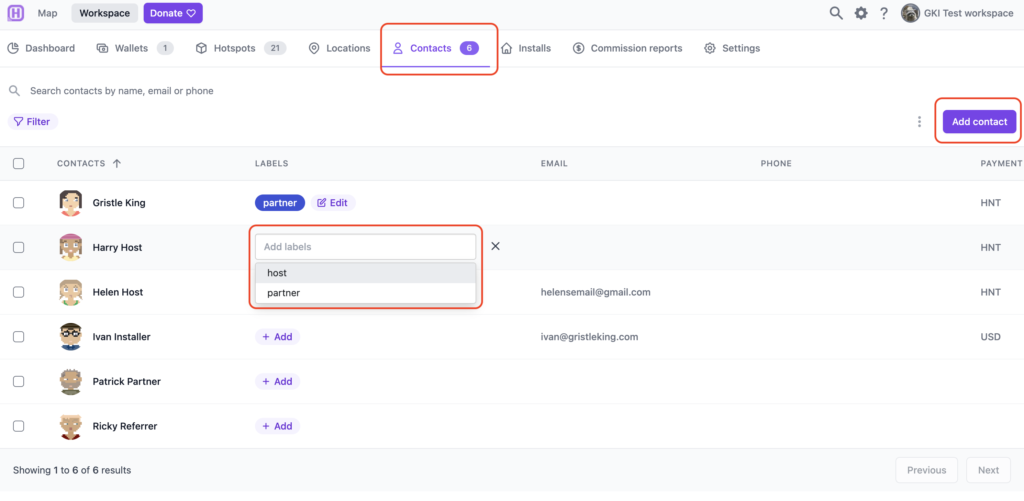
For each Contact you can add Labels. A Contact can have multiple Labels. The default labels come from the Commission setup you just did, but you can add custom labels; I added an “Installer” label for old Ivan, then used it for Gristle King as well. I mean, I’ll get my hands dirty. 🙂
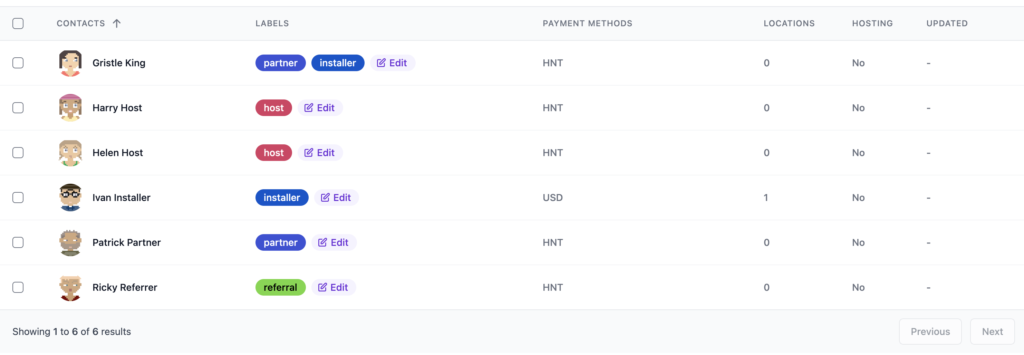
Cool, so now we know WHO we’re working with. Let’s find some Locations that we think might be good! Obviously the steps of what comes first, Locations or Contacts, is up to you and depends on your set up. With one fleet client I’m working with, we know who the main partners are and the installers, but the Hosts are added as we bring them into the system.
Check out Grandma’s house, your office, the radio tower over yonder, the taller mountain overlooking the city, your locker mate’s brother’s friend who knows the maintenance guy over at the Empire State Building, etc. If you need help, I’ve got a blog post over here about how to do an assessment.
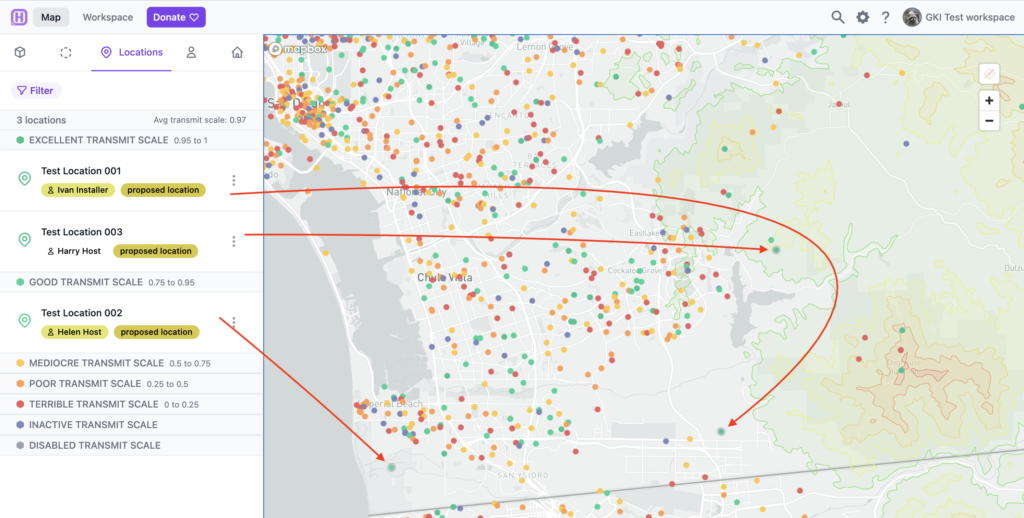
Once you’ve added your Locations into Hotspotty take a look at what they’ll do to the transmit scale, whether or not they’re too close to other Hotspots, and how they’ll change the transmit reward scale where they’re placed.
You add Locations over in the Map, up at the top left. Click on the Locations tab, drop a pin, drag the map, then add whatever information you’d like to the Location. Yep, Ivan be climbing on this one. 😉
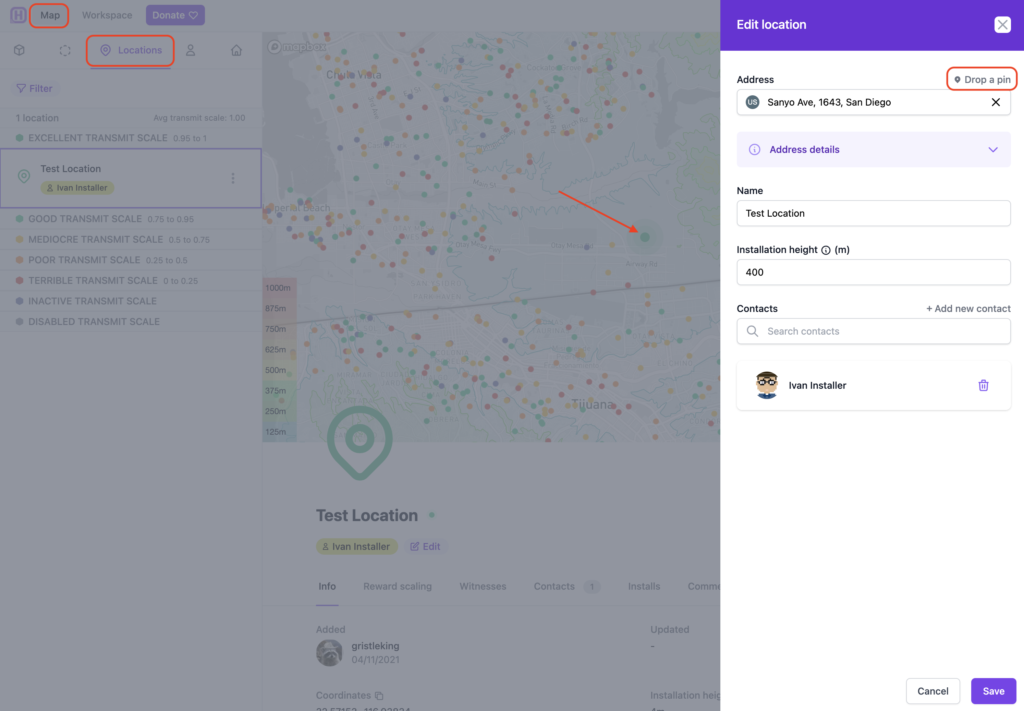
Once you’ve got a couple locations in, it’ll look like this. The dot with a border around it signifies a Location (vs a Hotspot.)
Now we’ve got Labels, Contacts, and Locations, all we need is to receive our Hotspots, do an Install, then make Payments!
Let’s say in Test Location 002, above, the Hotspot isn’t actually going in that spot for privacy reasons. Again, for demonstration reasons, let’s say this Hotspot is actually Striped Tin Coyote, but Helen Host doesn’t want the world to know where she lives. We change the Location to be where it actually is, then on the Helium App we assert the Hotspot 102 meters away from where it actually is. Hotspotty helps us keep track of that difference with Placement Distance.
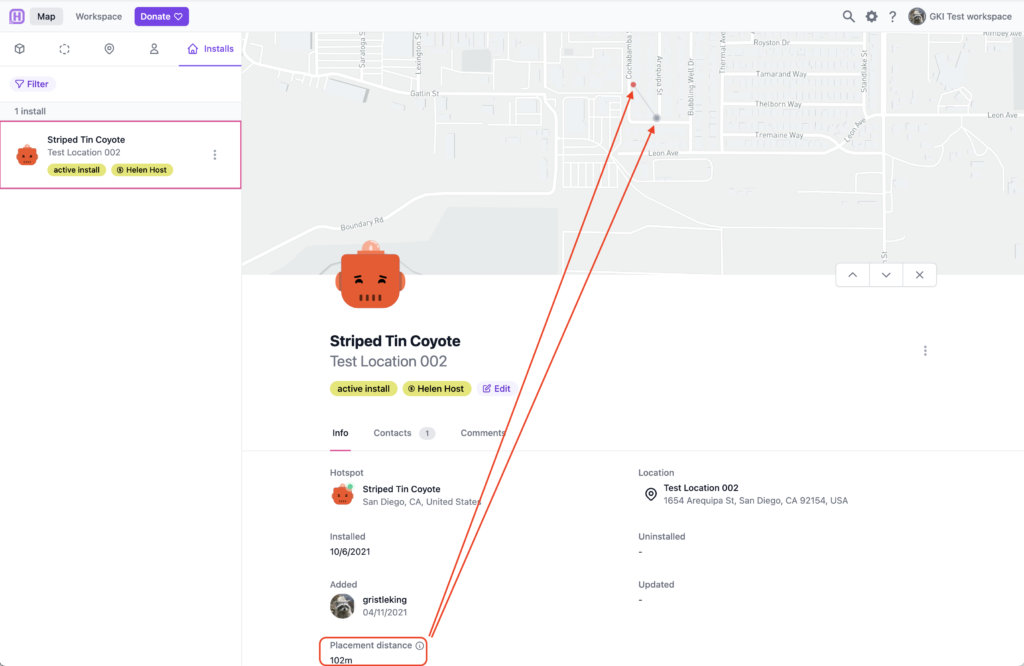
So now we’ve got a Hotspot connected to a Location and a Contact. Voila, an Install!
If you’d like to go deeper into how you’d use that on a fleet, I’m available for hire. Yes, if you’re running a fleet, you can and should go WAY deeper; this was just an intro.
Ok, that was kind of complicated. What about Payments? This is way easier.
Payments With Hotspotty
Pick a Hotspot; we’ll use Broad Lipstick Falcon. In this case, Ricky Referrer told us about this spot, Ivan Installer did the install, and Patrick Partner manages it. We’ll add all three of those Contacts by adding an Install to this Hotspot.
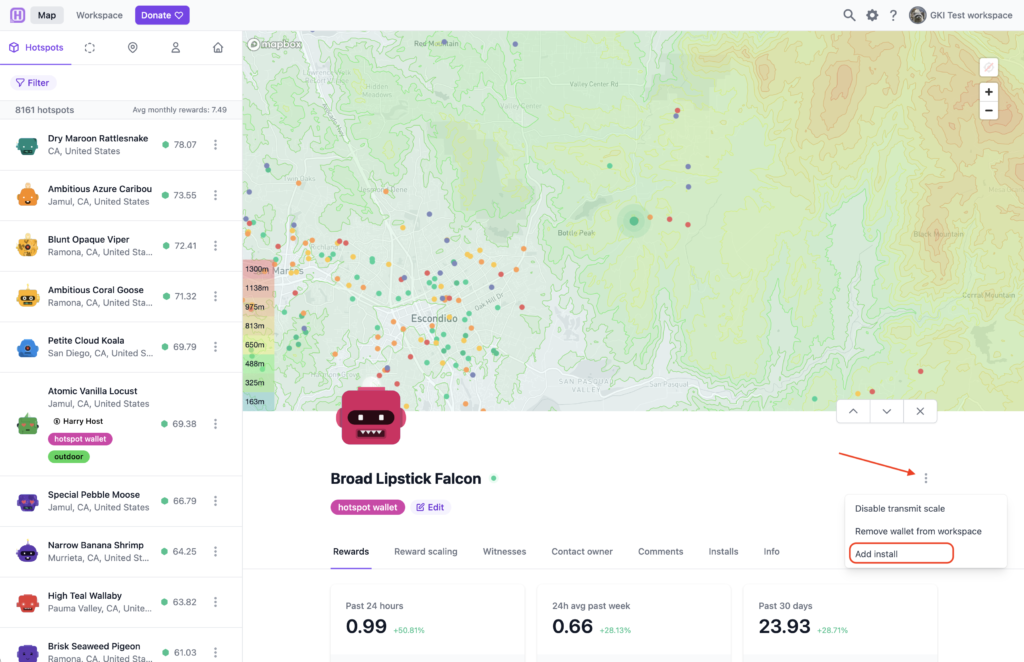
In this case, I’ll use the asserted hotspot location, then I’ll add the Contacts to this Hotspot.
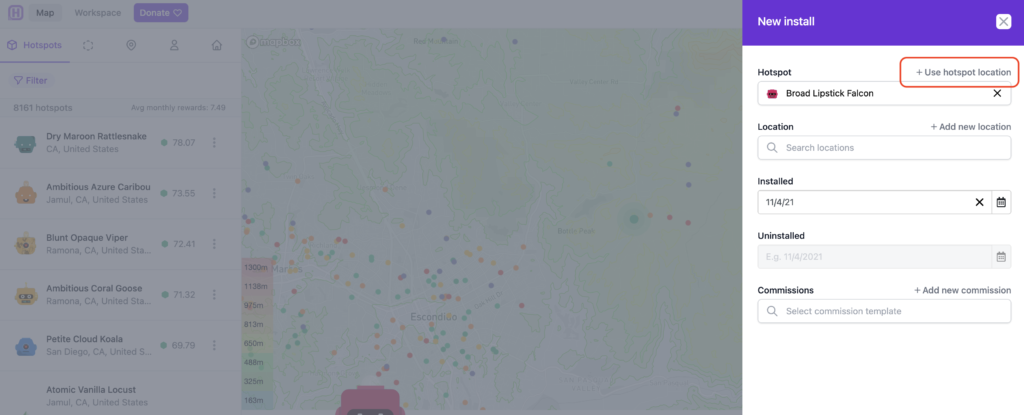
Once you click “+ Use hotspot location” it’ll bring up the next tab, where you start to add Contacts. Like this:
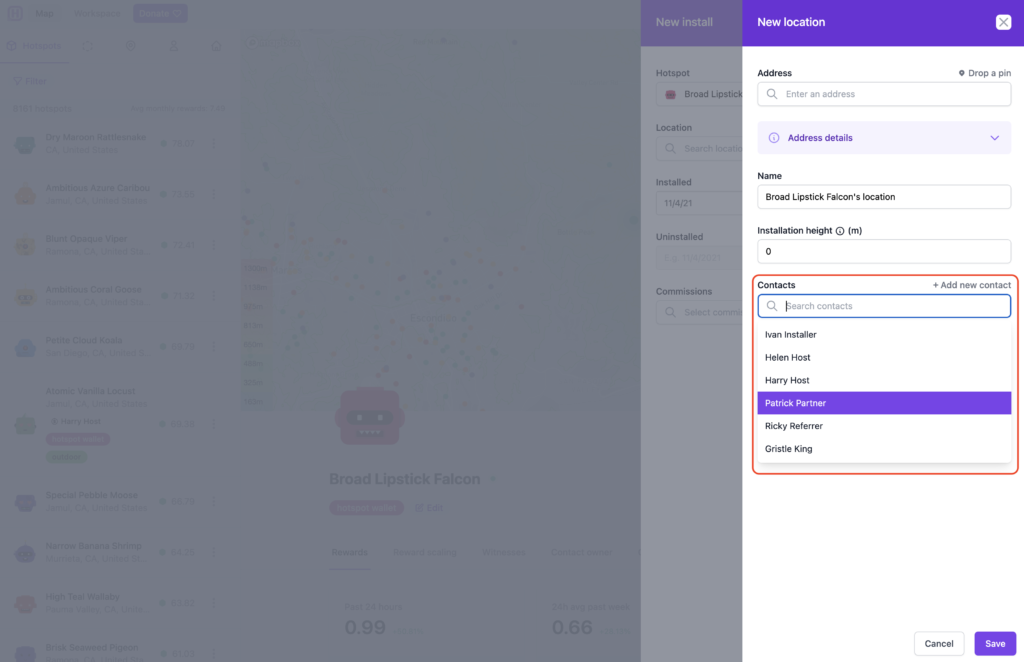
Once you’ve got everything properly labeled and the Commissions assigned, it starts to get way easier. Go to Workspace –> Commission Reports.

Then hit “Generate report”, fill out the date range and run it. I think I set mine back to September of 2021. Wait a second or two, and then click on your newly generated report. It’ll look something like this. The coolest part is the “Pay contacts” button at the top right. Hit that.
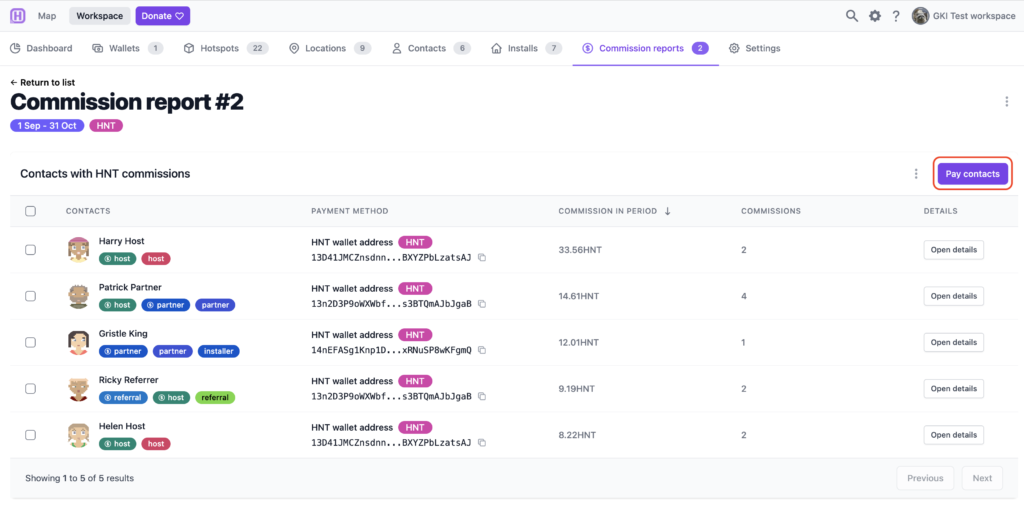
That will bring up a QR code allowing you to pay all of those contacts from your Helium app wallet. Yep, all at once. Up to 30 contacts at a time. Bam.
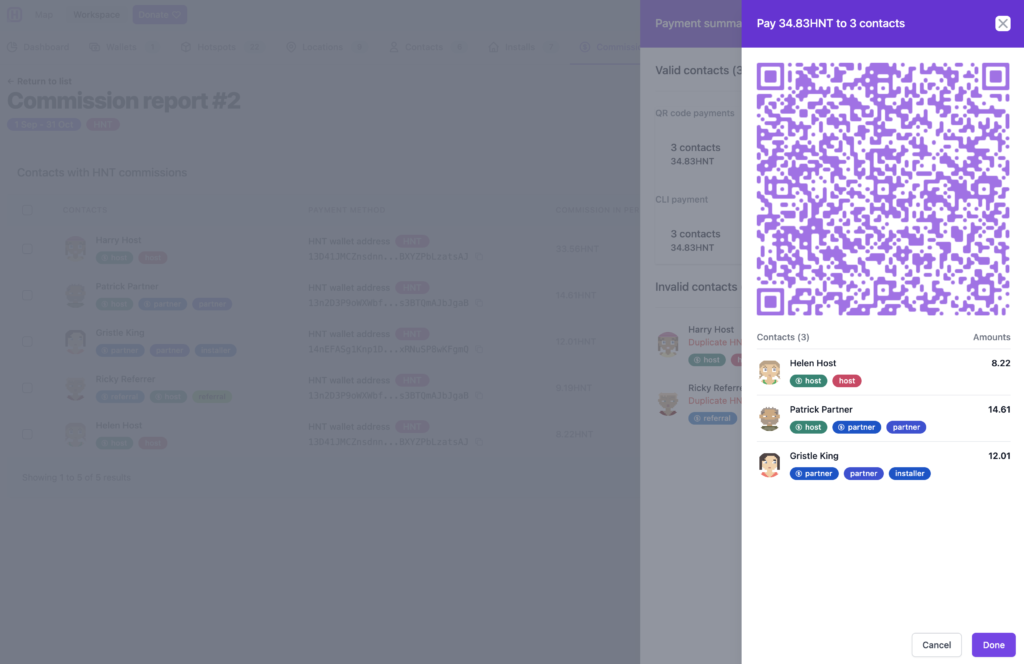
That’s it, payments are done!
That should help you get started using Hotspotty’s latest version. It IS complicated, and you’ll spend some time just banging around various windows and tabs for a bit. Don’t worry, within a few days you’ll be whizzing around like Max and crushing all your Hotspot management tasks.
If you want to use Hotspotty, head on over to their site and fire up an account. If you just want someone to use and manage this complex & powerful tool for you, I have a few slots per month to help fleet-deployment clients get through the start up phase.
Rock on, and enjoy using this powerful tool!

Leave a Reply