How small can you build an off grid miner? Can everything fit in one backpack? How light can that pack be? Finally, why would you want a tiny off grid miner?
And yeah, those are Puppies Make Me Happy sunglasses.
Hey, before we go any further, please know that I’m NOT an electrician, this is NOT professional advice, I’m just a dude who enjoys tinkering and building things. Some of these components, including but not limited to the battery & charger, can cause serious hazard if not correctly installed. Please find a local professional to help you execute a safe deployment.
I’ll start with the last question. Why would you want a tiny off grid miner? The short answer is “weight”. If, like me, you are super stoked on the idea of hiking in an off grid miner to a place deep in the wilds, you will eventually get over the idea of carrying in heavy equipment. I did that on my first off-grid, carrying in awkwardly loaded 60+ lb rucks over 6 miles of rugged terrain with 3k’ of gain.
It was the hardest thing I’ve done since running a hundred miles back in 2015. Fun once, and rad to share with a friend (we EACH had huge, awkward loads to carry), but not something I was desperate to repeat.
Still, being generally unafraid of physical work, I did the same thing a few more times, just to be sure it wasn’t just a one-time suckfest. One off-grid took 6 (SIX!) trips in to install.
By that time, I figured out that while I really like hiking heavy shit long distances out in the mountains, I’d probably enjoy hiking in a light ruck even more. So I set about building one. I also wanted to re-measure my initial power draws because I was seeing off grid setups that seemed smaller with a higher load..
After a conversation with @BFGNeil on Discord about using a Pi Zero and a RAK 2245 hat to put together just the packet forwarder (from a DIY Alpha code I received way back when they were still available), I decided to try it out. The enormous advantage of having just a packet forwarder (and not the full fat miner) is the lower data plan size I can use for the cell backhaul.
I cannnot overstate this advantage. Please do NOT think you’ll be able to use a small data plan (100MB or less) on your production Helium compatible Hotspot. You’ll need 50 GB MINIMUM, and will be much safer with 100 GB. I got lucky to find Helium right as they launched (and then quickly closed) the DIY program. This guide gives you an idea of what a Light Hotspot will be like.
One last note before we dig in. Off grids are hard, and complicated, and sometimes complex. If you just want to buy an off grid setup, I’d start with IoT Off Grid. If, however, you LOVE building your own stuff, keep reading!
Let’s start with a gear list.
PLEASE NOTE: This is MY gear list. It will probably not fit exactly what YOU are trying to do. My goal is to have a tiny, lightweight, right-on-the-edge of power requirements for a Light hotspot in a high sun area. Make SURE you measure your power draws before just blindly ordering what I used and thinking it’ll magically work for your area. Your challenges will be making sure you have enough power and making sure you have enough data.
[ninja_tables id=“2104”]The great news is that packet forwarders are what “light hotspots” will be, so it’s likely that you’ll be able to do this same thing and in a cleaner looking package by mid-2022.
The second advantage of a Light Hotspot is the lower power consumption. Compared to a regular miner, with a packet-forwarder-only setup you can shave off enough watts to really drop both battery size and solar panel size.
Here’s the power it’s pulling. Note the size of that “hotspot”. It’s MUCH smaller than current production hotspot, and pulls about ½ of the power.
Remember, volts x amps = watts, so this is right around 1.5 watts. It jumps around a bit, but in any event, that ain’t much.
Add in a cell modem and the solar charge controller with the packet forwarder on a Pi Zero and you’re looking at about 3.4 watts total. For comparison, a RAK V2 by itself pulls around 2.3 watts.
Want more data on power draws? Here ya go!
[ninja_tables id=“2112”]Of course, it also depends on the winter sun hours in your area. If, like me, you live in America’s Finest City (San Diego), you have more winter sun hours than just about anyone in the US. That means you can use a much smaller solar panel (30 watts is what I chose) as well as a smaller battery (20 Ah in my case.)
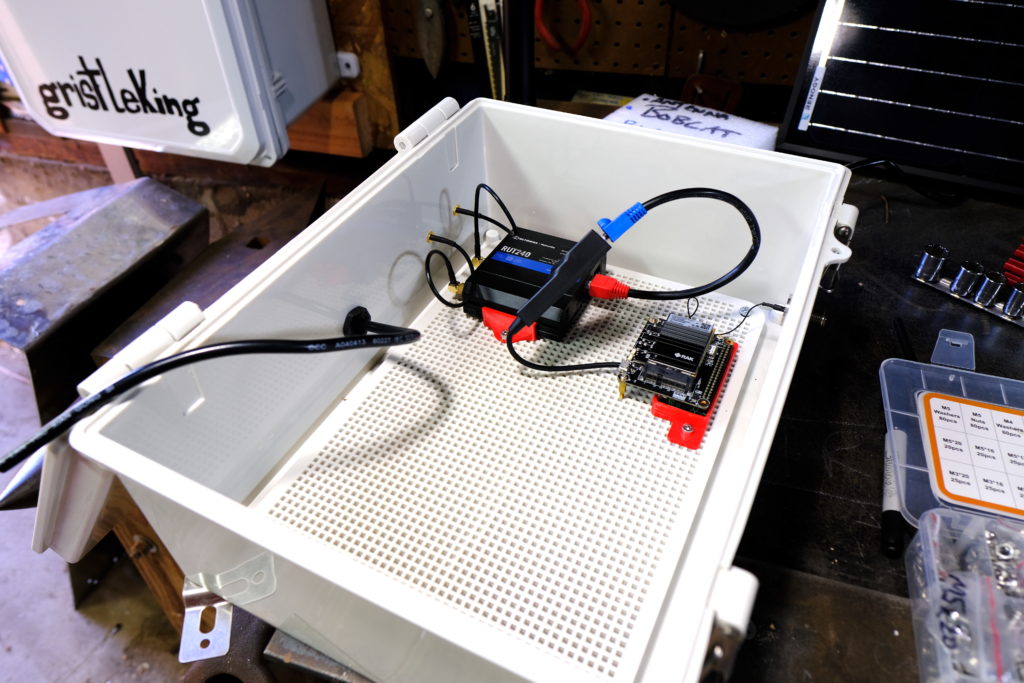
I put those together in an enclosure with the packet forwarder, a smaller cell backhaul (IBR200 instead of the 650C I’ve used before, many off gridders are now using a Spitz), the same charge controller I’ve used, and had a tidy little package.
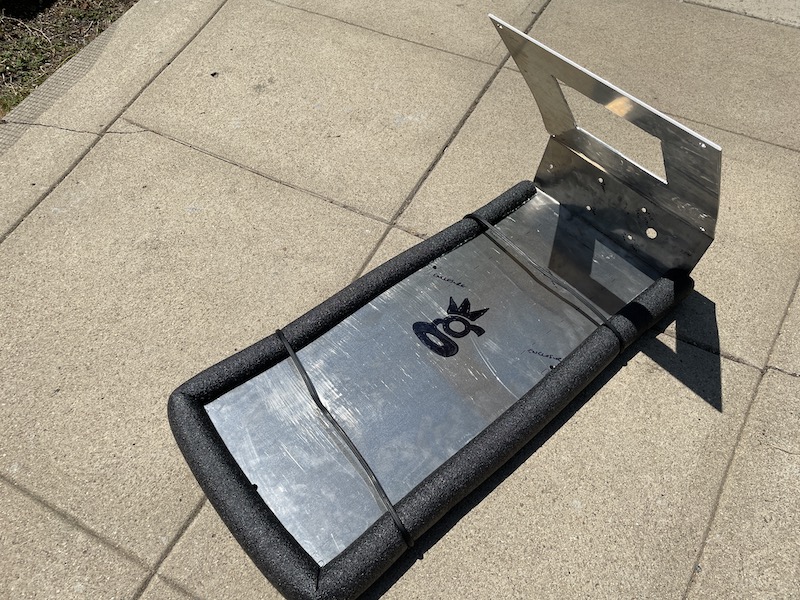
Still, you’re left with mounting the thing, which can be a real bear. The solution I came up with was inspired by something I saw over at MP Antenna, plus the fact that I love to hand bend metal.
I started out with a sheet of 12″ x 48″ .0125 5052 aluminum. 5052 is a good mix of toughness and rigidity. 6061 will crack when you bend it, and 3003 will flex too easily. I marked out the holes for cutting and the lines for bending.

I wanted to be able to mount this bracket anywhere, easily. One of the challenges of an off grid setup is actually mounting the thing. Though you can’t see ’em in the above pic, the latest version has slots for worm drive (hose) clamps as well as the screw/bolt hole mounts you see here. This will easily mount to a round object, like a pipe or a pole or a tree. It’ll mount to a flat surface as well, like a rock wall or the side of a building.
Next up is drilling & cutting ’em out. Aluminum is pretty easy to work with, which makes this a nice project.
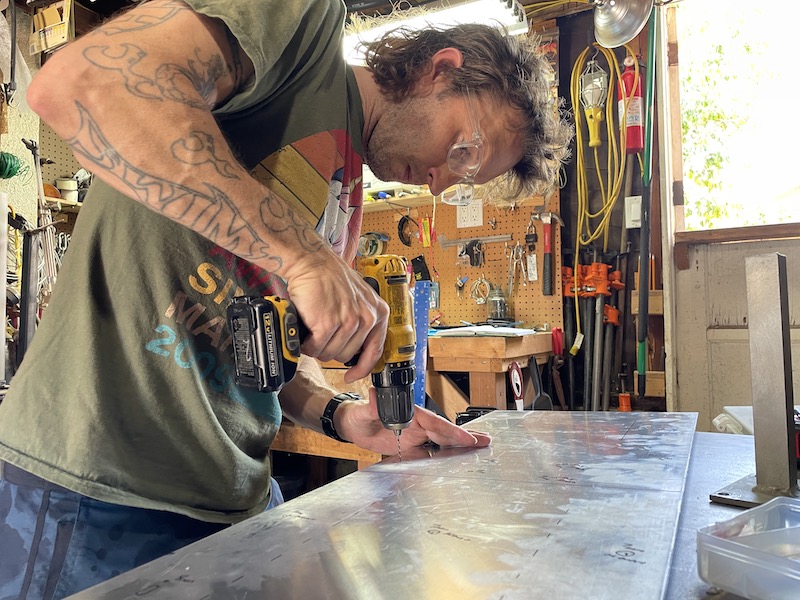
Next up was cutting the “window”, which allows you to reach in with a drill and mount on the back holes before putting the solar panel on. Here’s the plate drilled and cut, ready for bending.

When I go into production (that’s a joke, by the way) I’ll use a press brake and water jet, but for prototyping you can’t beat a bar clamp (as long as you don’t mind a little physical work). You put the plate in the bar clamp, make sure your bend line is straight, tighten everything up, and start hammering. Hand bending takes patience; you don’t see a lot of progress at first, but over time you’ll end up with a beautifully bent line.
As you can see, I set up a little cardboard angle measurement device which gives me an angle of 148, or a 32 degree bend. 32 is our latitude, and gives your solar panel the most sun rays during the shortest days of the year. Here’s what it looks like with the first bend finished.
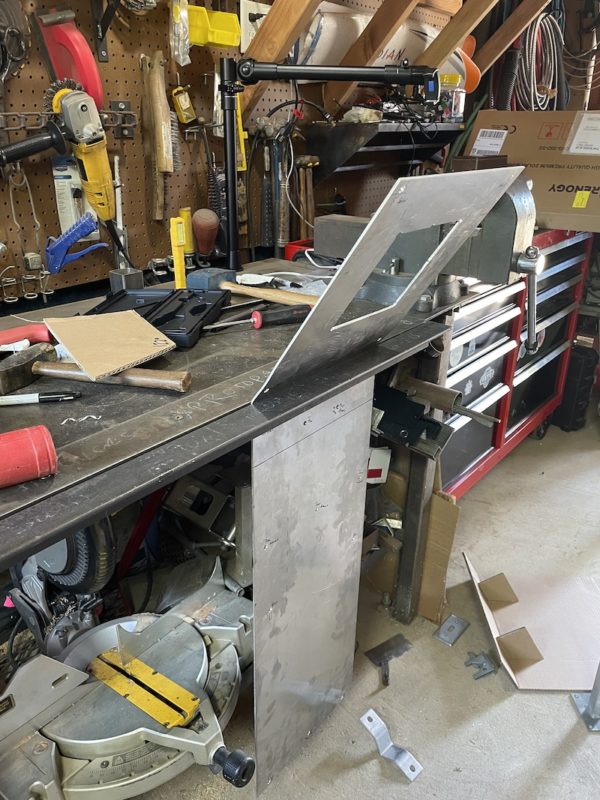
From there you just slide the plate up and hammer out a 90 degree angle. I’ll usually go back and forth a few times with the bends. On a press brake you don’t need to, but when hand bending I always find a little extra love makes for a cleaner job.
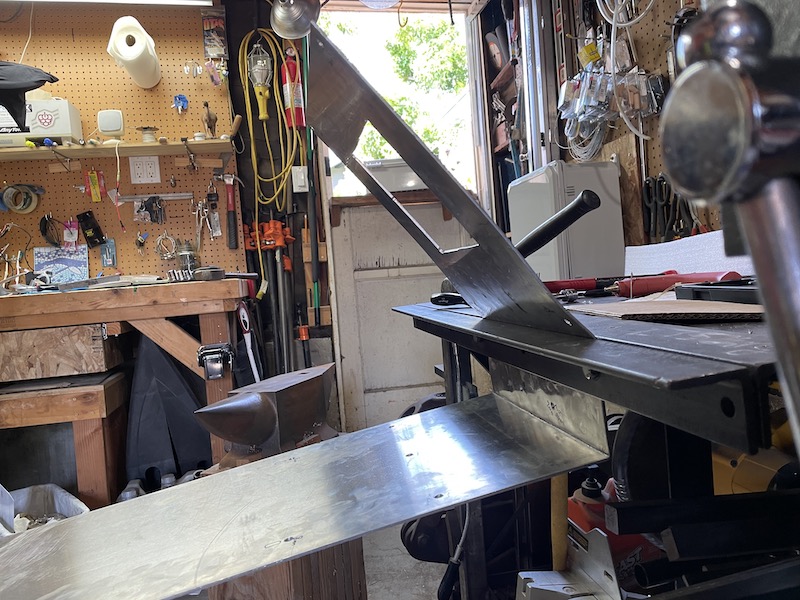
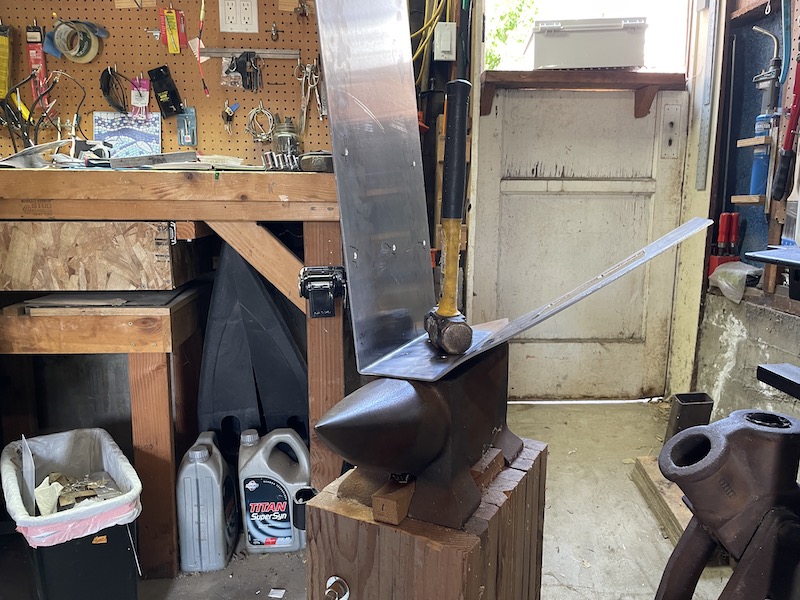
It’s not uncommon to have “extra” bends in there, which you’ll need to flatten out on an anvil. In this case the “roof” had a slight arc to it. I leap at any chance to use my Nimba Titan, here she is ready to assist in the flattening process. Man, the right tools make the job easier!
All that hammering attracted my wife’s attention. She knew the best fuel for any endurance event is the cake from Paleo Treats, so she brought some out. Damn, that Key Lime is good!
Fueled with cake and ready for the next step, I assembled the box, the panel, and the antenna.
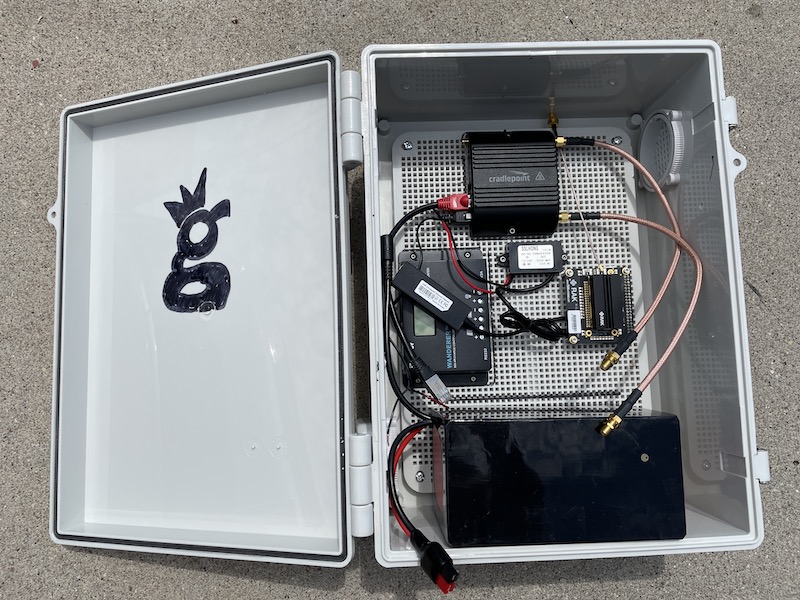
This next part may be confusing, as I’m using pictures from a few different builds here. The parts you see in this build on the inside of the enclosure are the RUT240 cell modem (NOT the IBR200), a Renogy Wanderer 10, and a Bioenno Power 20 Ah LiPoFe4 battery. The hotspot itself is a Pi Zero coupled to a 2287 concentrator and Pi hat from Parley Labs.
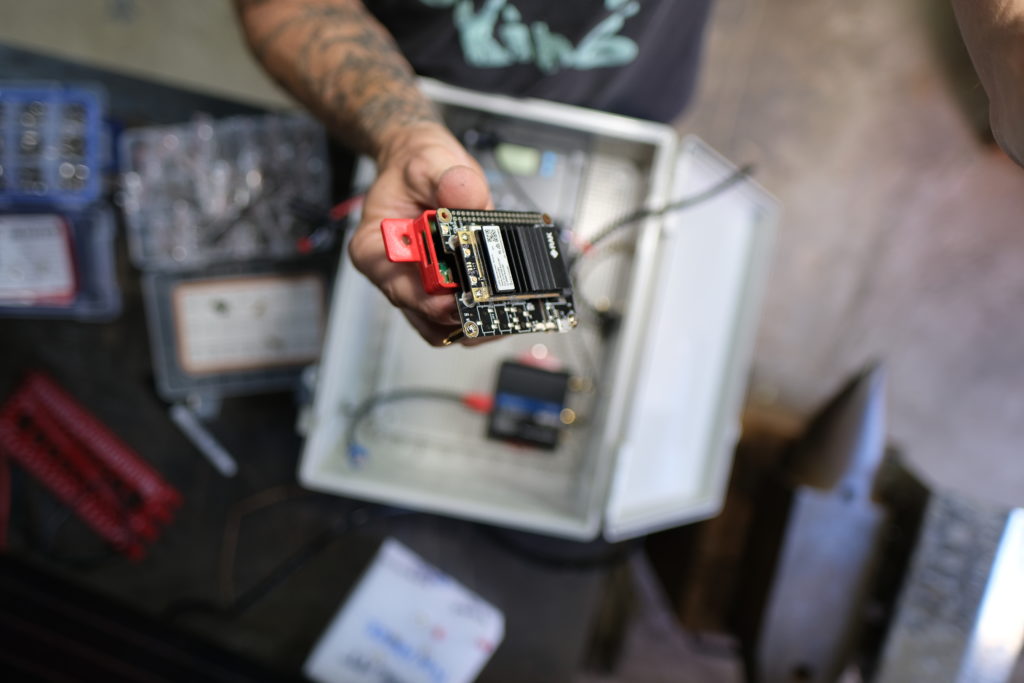
Here’s just the RUT240 and the DIY Hotspot.
I printed up little red PETG brackets for the RUT240 and the Pi Zero on my Prusa 3D printer. At about $800 for a kit, they’re a very useful thing to have if you get into this off-grid world.
If you don’t have (or want) a 3D printer, go to the Prusa World map page and look for folks near you who are willing to print them up for you. That’s how I did my first 3D prints. Here’s the Pi Zero nestled into its bracket. Brackets make it very easy to attach components to the “perf board” that comes with most enclosures.
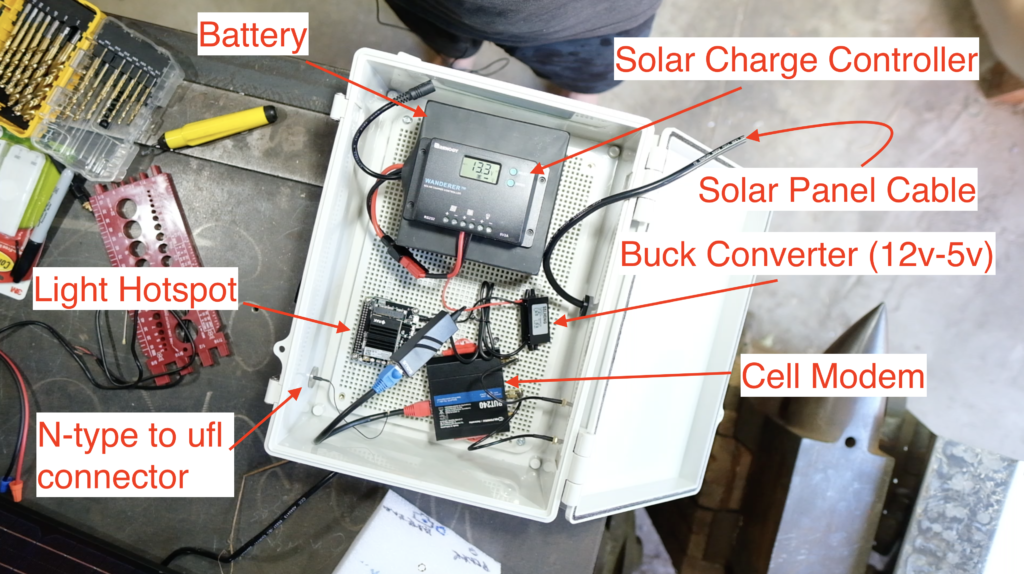
Wait, you want everything labeled for ya? No prob:
Here it is mounted on the nearest available space (my workbench) as a test run. Please note that you’re not limited to mounting on workbenches. 😉

The box still needs vent holes cut and vents mounted along with the holes & glands for antenna cables, but this gives you an idea of how the thing works. It is WAY easier than any other off grid mount I’ve built. Here’s a quick video of it with the HNTenna and a cell antenna mounted, though no cables run yet.
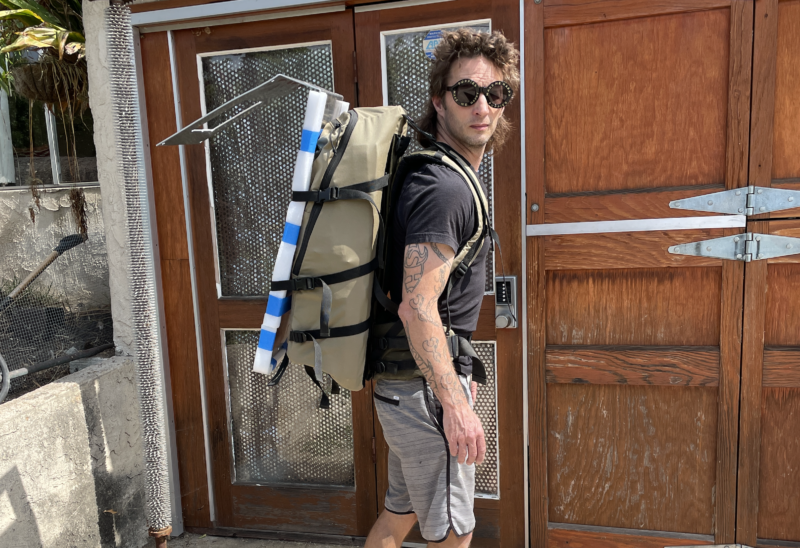
The next step is breaking it all down and seeing if I can fit it in my backpack. One of the real beauties of this setup is how small it is. Most backpacks on the market are way too small to fit a large enclosure. This backpack is built for elk hunters to carry out their meat, but I figured Stone Glacier wouldn’t mind if I repurposed their EVO 3300 as a telecommunications pack. To be clear, this is not (by far) the cheapest pack you can buy to do this job. I just like nice things.

From left to right you’ve got the pack, the solar panel, below the panel is the HNTenna, then the enclosure with a GK tool roll on it, and finally, the bracket.
Now, that bracket has some sharp edges, so if you’re going to strap it on a pack you’ll want to cushion those. I had some leftover foam laying around the shop, so I taped it on with painters tape (comes up off easily) and set up the pack.
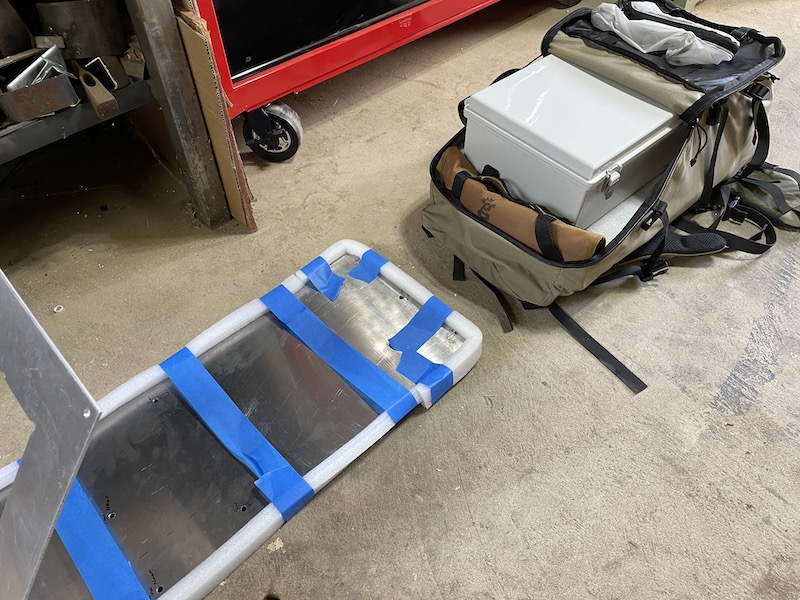
You can’t see it in that pic, but I’ve also padded the solar panel, which is against my back in the pack. While the panels don’t scratch super easily, they’re not the toughest thing out there, and any scratch can decrease the efficiency. That’s something you want to avoid when you’ve got such a small panel. Here’s the pack with everything in it, all ready to go.
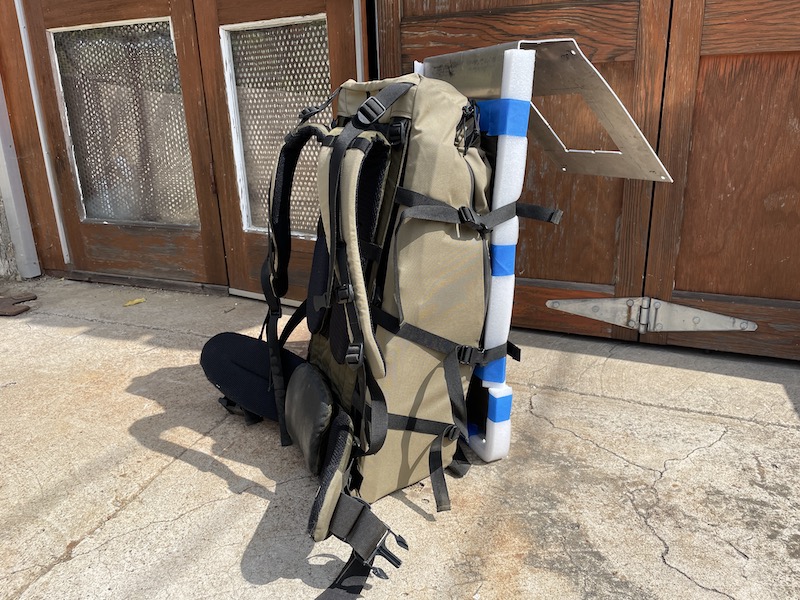
I’m guessing the whole thing weighs less than 35 lbs. If you’ve ever gotten into pack weight and how it can effect your ability to perform under pressure, you know that this is right at the limit of what saps courage over time. I’m not expecting to engage in any firefights while mounting this thing, so I feel pretty safe, even if I’m slightly over S.L.A Marshall’s recommended weight.
After loading the pack up I decided to re-wrap the bracket with a cleaner looking foam setup using pipe insulation. Here’s what that looks like, just for reference.
The gear is pretty straightforward (aside from the bracket). This is a slightly different setup than the one I’ve shown you. Try to identify the components on your own, hit the comments if you need help.
IBR200 cell modem, Renogy Wanderer charge controller, 12–5v buck converter, and then whatever your hotspot is. Here’s the interior layout with almost nothing hooked up. The two pink/orange cables go out to the cell modem antennas. You can see the vent up at the top right. There’s also one at the bottom left. Because the PiZero doesn’t have a native Ethernet connection I picked up a converter for it. Everything else is pretty straightforward.
If you’re looking to do this same thing, keep in mind that this enclosure may NOT fit your hotspot, at least as I currently have it laid out. RAK V2s will be fine, but other hotspots may need to be mounted on the door, or just require a reshuffling.
Ok, that wraps up most of the details on this project. If you’d like help getting your Helium Hotspot off grid, consider hiring me to walk you through the best ways to both build and place your hotspot. Rock on!
Leave a Reply