Onocoy is a GNSS DePIN project with a “bring your own” hardware invitation. You buy a base station, set it up, and start providing its correction stream to Onocoy.
The “bring your own” model has a couple advantages over projects that require you to use their hardware.
First, you can easily use your own data stream by connecting directly with the receiver. Second, you can really dive into the details of what you’re doing to see where you can improve. Third, using your own station requires you to learn a little bit more about the world of PNT (Position, Navigation, Timing), which is just flat out fascinating.
Of course, for us regular (non-GNSS nerds), a “bring your own” station is a little intimidating; it ain’t quite plug ‘n play. Let’s go through the broad strokes you’ll need to do, then get down into those details to make sure you maximize your rewards.
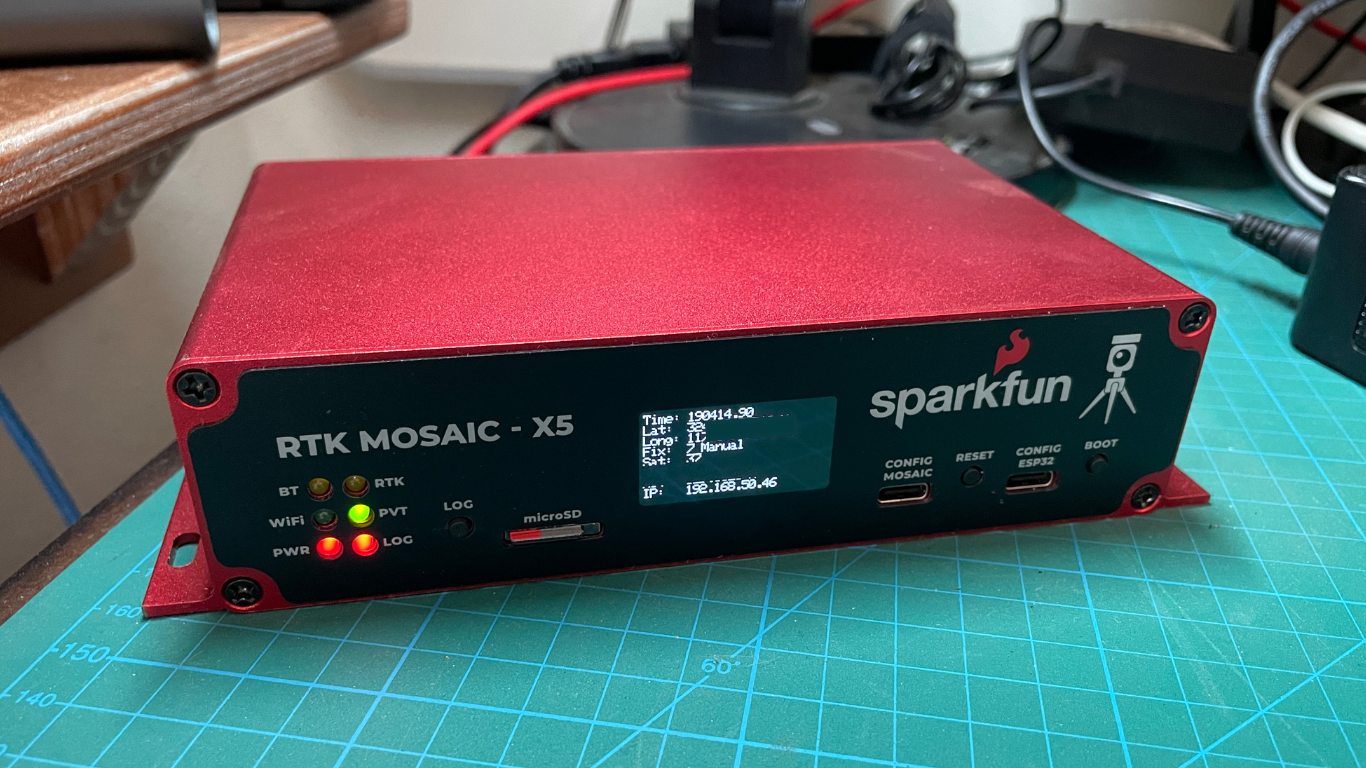
First, you have to buy a base station. The good people over at SparkFun were gracious enough to send me over the best of what they have, which is a SparkFun RTK Mosiac X5.
Here it is sitting on my workbench, merrily collecting signals and issuing out an RTK correction stream. Yes, I’ve covered up the location of my top secret hidden lair in San Diego.
I installed it in my office with the antenna up on the roof. I used PoE (Power over Ethernet) because I avoid WiFi connections wherever I can. I’ve got a Ubiquiti router and PoE switch, so injecting power and finding a port isn’t a problem.
Still, for both antenna and PoE I had to cut some holes in my wall and run cable through the walls and up to the roof. I think that’s fun work, but I also don’t have to do it every day.
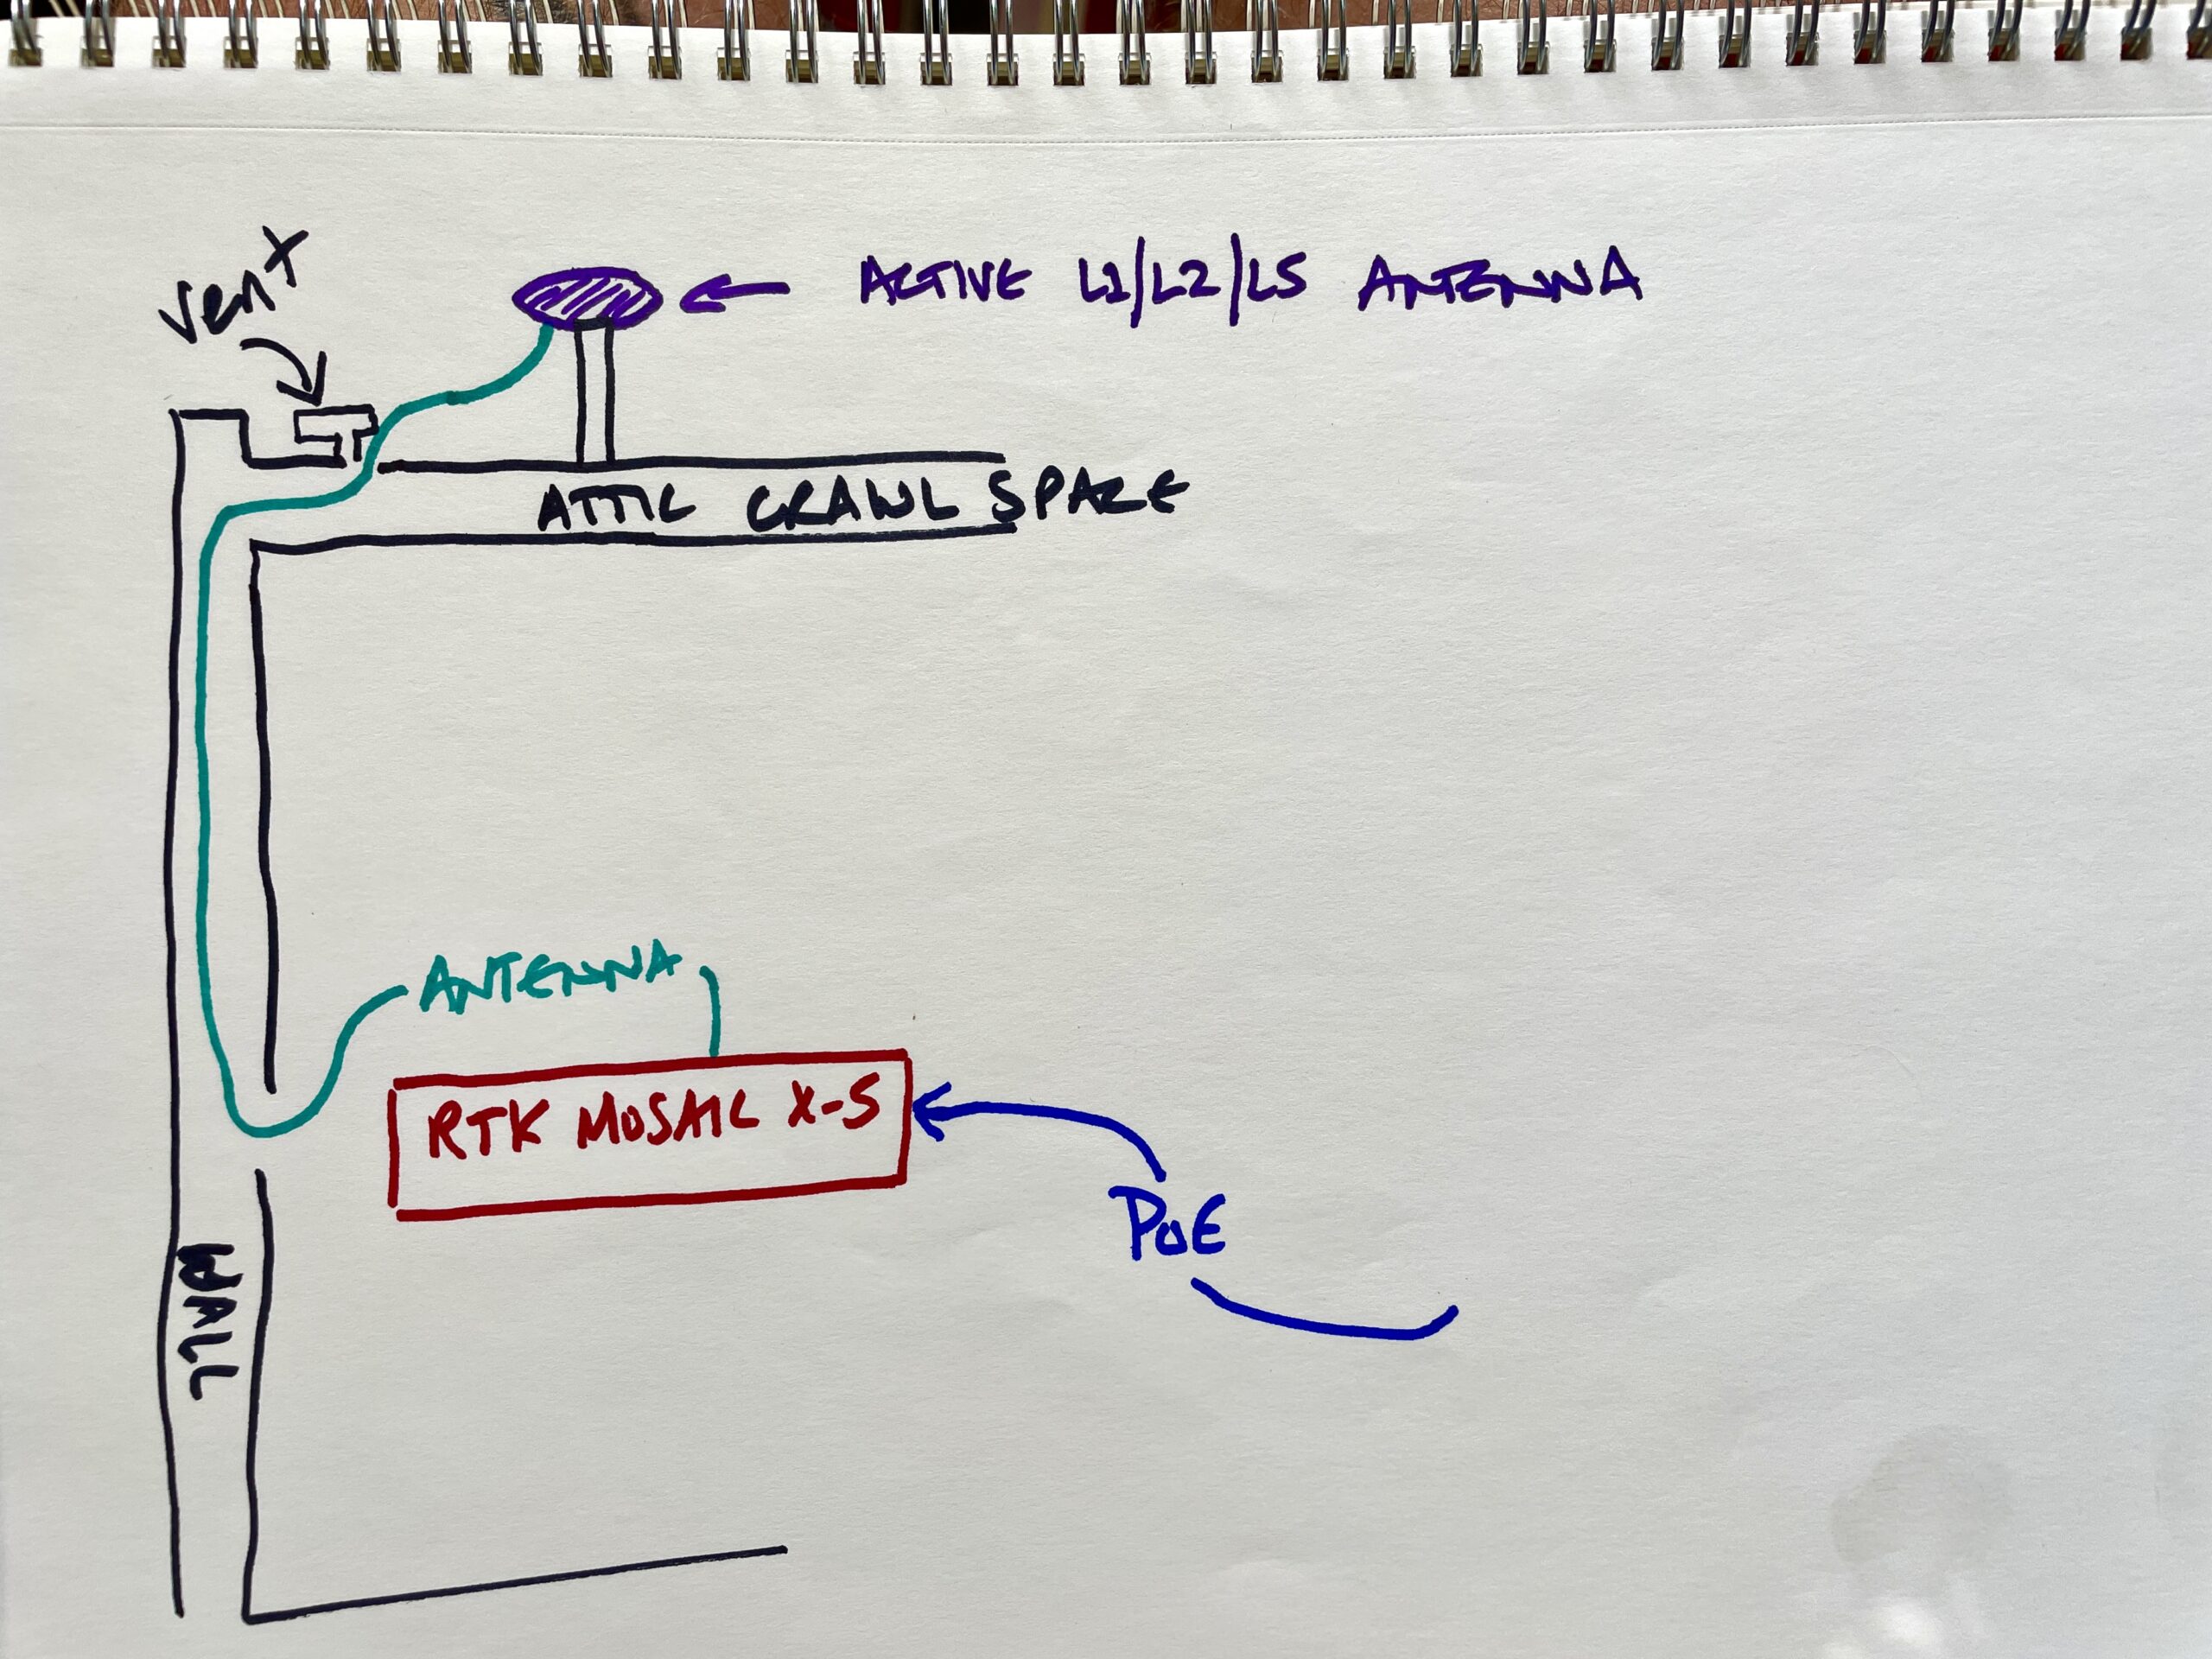
The more stable your antenna on the roof, the better. Ideally the antenna mount is bolted on with zero (millimeter or less) wiggle. I’ve got mine on a heavy duty non-penetrating roof mount. While it’s not perfection, it’s pretty darn stable.

Ok, that’s the physical deployment side. Let’s jump into the geek-side and plug our faces into the computer.
To get the bare minimum setup for the Mosiac, just plug the thing in like I have (connected to power and ethernet and the antenna), then navigate on your network to whatever local IP you’ve set up. In my case, it’s 192.168.50.46. Obviously that’ll be different for you. You’ll see when you go there the “Septentrio” branding; the Mosiac X5 is their most compact and high precision GNSS receiver.
Once you’re on the local IP for your Mosiac it’ll walk you through basic setup. SparkFun has a guide that makes it dead simple, here.
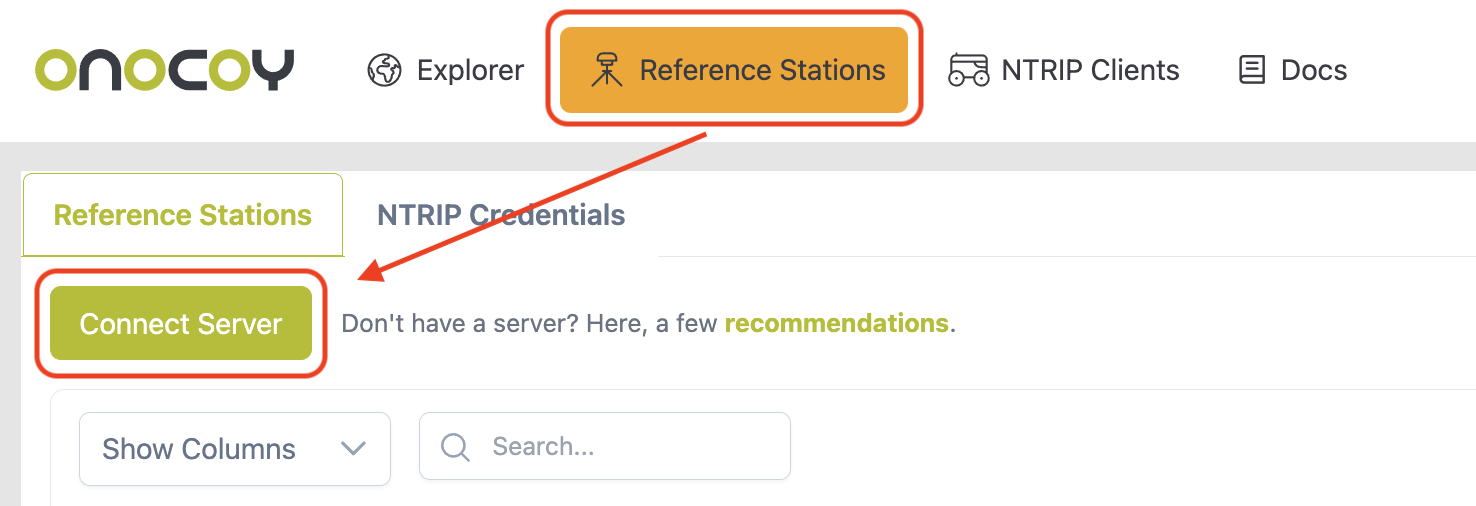
You’ll also need an Onocoy account in order to take your shiny new RTK stream from the Mosiac and feed it into Onocoy. You can set up over at console.onocoy.com. Once you’re there and signed up, open the Reference Stations tab and hit “Connect Server”.
Onocoy has excellent documentation on setup and it will change over time. One thing I’ve learned with writing these rough guides is that it’s far better for you if you refer to the project’s set up docs than mine, at least for basic setup stuff.
Use the Onocoy Installation Guide to connect your station’s stream to the Onocoy network.
Once you’ve finished setting up your Onocoy & Mosiac, you should see something like this on the Mosiac side:
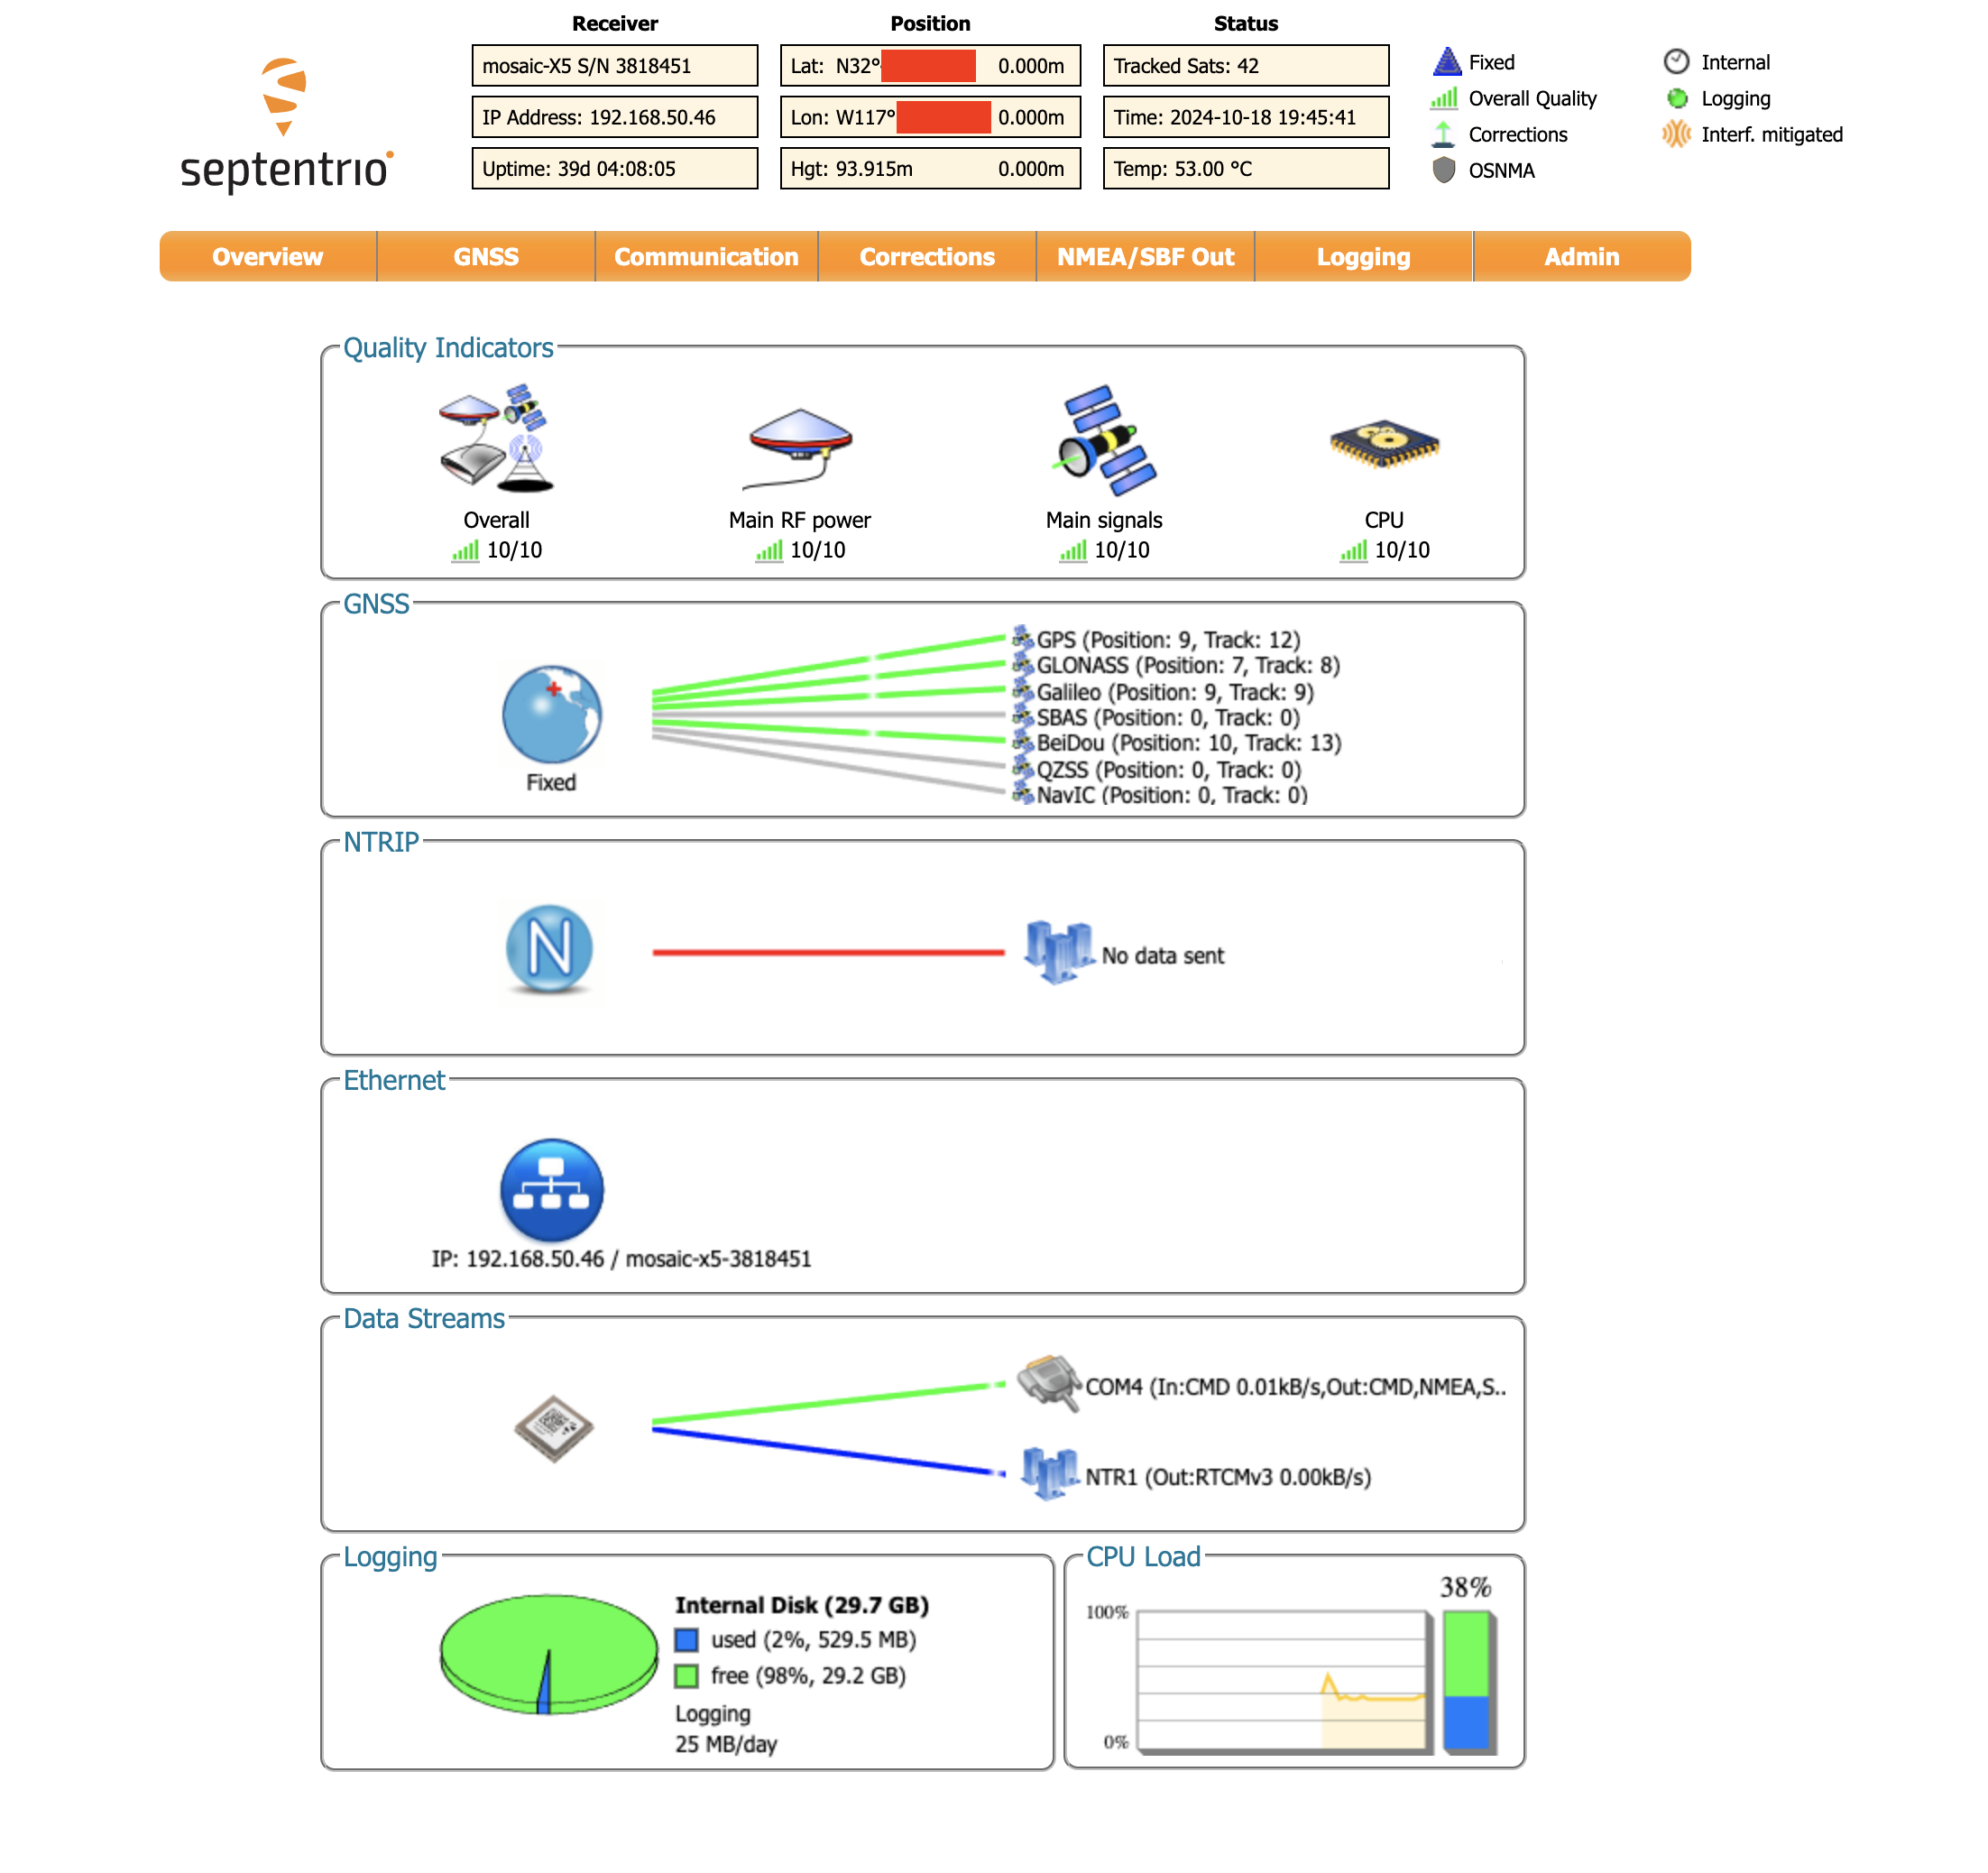
That shows that you’re receiving signals from satellites, and feeding out a data stream to Onocoy. Cool, right?
After 24 hours of having it up, your Onocoy console should look something like this. I mostly pay attention to the Satellites and Signals boxes, and spent a bunch of time comparing with local stations.
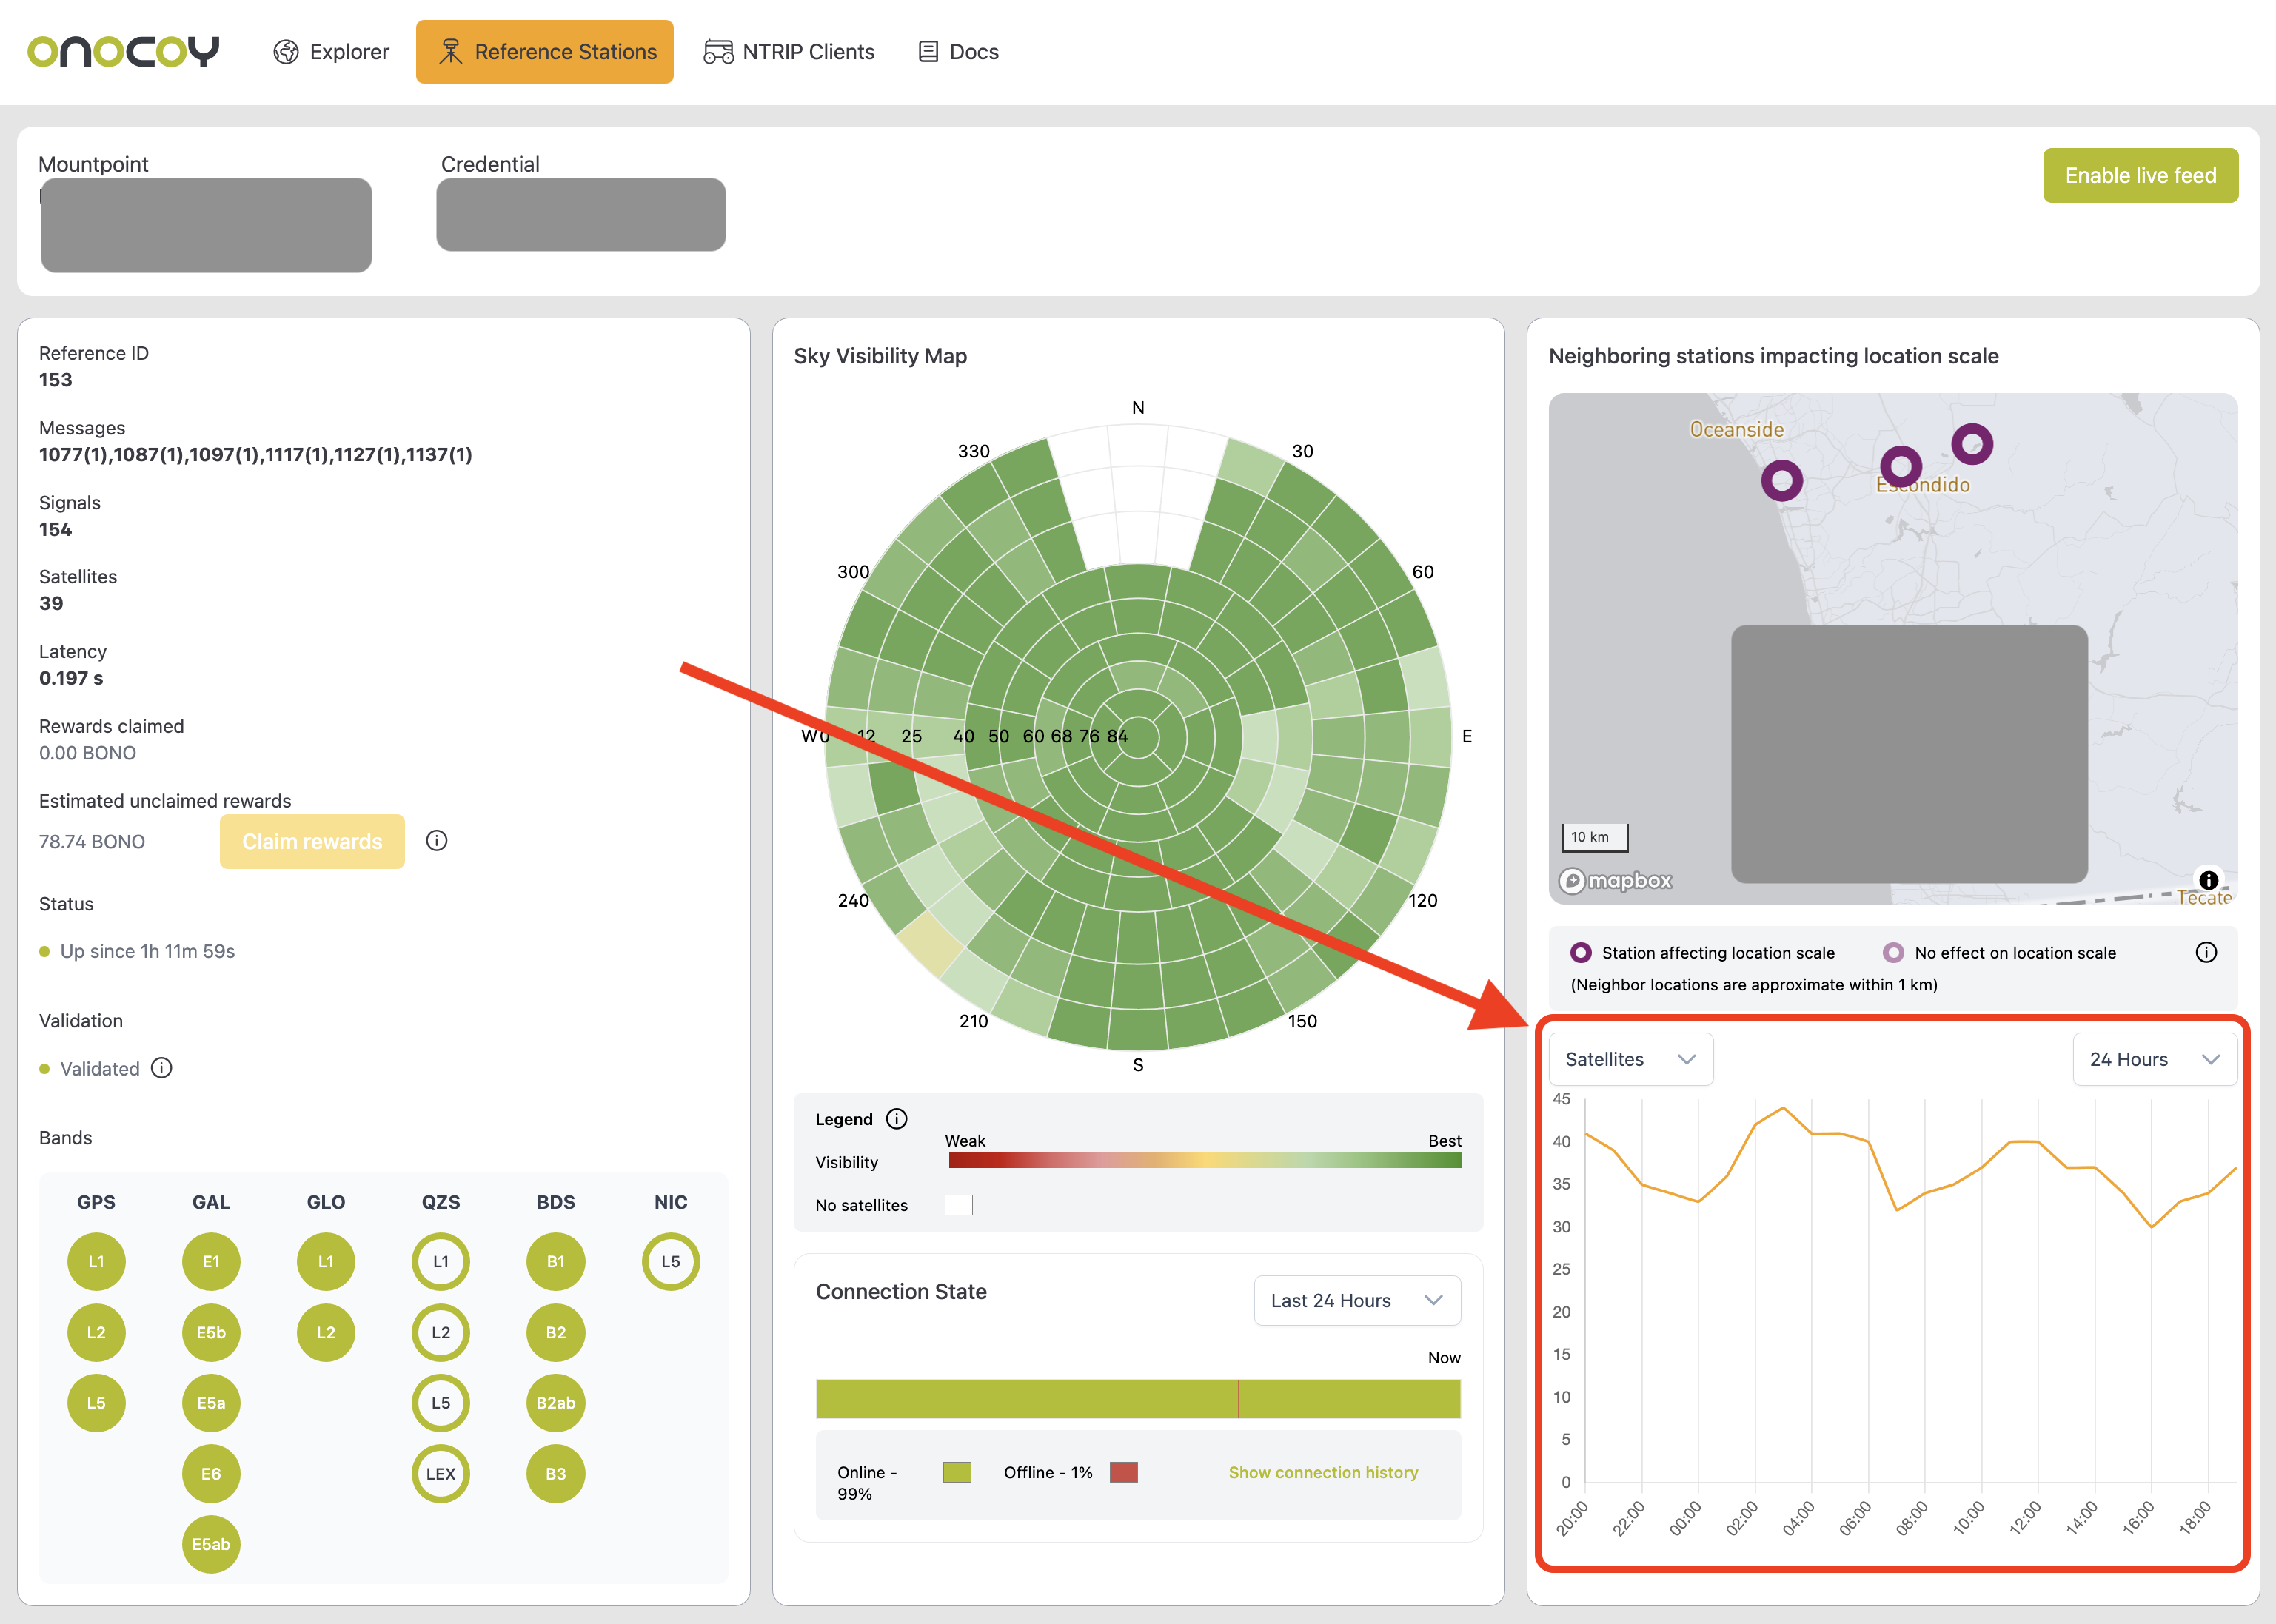
The general conclusion I came to after looking at my station vs all the other local ones (including ones clearly set up by professionals) is that the SparkFun setup I’ve got is as good as it gets out of the box; there’s nothing better on the market for what we’re doing.
The only real issue is that I’ve added a station in San Diego that either wasn’t desperately needed or is more useful than others but is in a deployment area that’s already saturated.
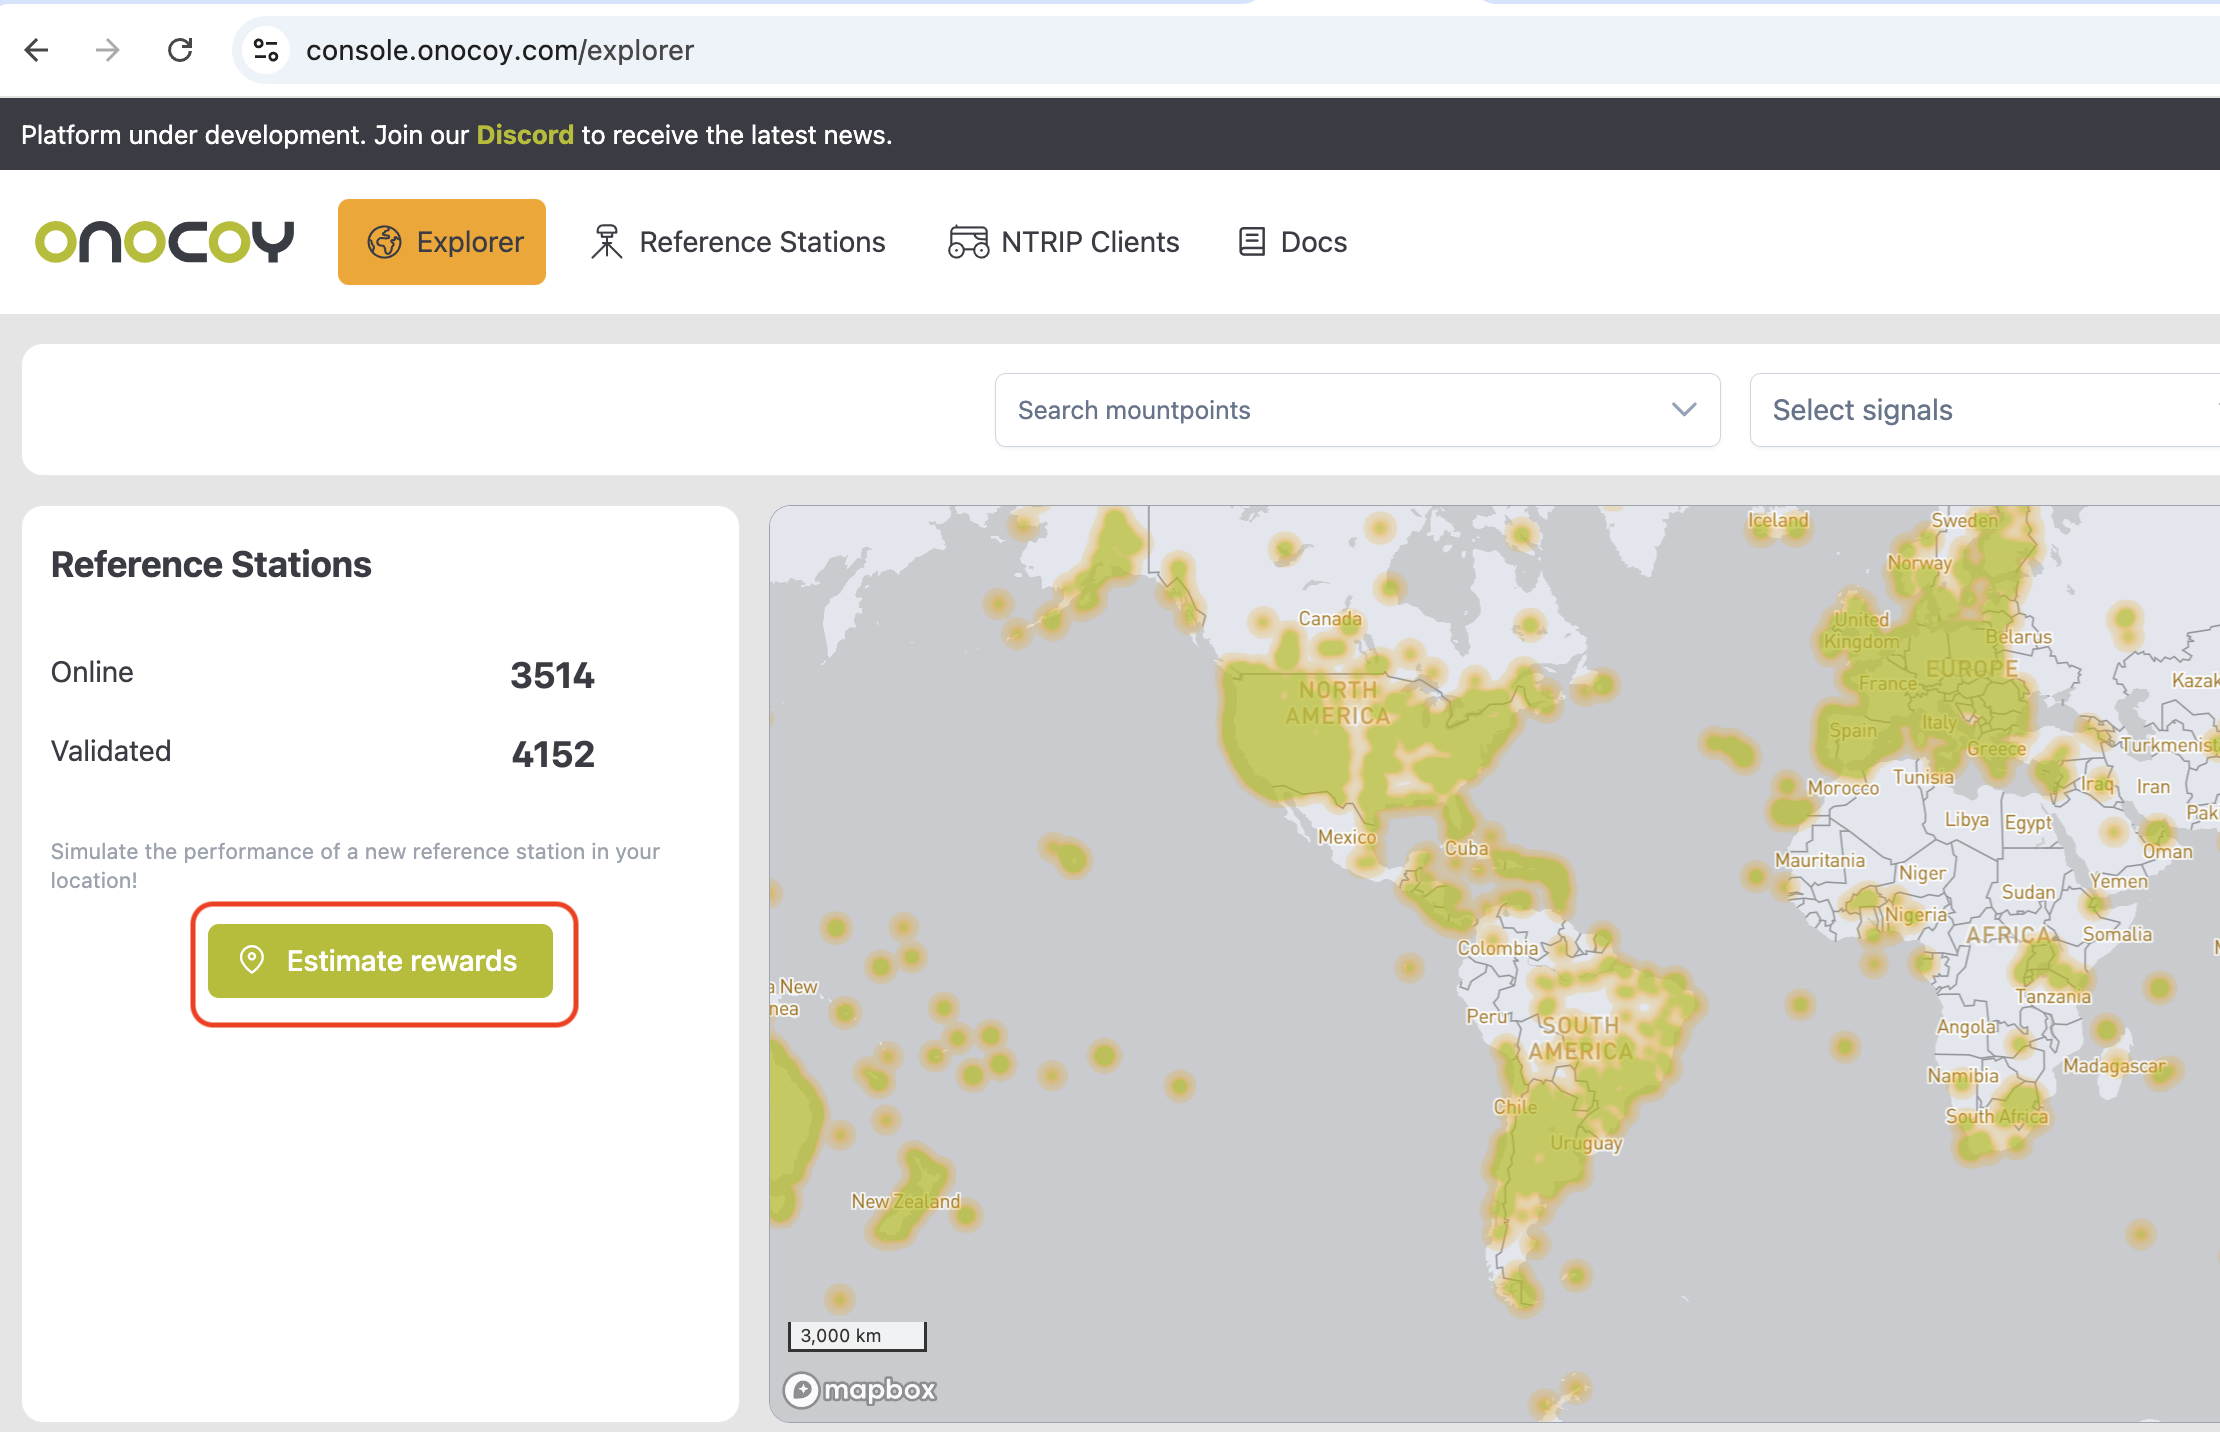
If you’re thinking of deploying a station and your main motivation is the Onocoy tokens, use the Estimator tool available on the Onocoy Explorer to get an idea of what you’ll earn.
That’s it for now! Poke around on both the Septentrio & Onocoy sites to learn more. Next up? How to use the SparkFun RTK Torch!

Leave a Reply