How do you manage your Hotspot if it’s at someone else’s location? Whether there’s a formal “Host Agreement” or it’s your Aunt Sally, having the ability to remote in to your Hotspot’s dashboard and do anything from a quick check on the latest transactions all the way to a reset or reboot, it’s nice to have that ability.
I’ve been using remote.it to do this since I began putting Hotspots in remote locations. Here’s how it works in broad strokes.
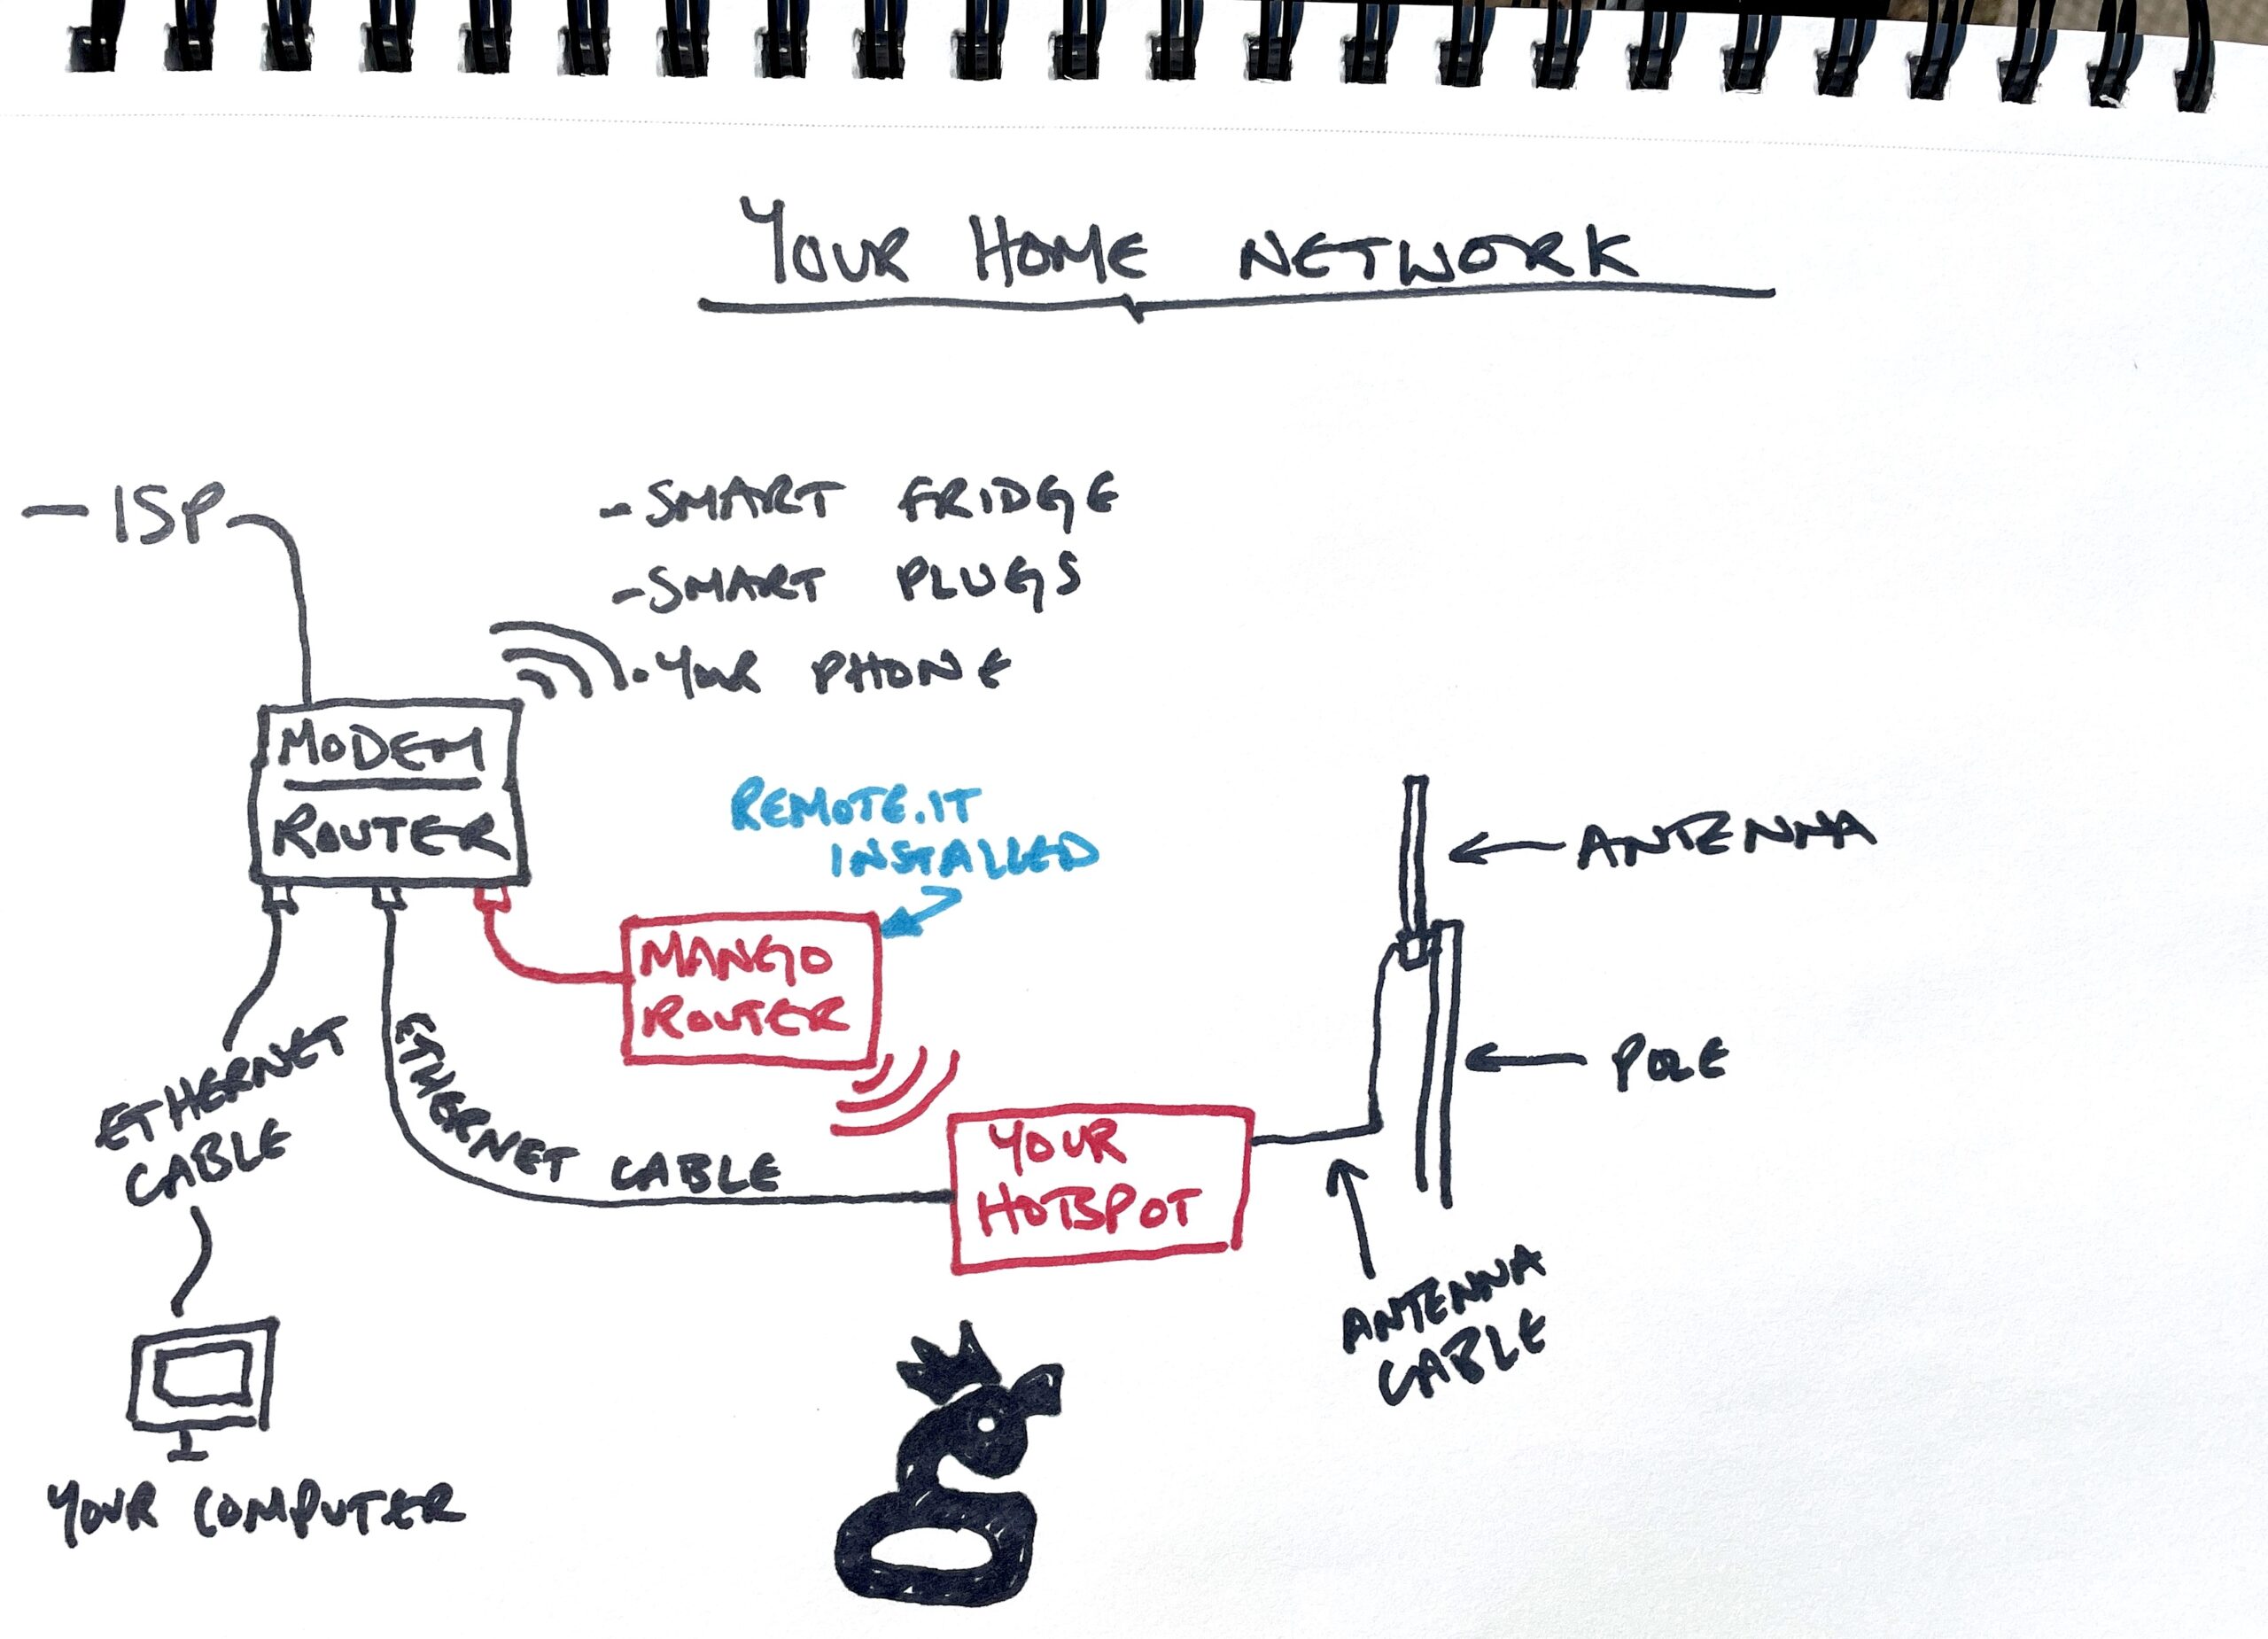
Every Hotspot is connected to a router. Most routers in the home are actually a combination of modem and router, and are more or less locked; you can’t add new software like remote.it to them. What you CAN do is add another router that is more configurable, put remote.it on the extra router, and then create a connection from that 2nd router to your Hotspot. It sounds complicated, but it’s really pretty easy. Let’s walk through how to do it.
Oh, before we do, you should know about the upfront costs and limitations. The extra router is around $30 on Amazon. The remote.it service is free for up to 5 “devices” (aka Hotspots) and after that is $5/month for an unlimited amount of Hotspots. Until manufacturers start including remote access to each Hotspot’s dashboard, this is a no-brainer if you want to be able to connect to your Hotspot remotely. Finally, if your Hotspot doesn’t have a Dashboard, having remote access doesn’t matter much.
Ok, let’s start with a diagram showing what it looks like. If we wanted to be fancy, we could call this your network “topology”. It’s basically a map of your home network, from modem to router to all the devices you might have connected to the internet in your home. We’ll focus on the specifics of the Hotspot connection here, but I’ve added a bunch of other devices just so you get a feel for the big picture.
First you’ll have to order a Mango. Like I said, ~$30 or so on Amazon. This’ll work with any router based on the OpenWRT Linux distribution, but for this tutorial we’ll use the Mango.
While you’re waiting for it to arrive, open up a remote.it account, which is free to open.
Once the Mango arrives you’re ready to begin.
On Remote.it, you’re going to generate a “command line install command”. This sounds scary, but if you can click your mouse and follow directions you’ll be fine. 🙂
Log in to your Remote.it account.
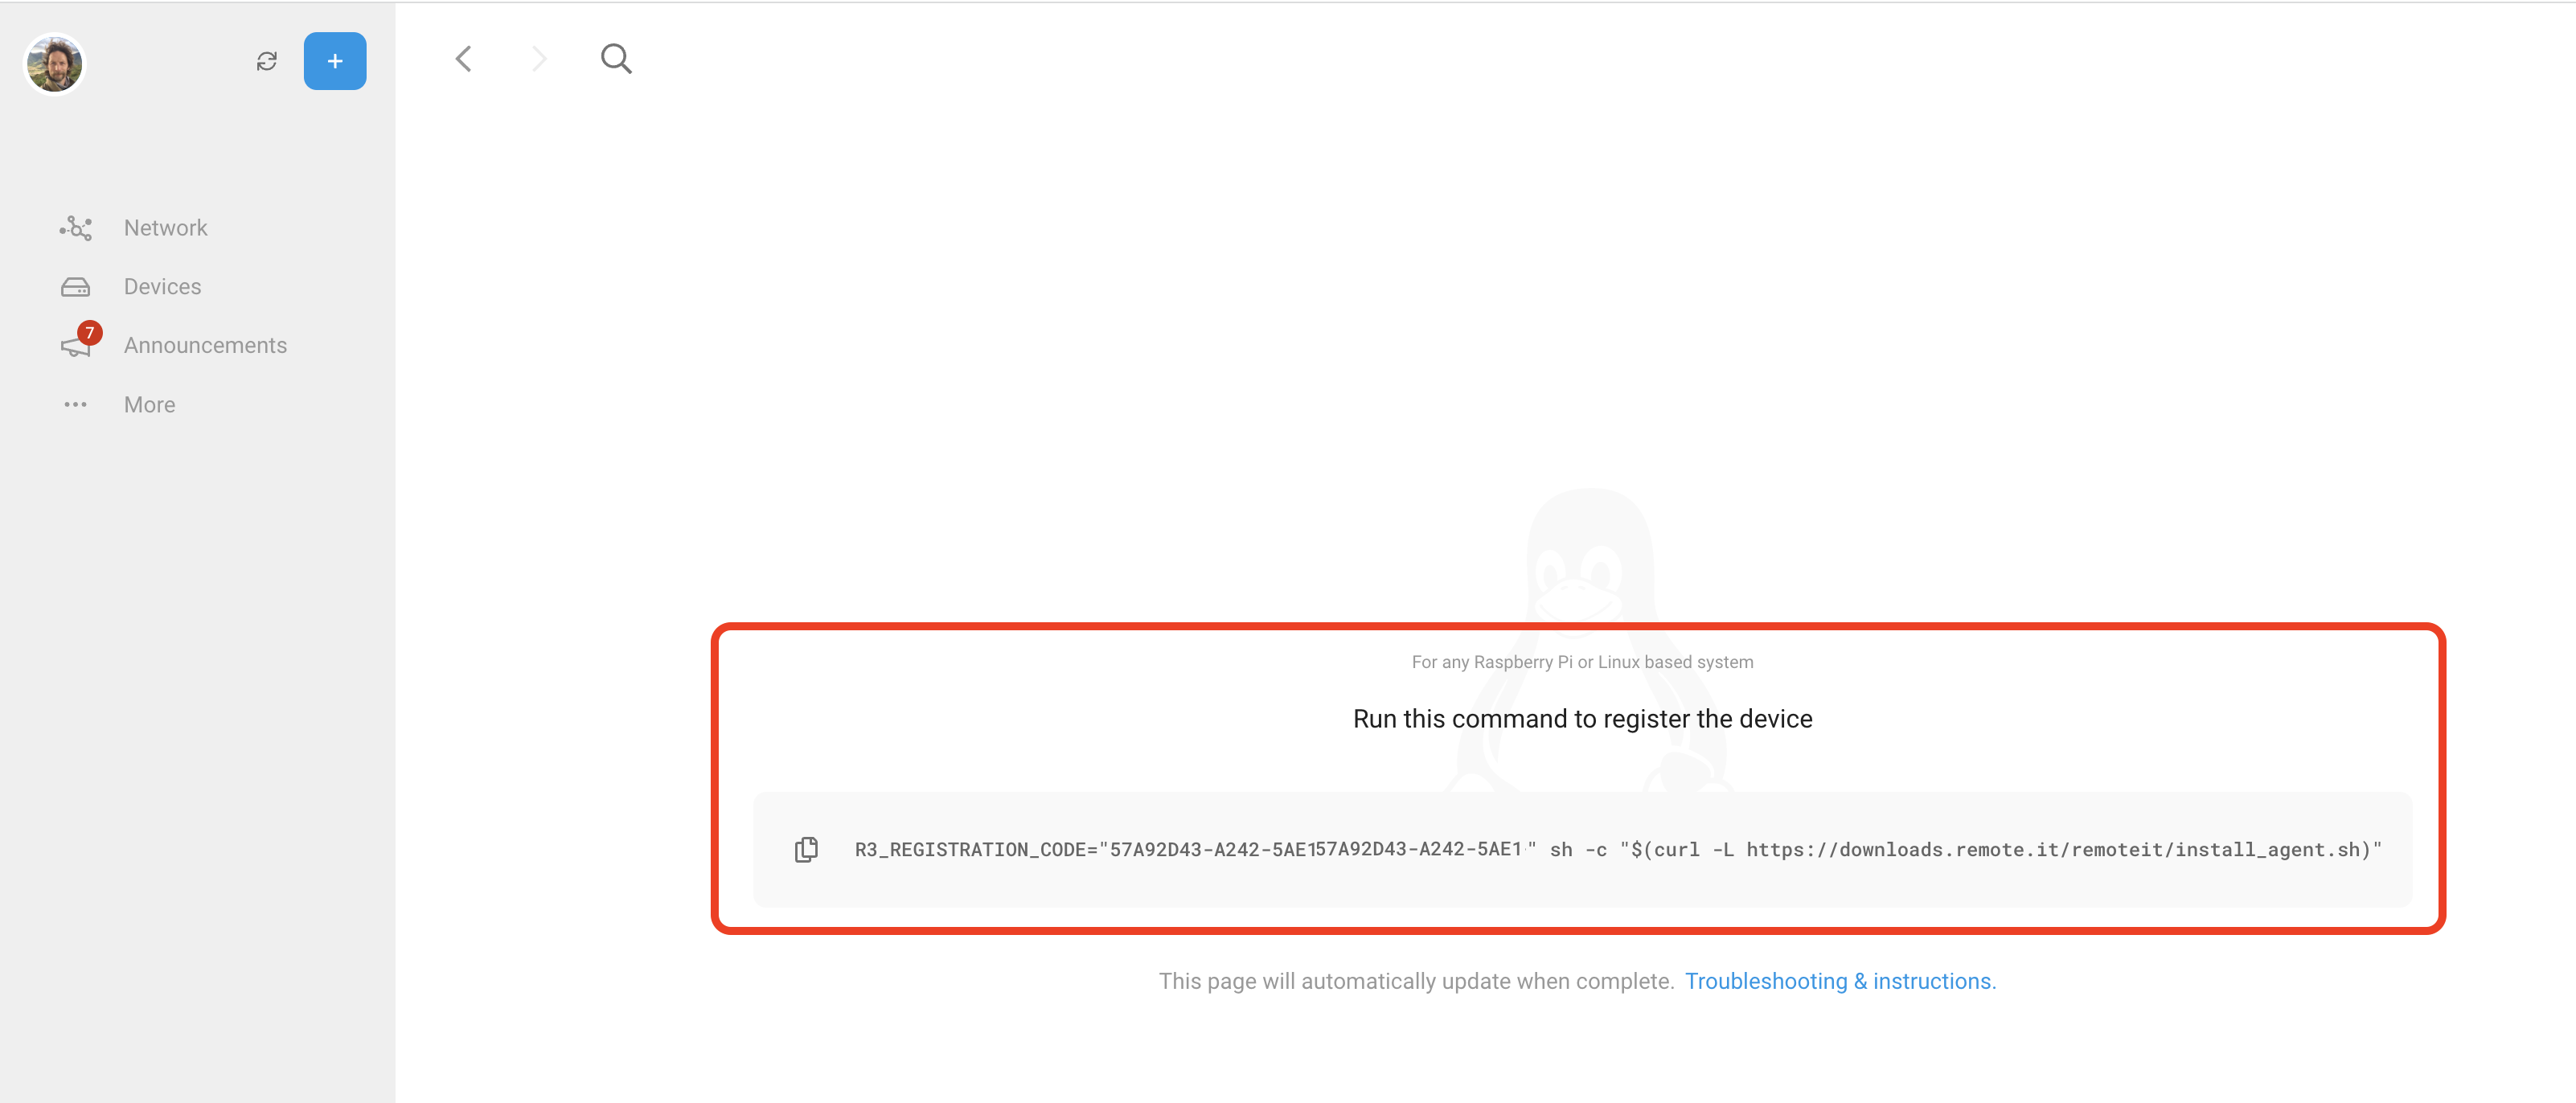
Hit the blue plus button to “Add A Device”, then choose “Linux & Raspberry Pi”.

That will bring up a code for you to copy. You can copy it now or come back to it later, but leave this tab open. You’re going to need that command (the thing starting with R3_REGISTRATION...etc) later.
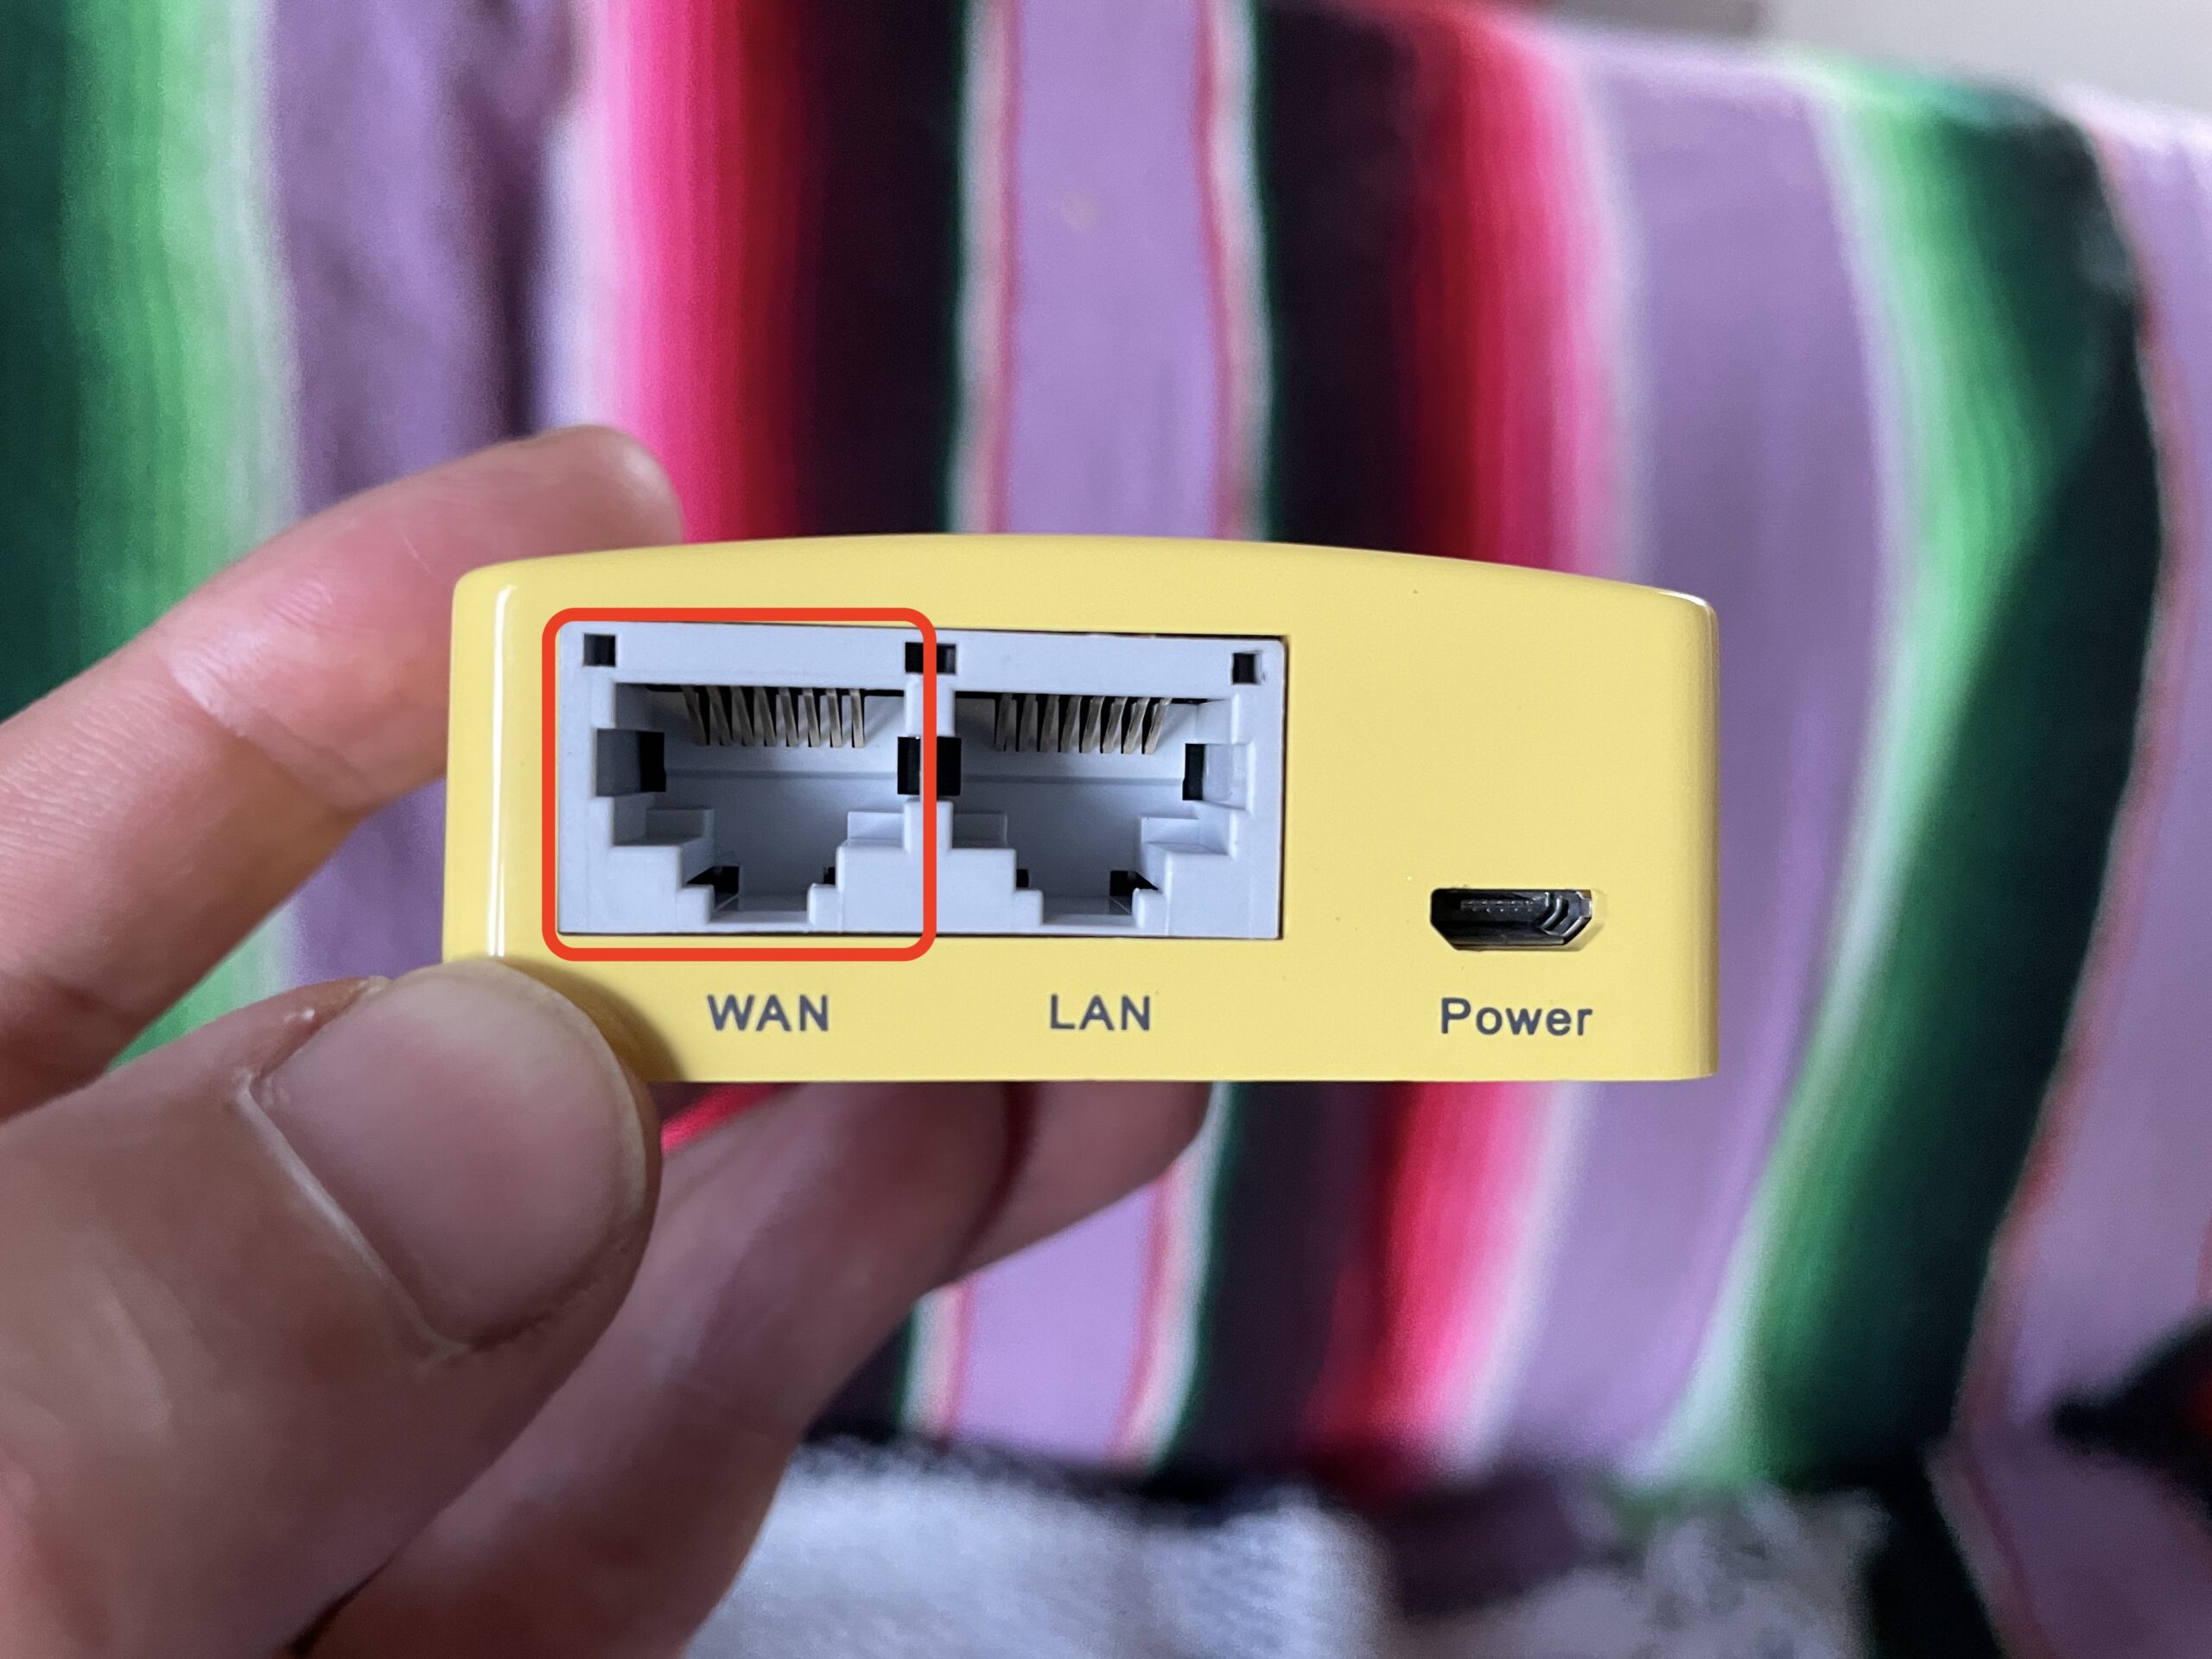
Over on the Mango, plug in power, then connect your Mango to your router with an ethernet cable. Use the WAN port on the Mango, and any LAN port on your router.
Power up the Mango. It’ll start broadcasting a WiFi network, which you’ll join using your computer.
- Look for the Wi-Fi network on your computer, it’ll be something like “GL-MT200N-V2-xxx”.
- Open a browser and go to http://192.168.8.1 That address should be on the back of the Mango box, and the password (which is probably
goodlife, should also be there. Sign in. I think it made me change my password right away. - Open up the Terminal app if you’re on a Mac, or for Windows, an “ssh client” like Putty (or whatever you use for command line).
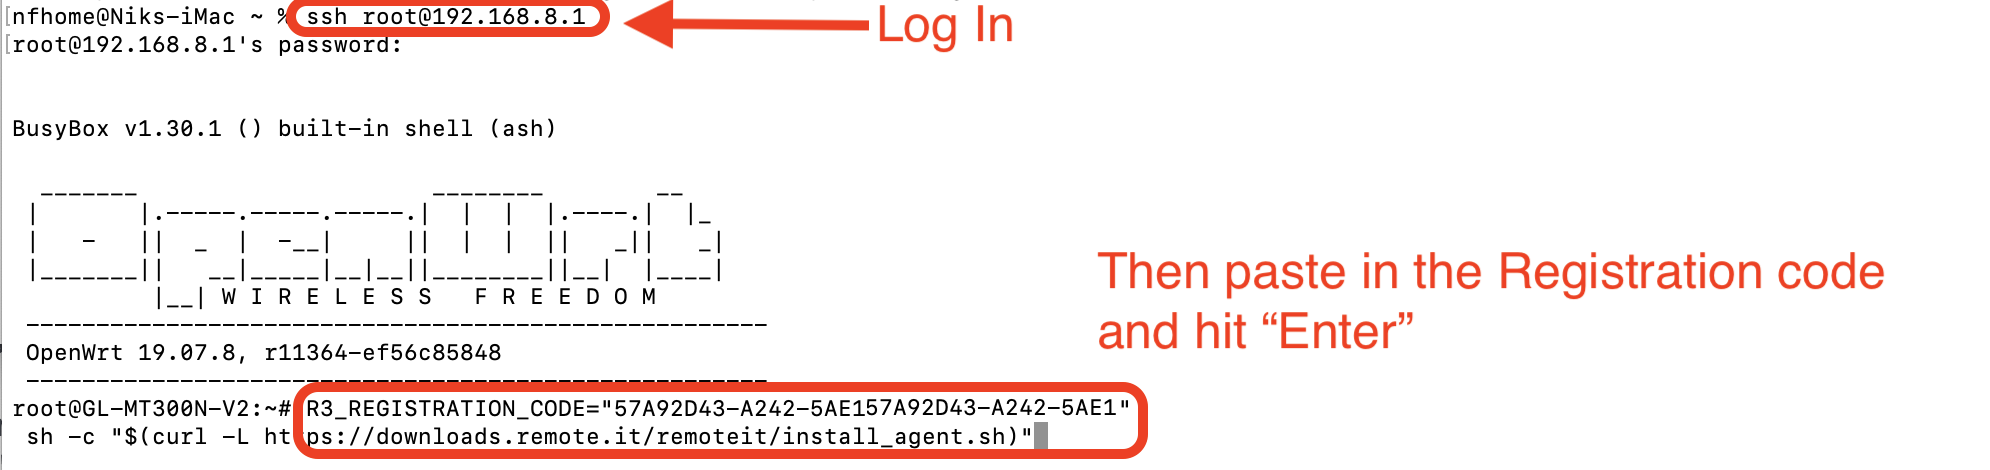
- In your command line app, connect to the Mango using this command:
ssh root@192.168.8.1Again, the default password isgoodlifeif you haven’t changed it. - Now that you’re logged in to the Mango command line on Terminal, take the command you copied from the Remote.it website (
R3_Registration-blah-blah-blah), paste that into your command line, then hit Enter.
- It’ll spit out a bunch of code. I always feel like a super secret hacker when this happens. You don’t need to do anything, just watch the Matrix work. :). It’s connecting your Remote.it account to your Mango.
- Once it’s done and you see another command prompt, type in
exit, then hit Enter, then close the Terminal app.

- Wait a few minutes, then look in your Remote.it account and you’ll see the Mango in your account.
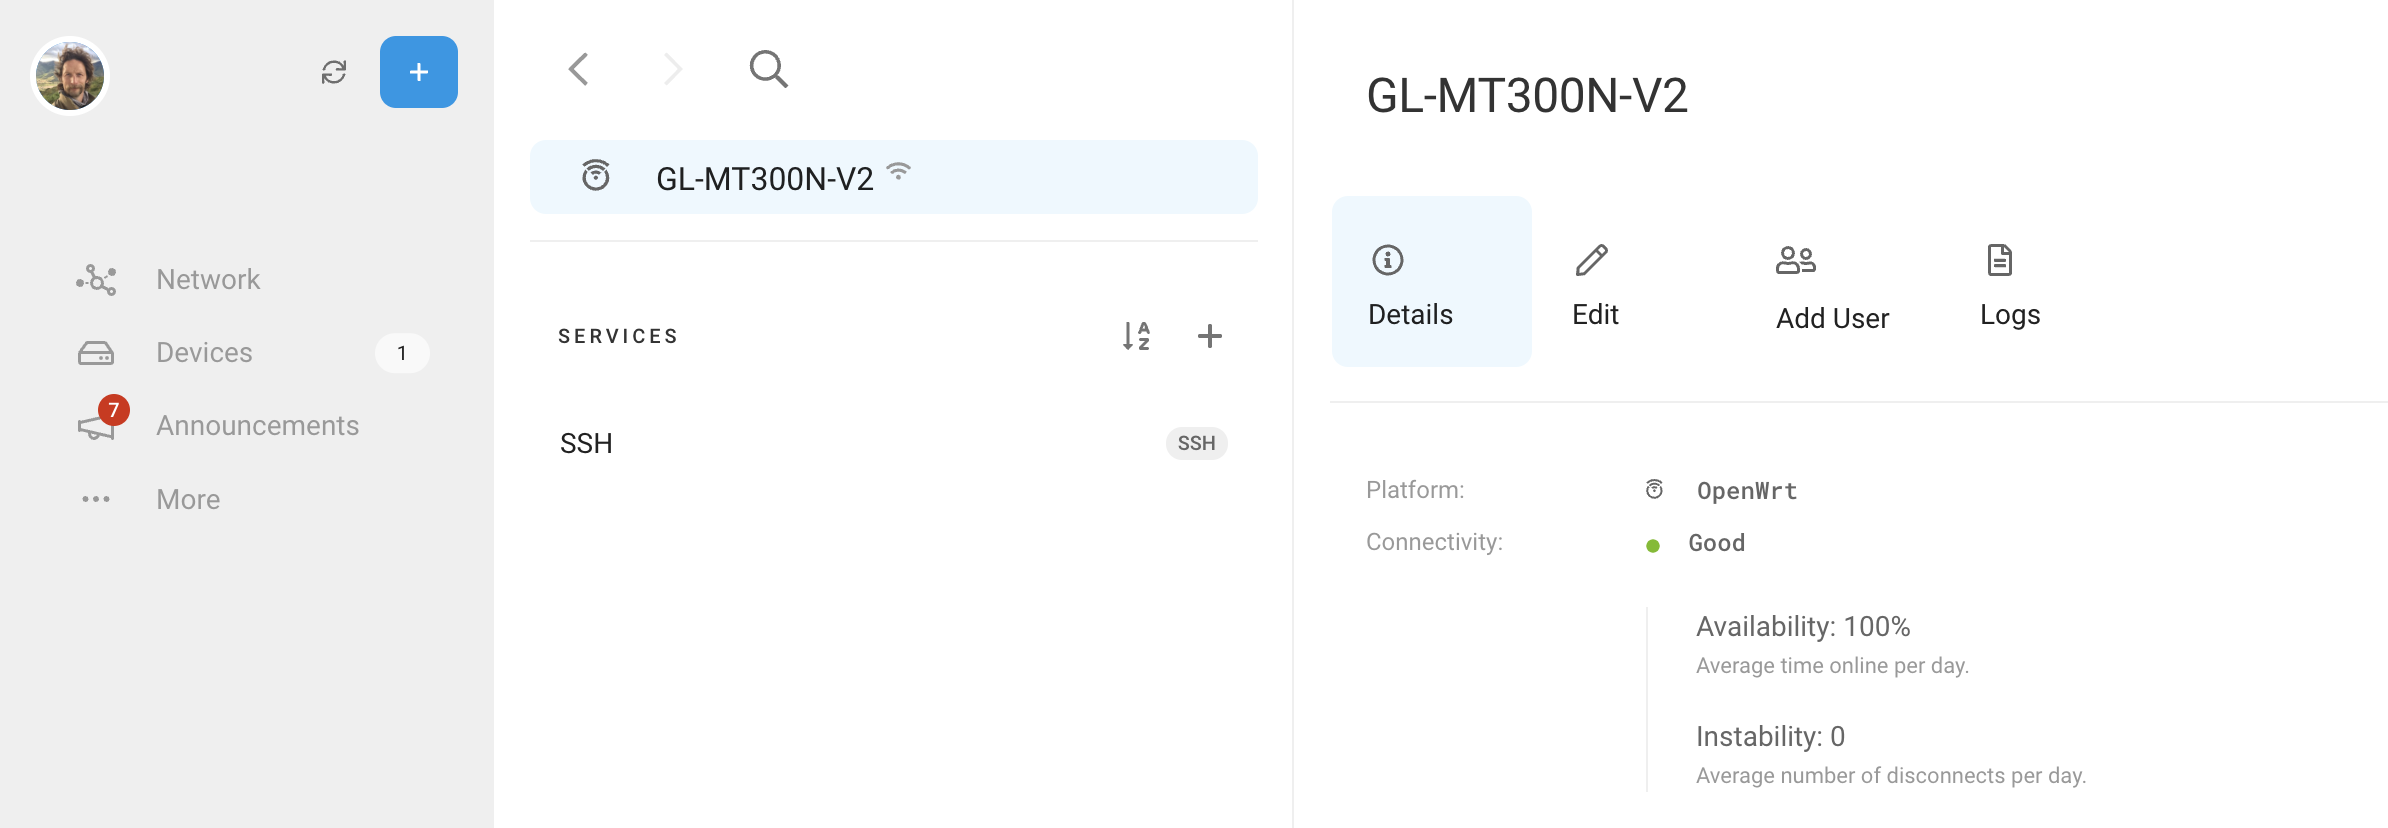
- Now your Mango is connected to Remote.it. The next step is to tell the Mango which device (your Hotspot) you want it to keep a line open to.
- To do that, you’ll need to find the local IP address of your miner. To find that, you’ll need to log in to your regular router. Google your router name and “find device IP list” to do this. It’ll take some time. Just go slow and follow those directions. Your list MAY look something like this.
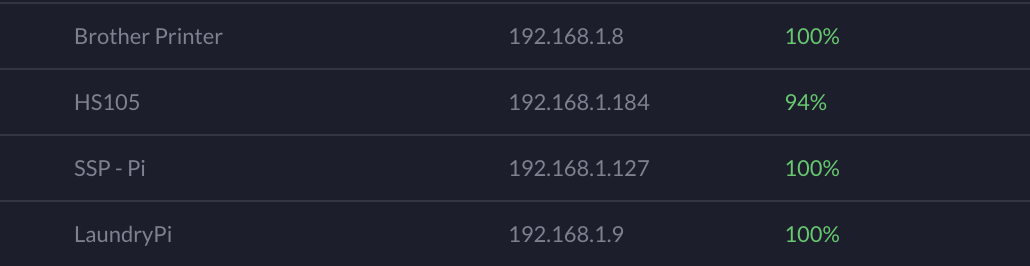
- You’ll see a list of all the devices in your home on your router, from your printer to your computer to smart fridges. You’re looking for the miner’s IP address. It’ll be something like 192.168.1.xxx.
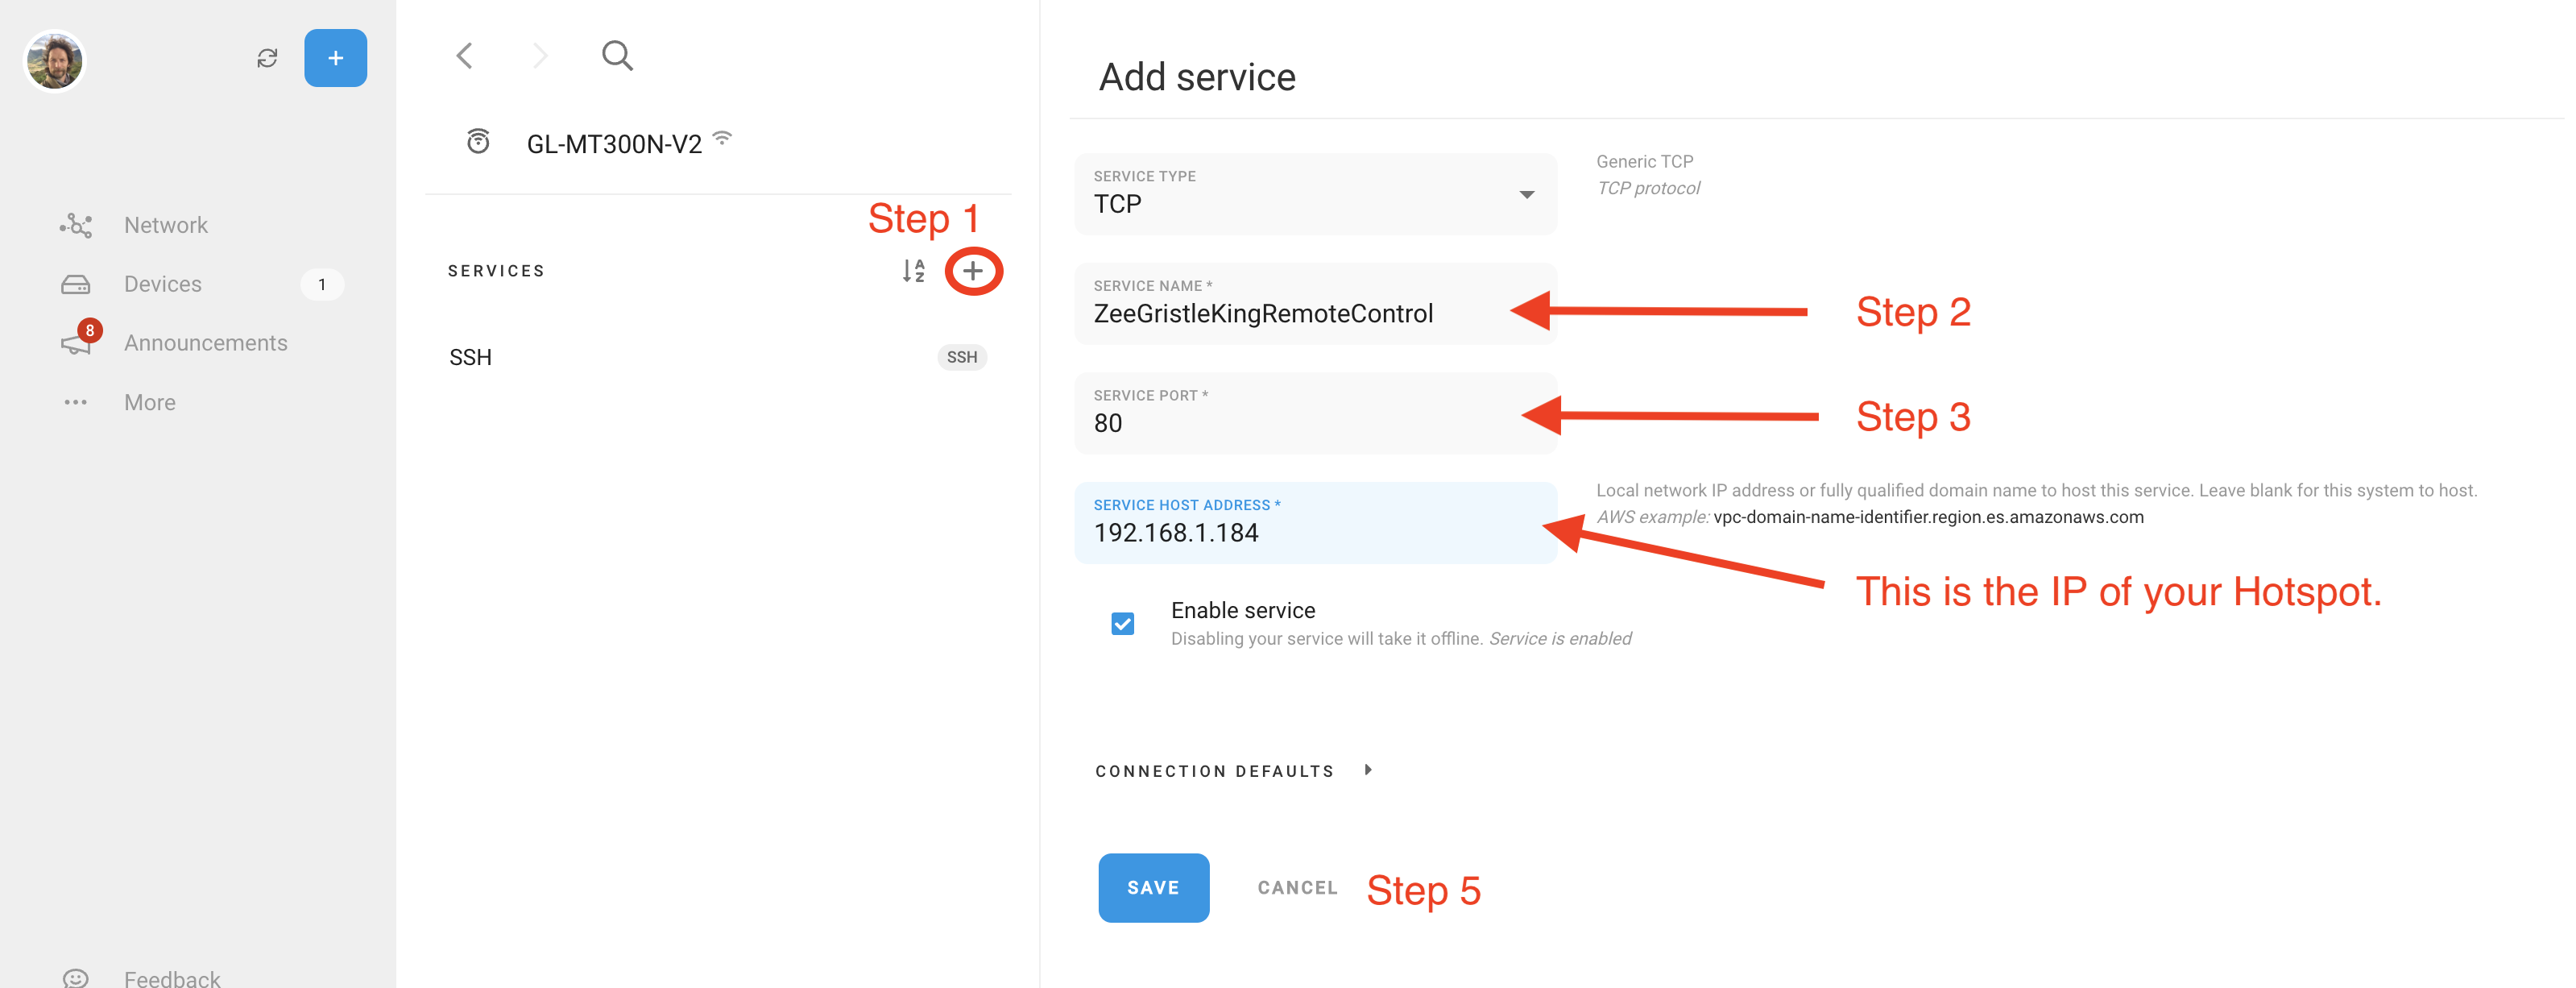
- Now, back on the remote.it app, select your Mango, and under the Services column, click the
+button to “Add Service”. - Leave the Service Type as TCP.
- Change the Service Name to whatever you’d like, say, “MyRemoteMinerAccess” or whatever.
- Set the Service Port to 80.
- In Service Host Address, paste in your miner’s IP you just found on your home router.
- Enable service, and Save.
- Wait for a minute or so and you’ll see it appear in the Services column.
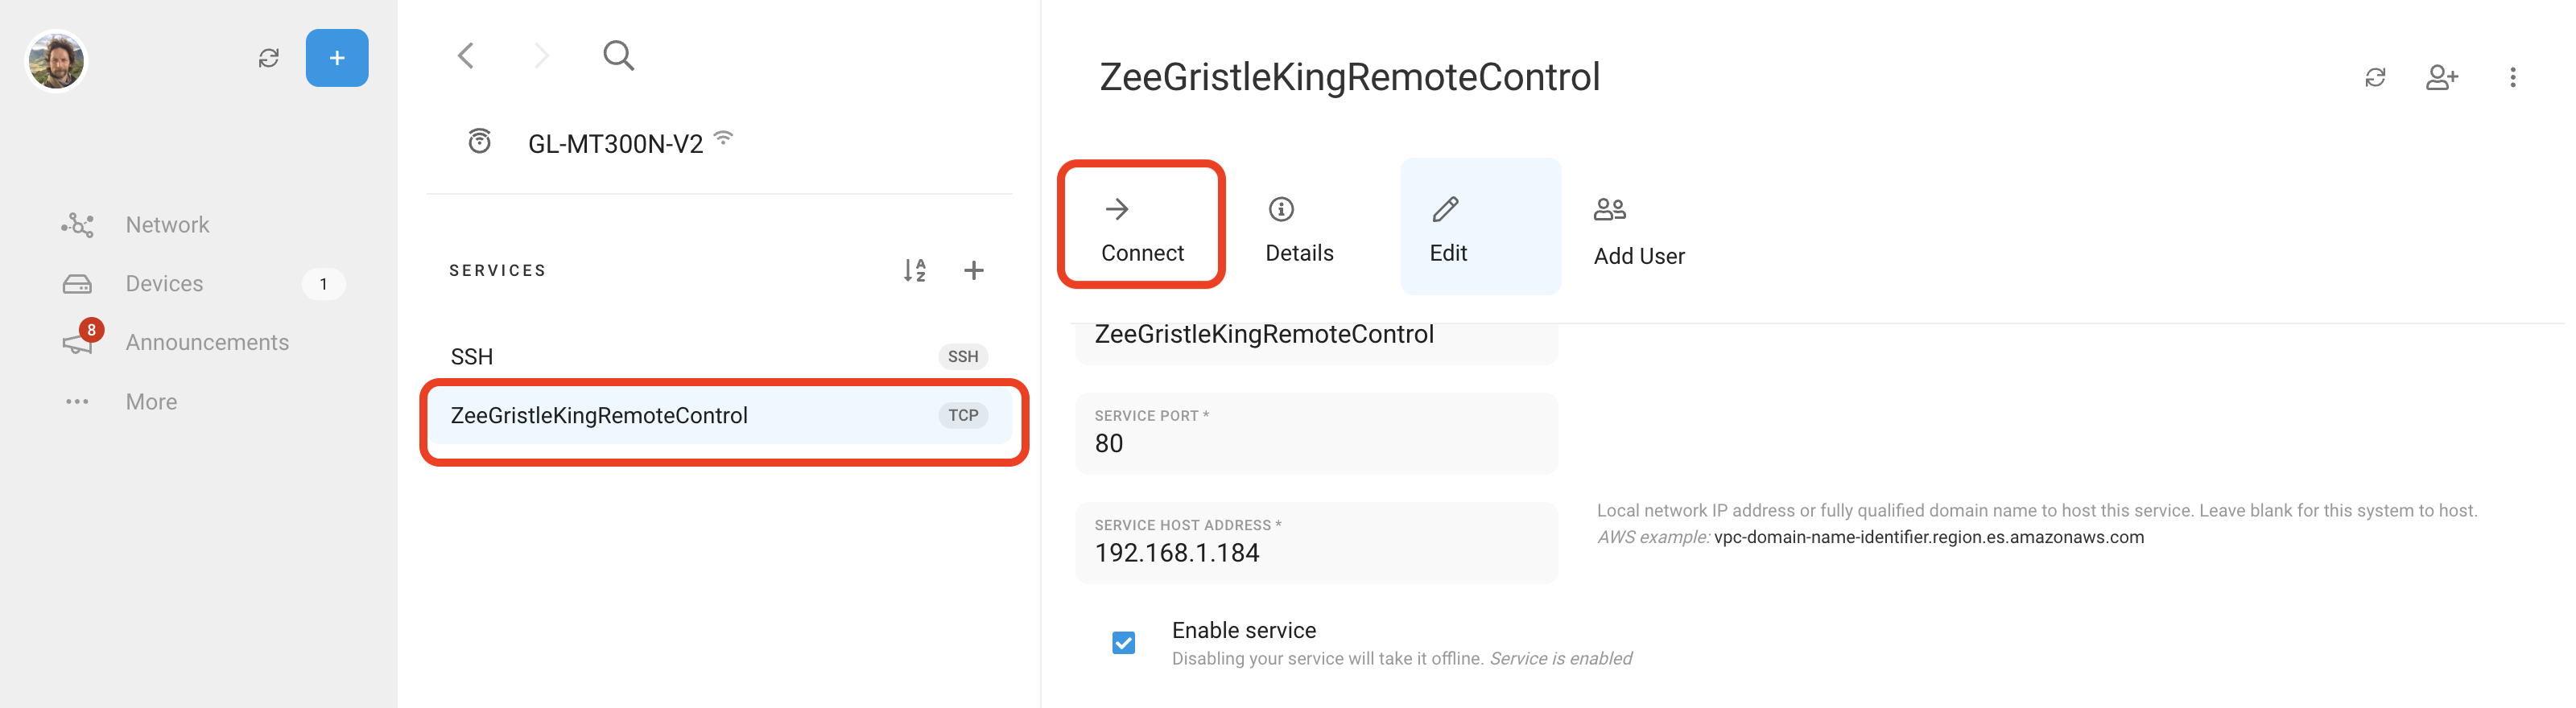
- You’re done! Now, from anywhere in the world you can log into your Remote.it account, select the Mango your Hotspot is attached to, click on the Service you just set up, then hit “Connect”.
- You’ll see it say “Starting”, then in the bottom right corner of the blue section look for an arrow with “Launch”. Click Launch, and you’re in!
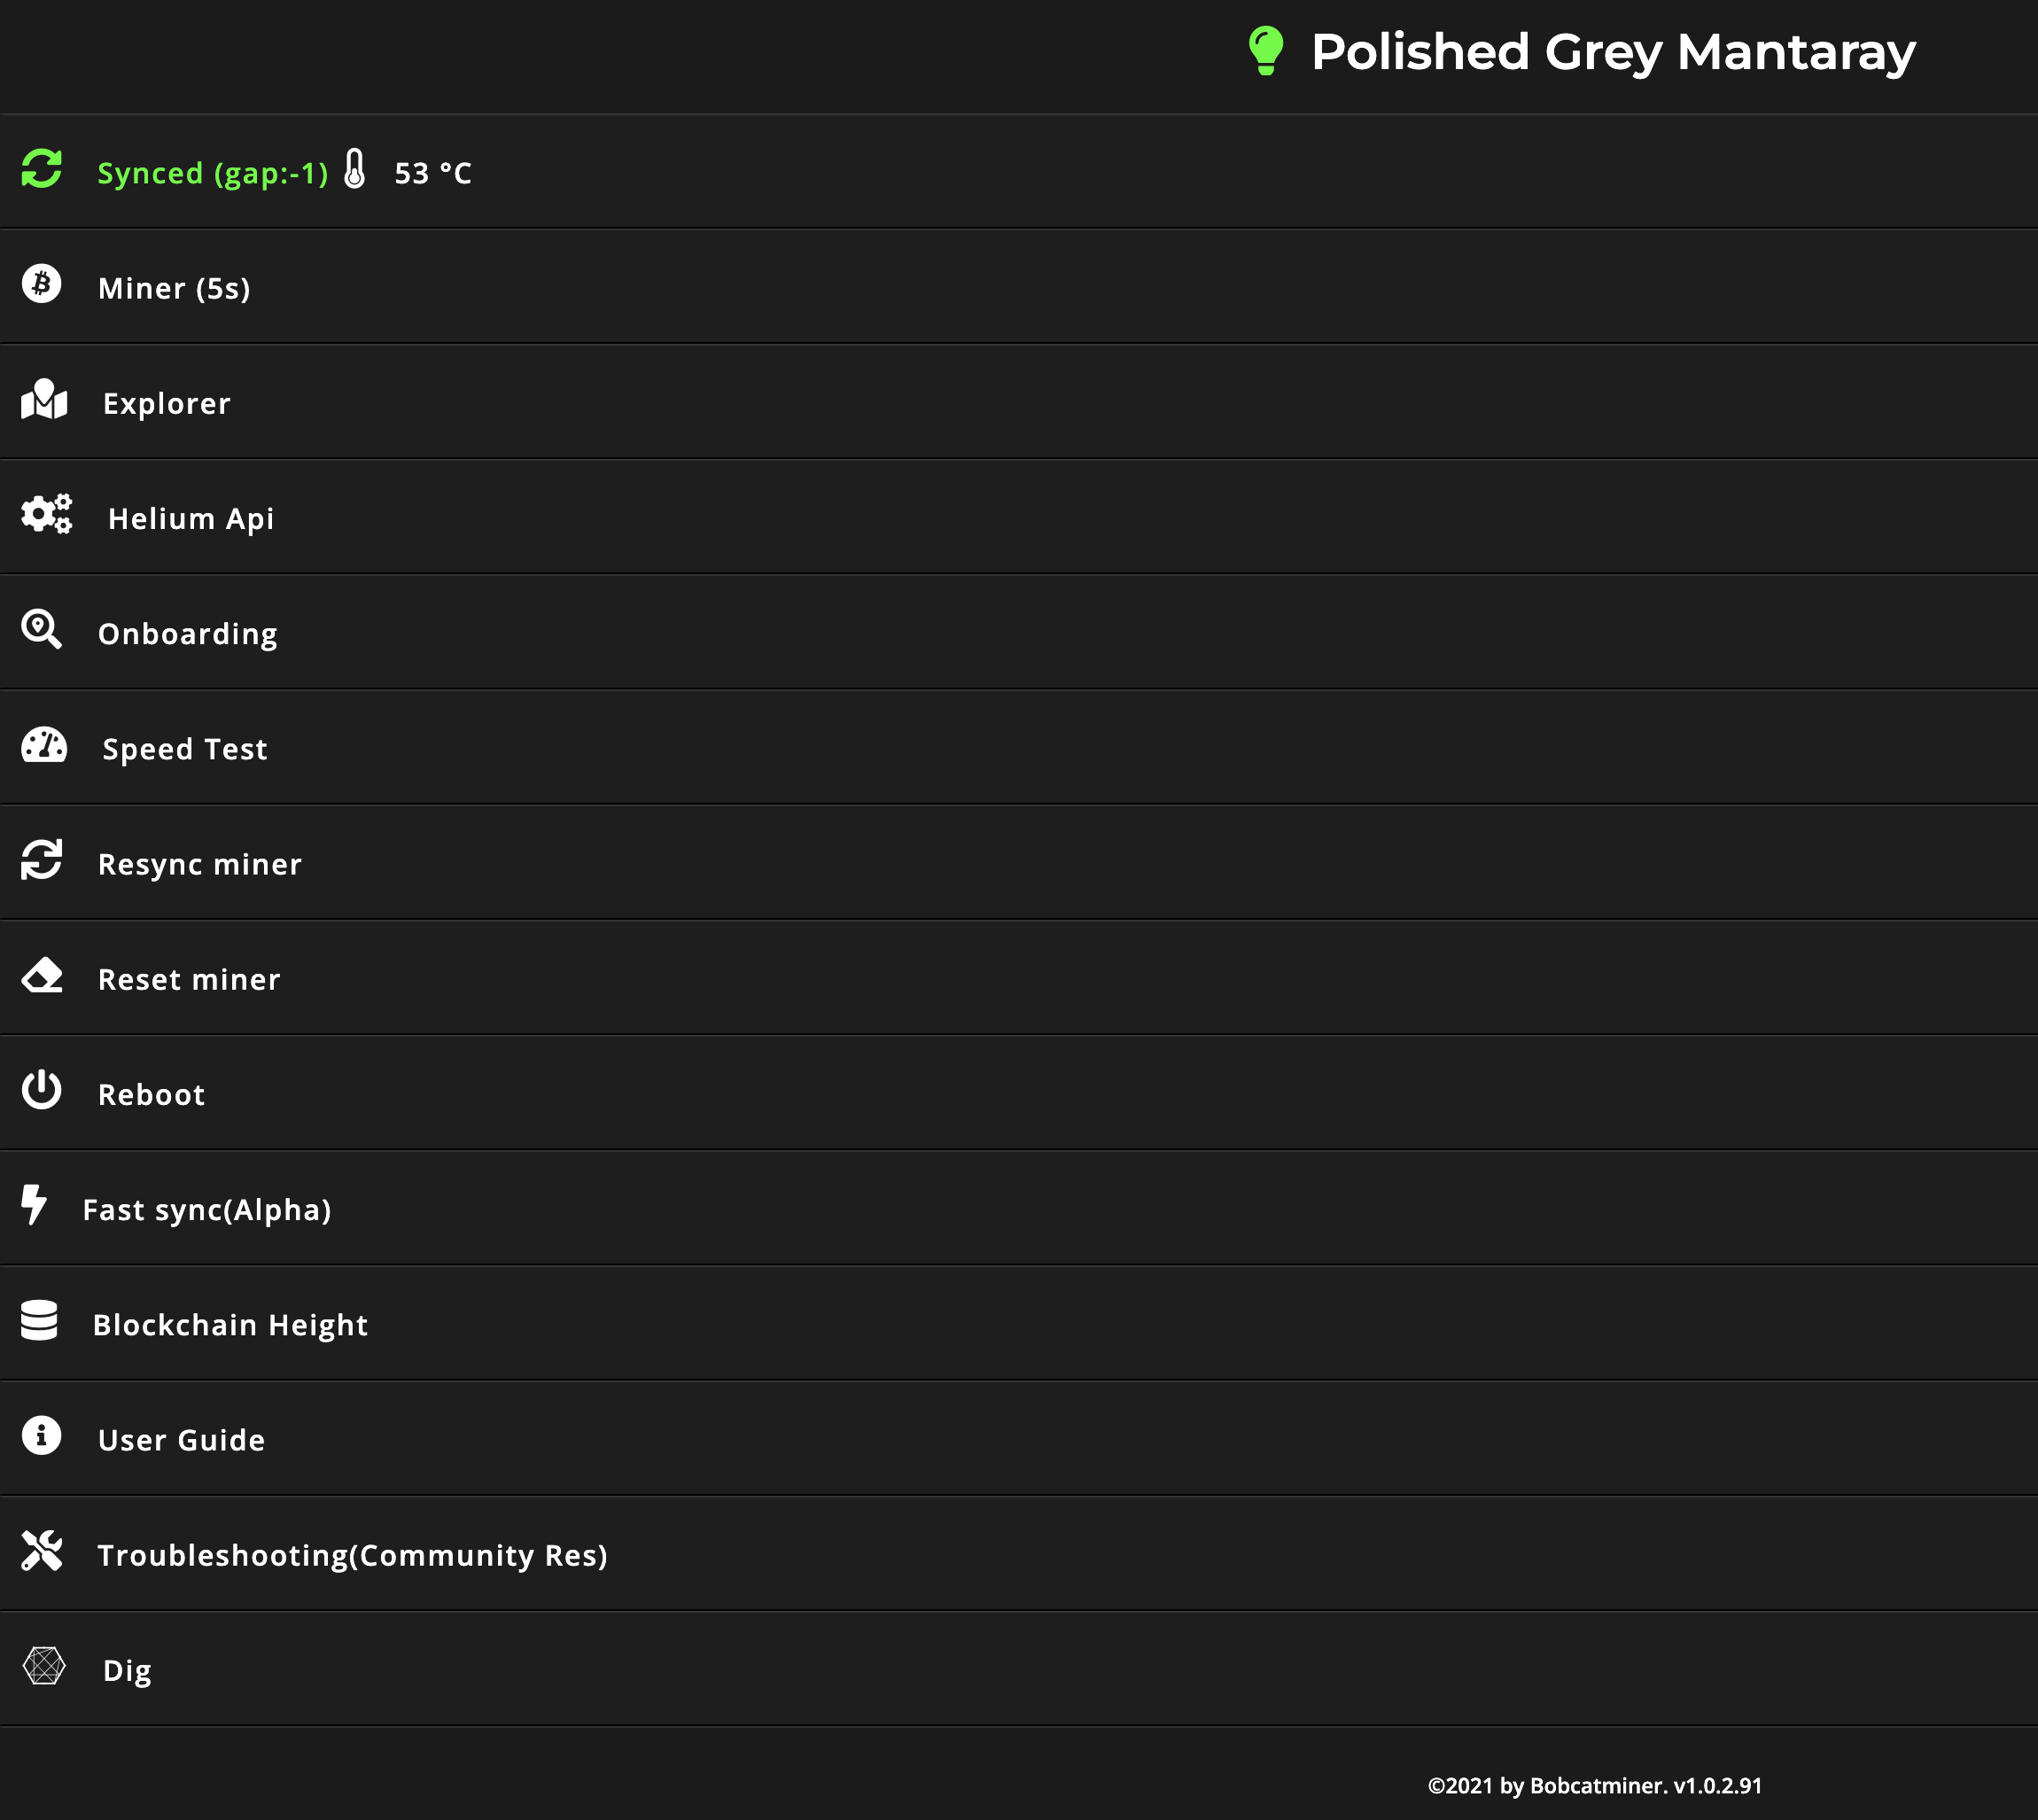
This is what that the Bobcat dashboard looks like, as an example:
Security concerns: If you want to get geeky, you can put the Mango on a different subnet on your network. I wouldn’t worry about that complexity, but if you or your hosts are extra concerned about security, Google how to setup subnets on your router.
That’s it, you’re all set up with the Mango and remote access to your Hotspot’s dashboard. Rock on!
Remote.it + Mango Benefits
- Monitor online/offline status for your miner in real time from anywhere.
- Check the stability of your miner’s internet connection over time.
- When using a cellular router connect to your miner and Mango, the data plan usage of remote.it (NOT your Hotspot)will be ~2MB per month to maintain an on-demand connection to your Miner. $49/year unlimited slow data (T‑mobile card).
- Get to the web interface of your miner. This ONLY works with Hotspots that have a web interface (like Bobcat).
Oh, one more potentially hot tip (that I haven’t tested). The good people at Remote.it have pointed me in the direction of a T‑Mobile SIM card that runs $49/year with unlimited data. Even though it’s gawd-awful slow (64kbps), that *shouldn’t* matter for Light Hotspots which should be below 1.4kbps. Your mileage may vary, but for the record, here it is.
Leave a Reply