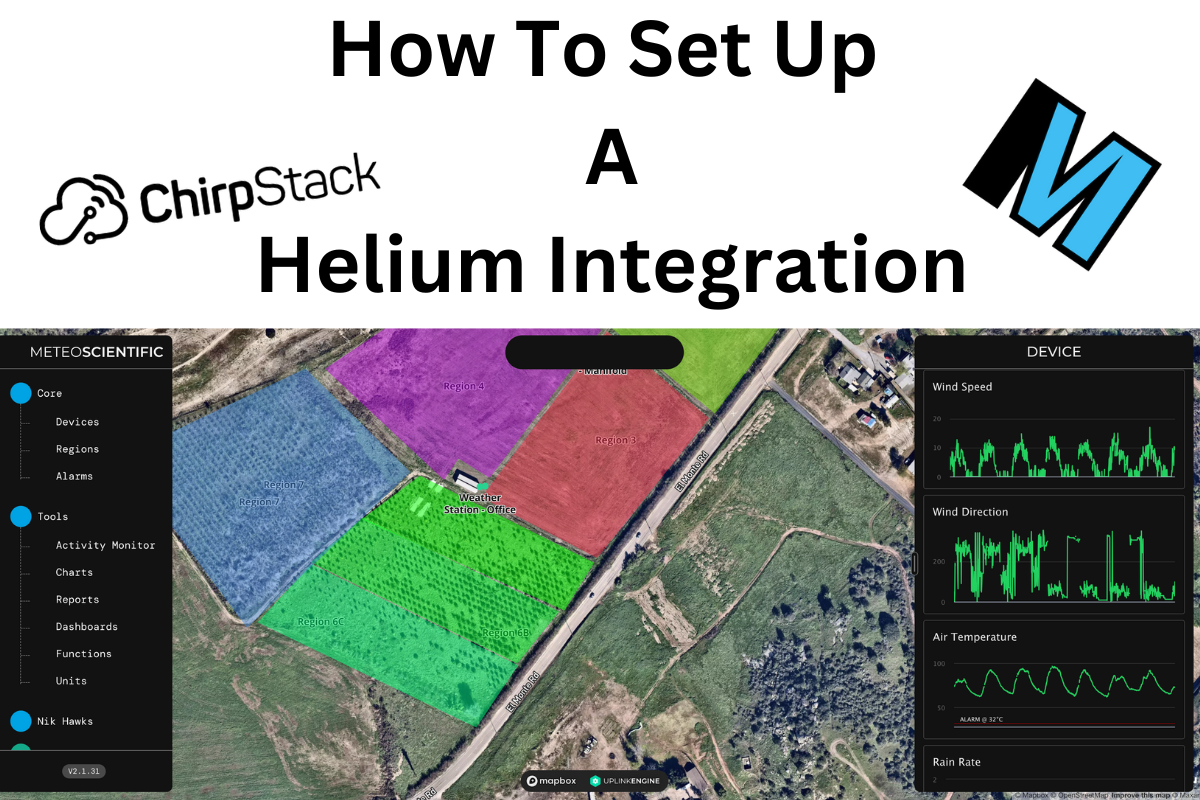
Let’s start with the basics: What the heck is a Helium Integration, and why would you even need one?
An “integration” is what allows the raw data that’s coming from your Helium sensors to be actually used. Whether that’s showing a dashboard of soil moisture, or temperature, or if you’re tracking the number of people who park in a spot, you’ll need an integration to actually understand that data.
Let’s do a quick review of how information moves through a LoRaWAN:
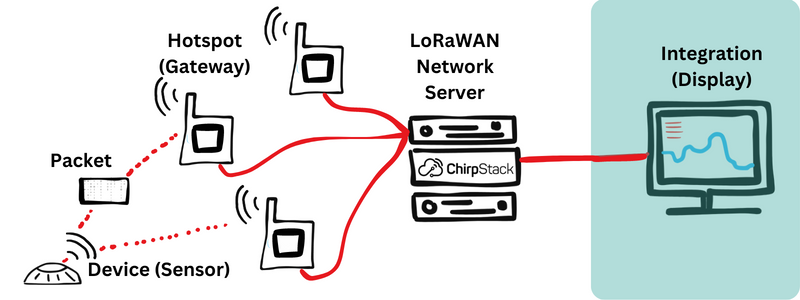
It starts with the Device sending out a Packet over radio waves. That Packet is received by a Hotspot. The Hotspot sends it on to an LNS (LoRaWAN Network Server), which will typically decode the packet and send it on to an Integration.
Now, an Integration doesn’t have to be a display; it could be any use of that data. Let’s say you have a Helium sensor monitoring soil moisture under a sprinkler manifold. If that sensor suddenly reports that it’s super wet, you may want to have your Integration just shut off any water to the manifold.
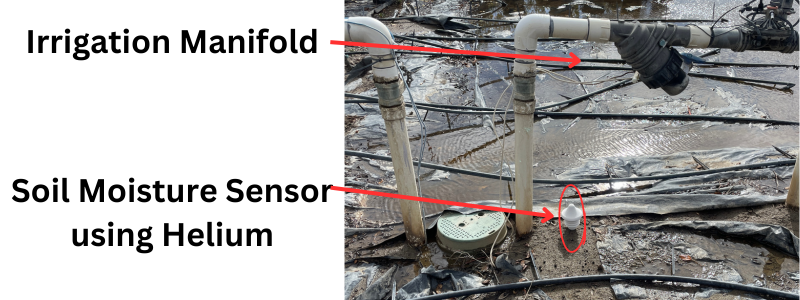
Of course, you might want to know if that soil moisture is because of a leaking pipe or just that it rained recently, so you probably want to tie in data from a local weather station, like this:
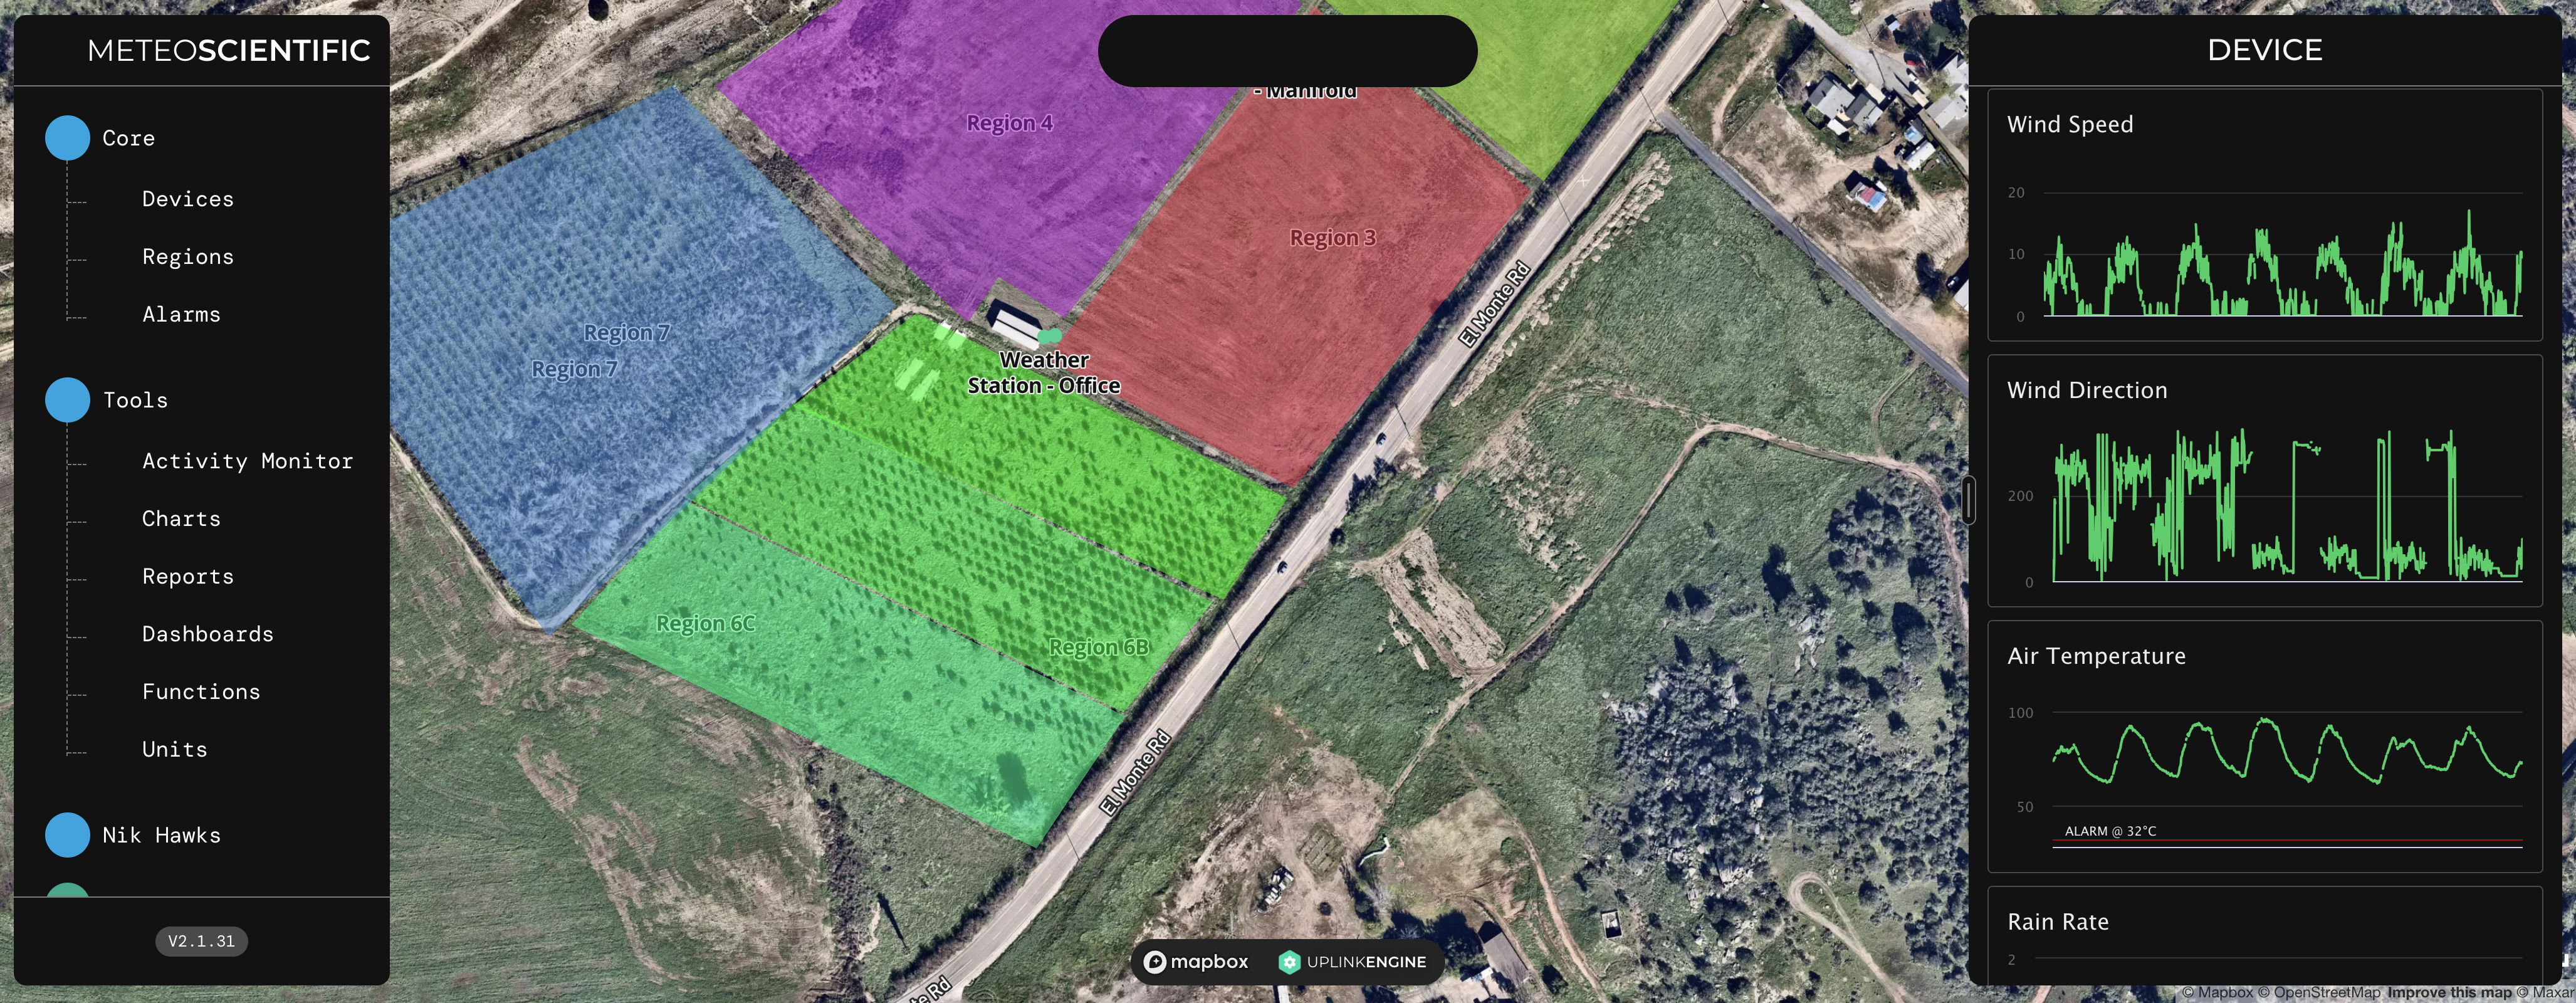
To see all that data, you need an Integration. In this case, we’ll be using the MeteoScientific integration, which also has a Rules Engine that allows you to create rules and workflows around what happens when it rains, or gets too cold, or does any one of a number of things that your sensors can report on. *Full disclosure: I own and run MeteoScientific and invested in the software it runs on, which is called UplinkEngine.
For now, I’ll walk you through how to connect your Console to an Integration. We’ll get to actually displaying the decoded data in the next post.
The MeteoScientific App is free to sign up for, and the smallest device plan is $.50/month, which is competitive with any other integration option out there.
Integration Options
There are lots of other integration services, like Datacake, Ubidots, Tag.io, and of course, Nova’s 1663 option for large commercial users. Each of them offers something slightly different, and depending on what you want, they may be a good match for you. They all will have the same general steps that we’ll follow below for MetSci. You’ll generate an API key, add it to your LNS, figure out how to read the incoming data, and then (for most of them), automate actions based on that data.
Relax, we won’t do ALL of that in this post. 🙂
I’ll make an assumption now in order to save us some time and space, and that’s that you already have your sensor up and connected to the Helium network. If you don’t, start over here with the MeteoScientific Console.
Chirpstack Device Setup — Example
Once you have a device set up, it’ll look something like this weather station, which is an example from the Chirpstack LNS on console.meteoscientific.com:
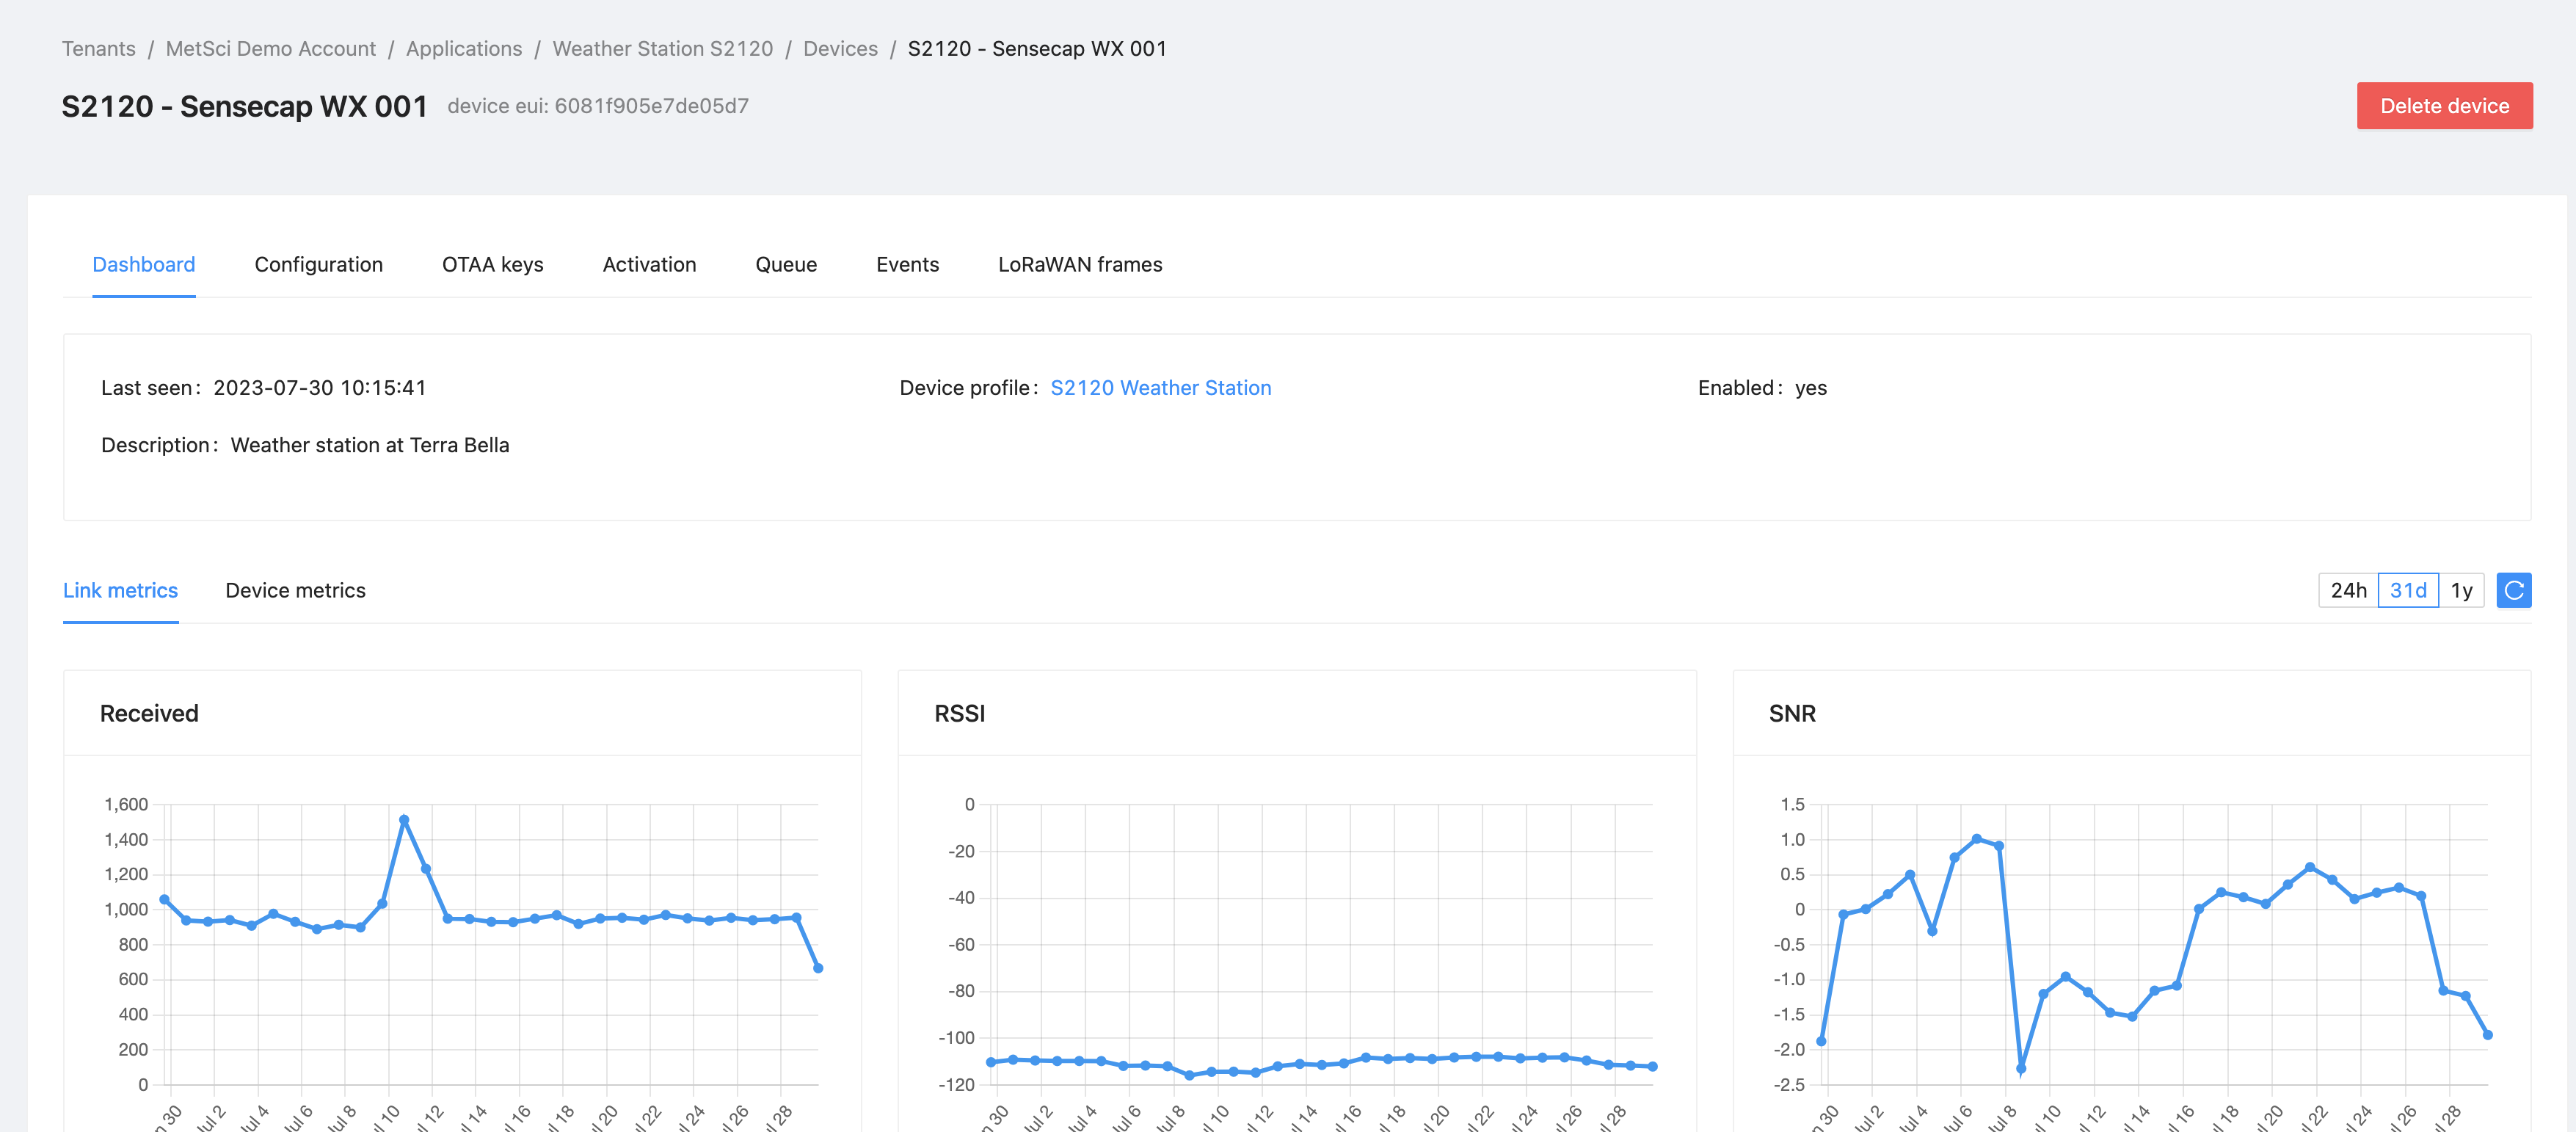
You can see that the sensor is up and reporting packets consistently, and the signal strength is good enough. Now, this is just the Device. To create an Integration, start by finding your Application in Chirpstack. Click on the Application, then look for the Integration tab, like this:
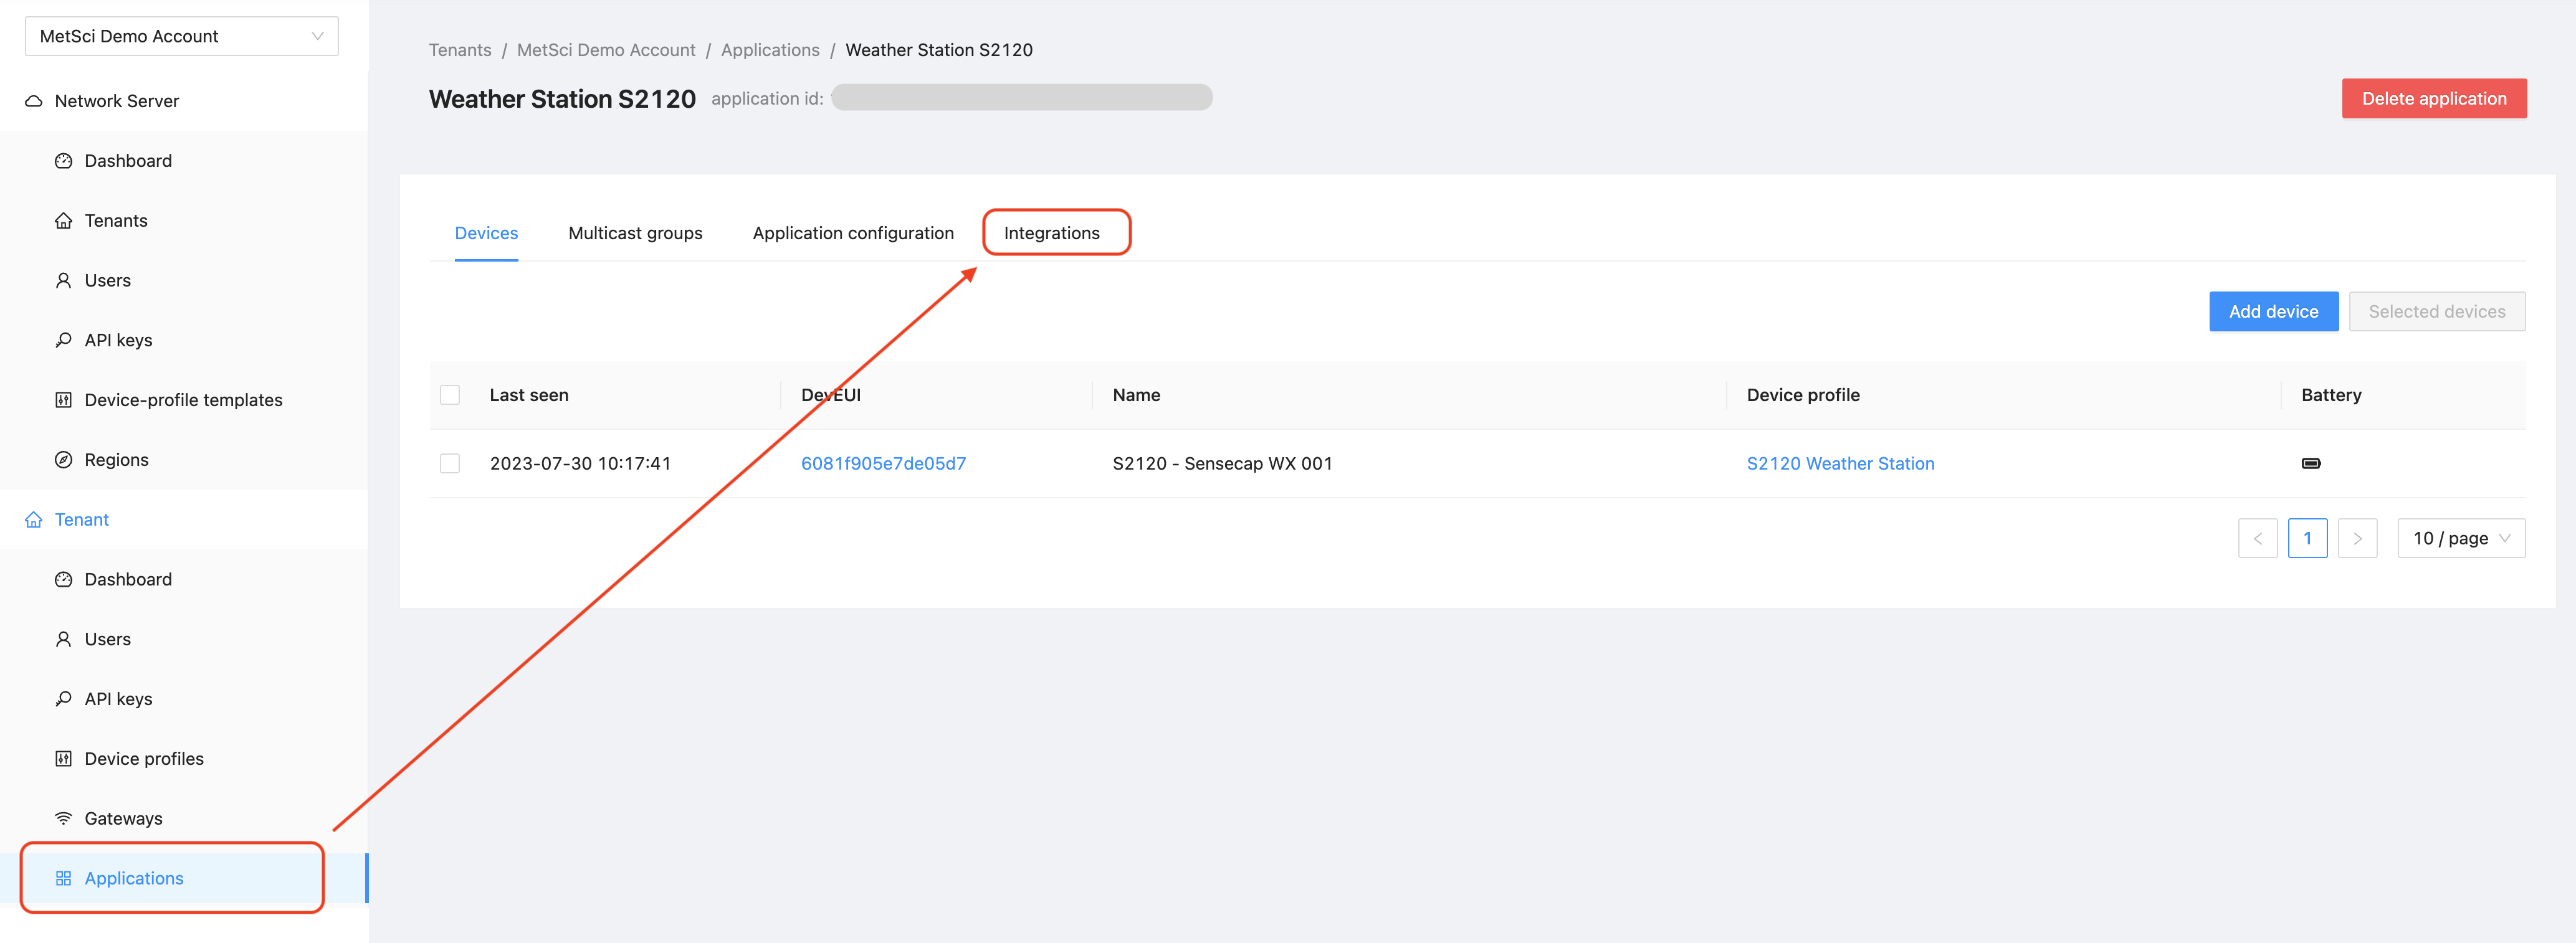
Click on the Integration tab, and then hit either the “plus” button if you don’t currently have one, or the pencil icon if you already do (which is the case in this example.)
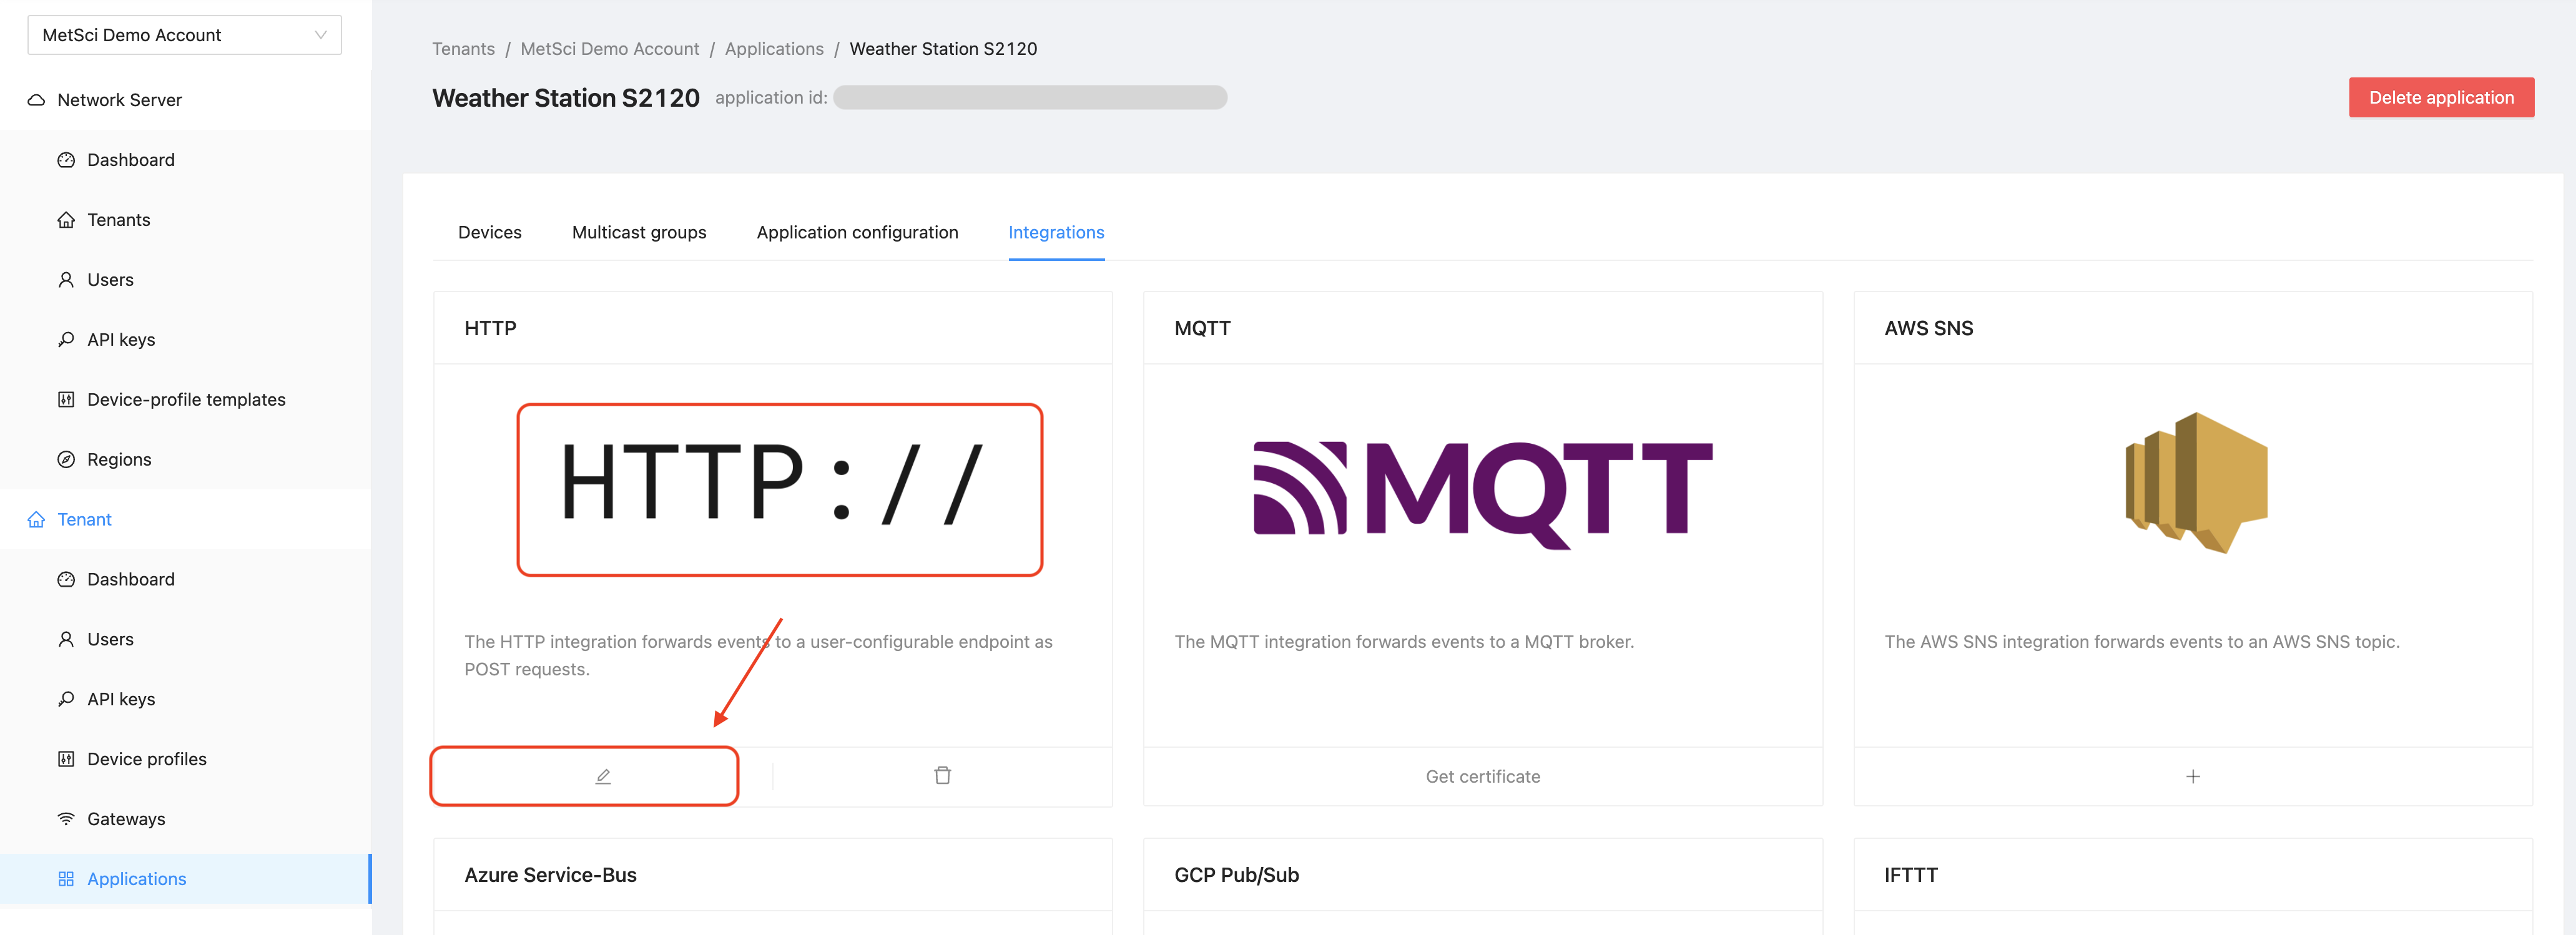
Once you’re in the integration, we’re going to tell Chirpstack where to send the data from our sensor. This sends our data to the “Integration.”
To do that, we’re going to open another tab and for our Integration account. In this case, that’s the MetSci (MeteoScientific) app. There we’ll generate an API key, then copy and paste a few things back into the Chirpstack Integration window.
MeteoScientific App
So, over on app.meteoscientific.com, look for your account name, then API Keys, then go to the top right and hit the “Add API Key” blue button, like this:
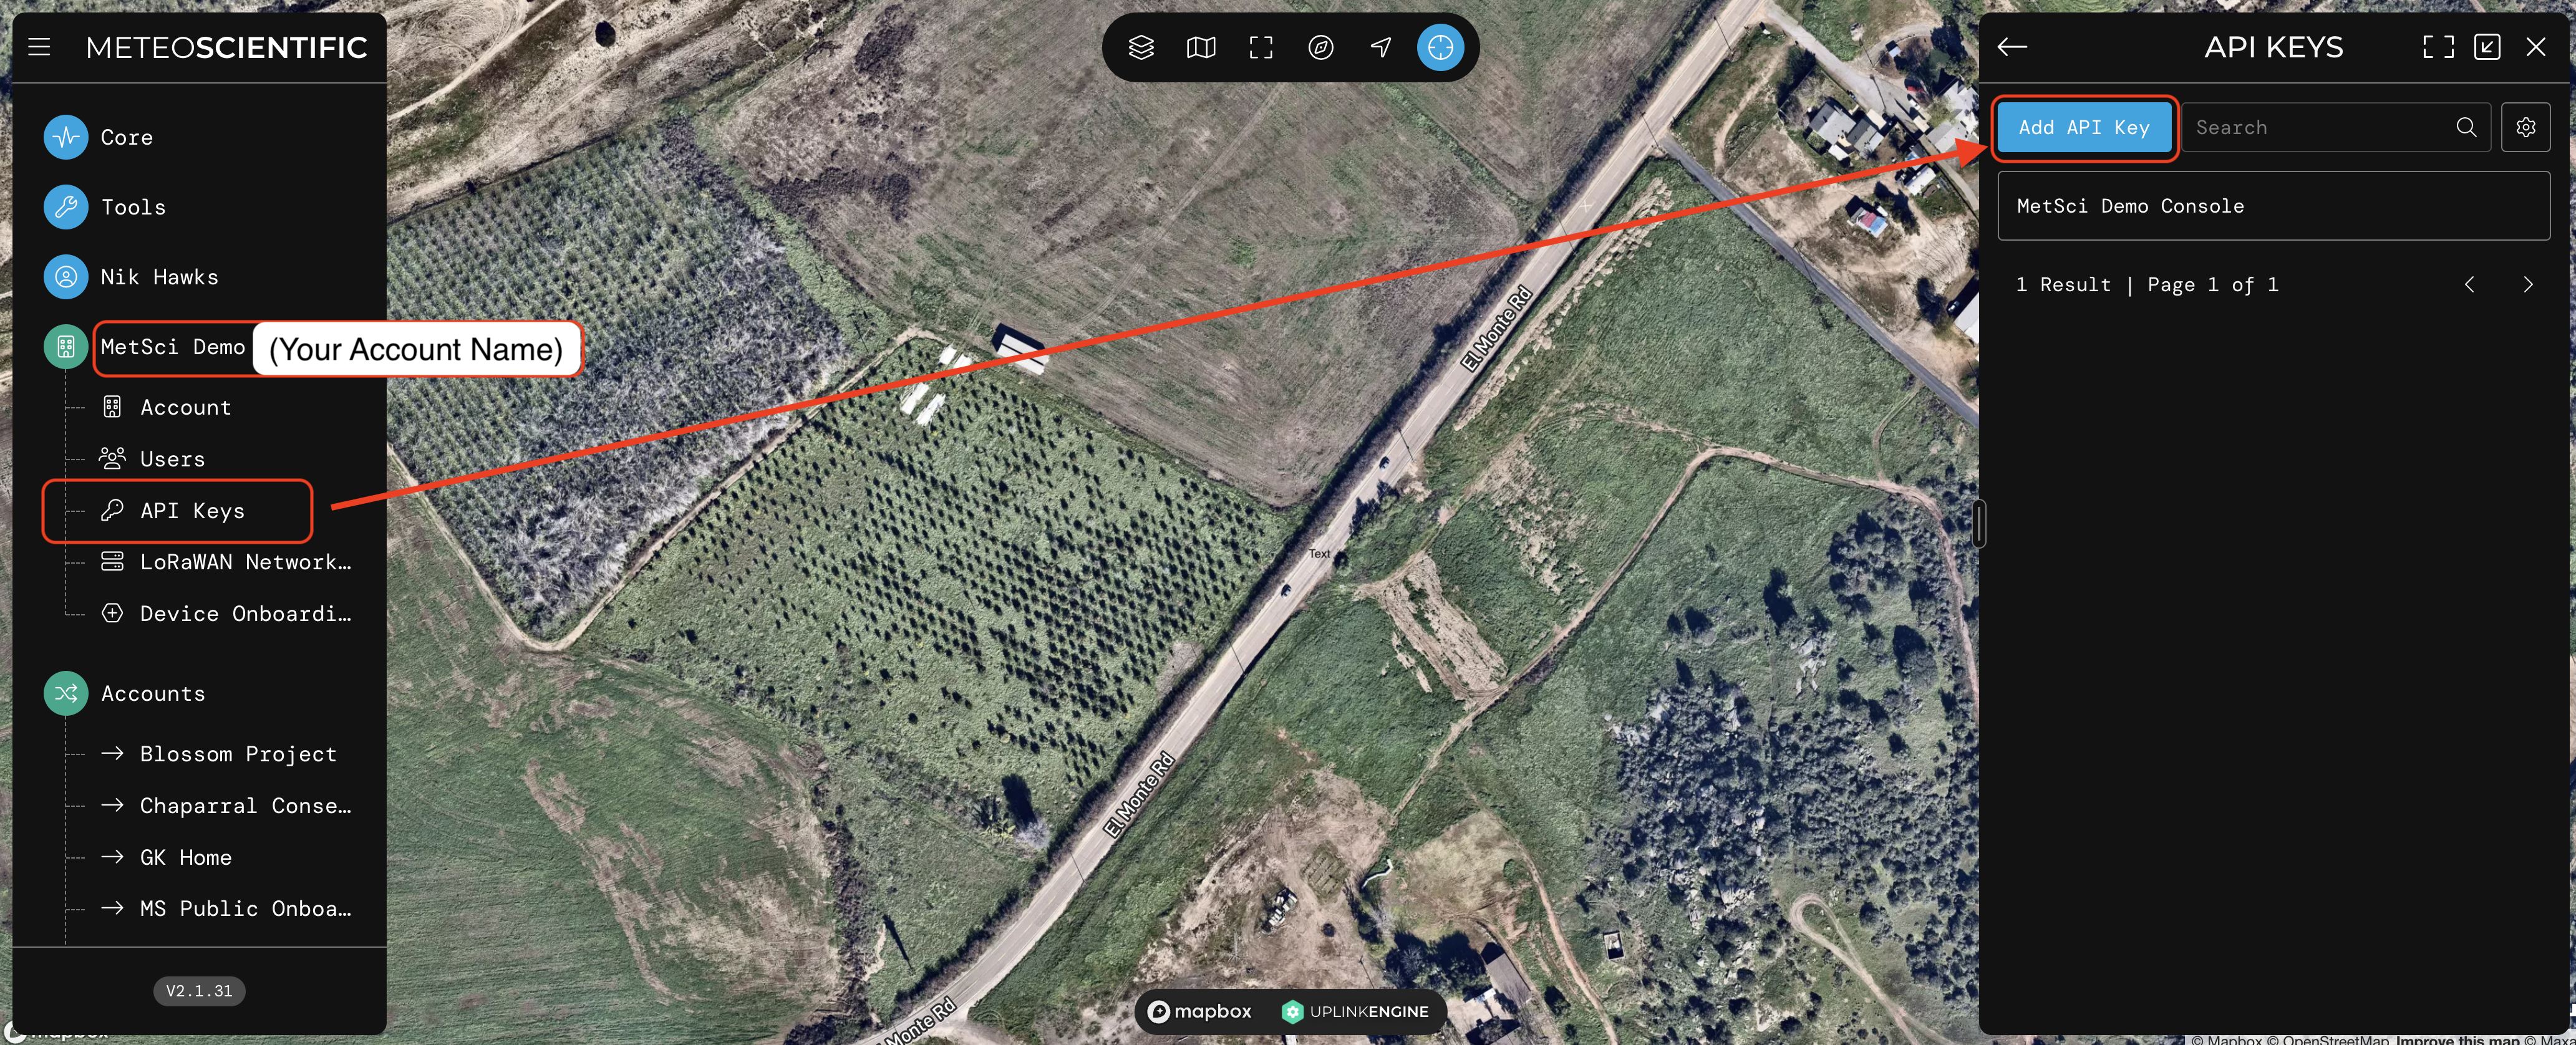
Once there, you’ll see the option to add an API key. API stands for Application Programming Interface, and it’s the code that allows two programs to talk to each other.
Add the key and name it something that makes sense, then save. You’ll need to add a “verification code” which will be sent to the email you signed up for the App with.
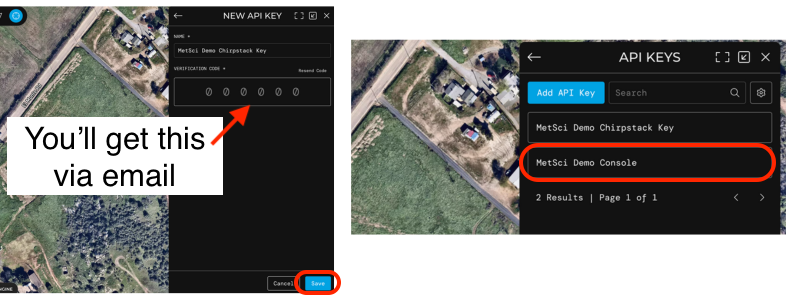
You could name it Super Duper Double Trouble Radical Wizard Key. The name doesn’t really matter, it just has to make sense to you. Once you see it in your API KEYS list, we’ll move on to the next step: Add the Device you have over on Chirpstack to the MetSci App, then using the API key to connect the two.
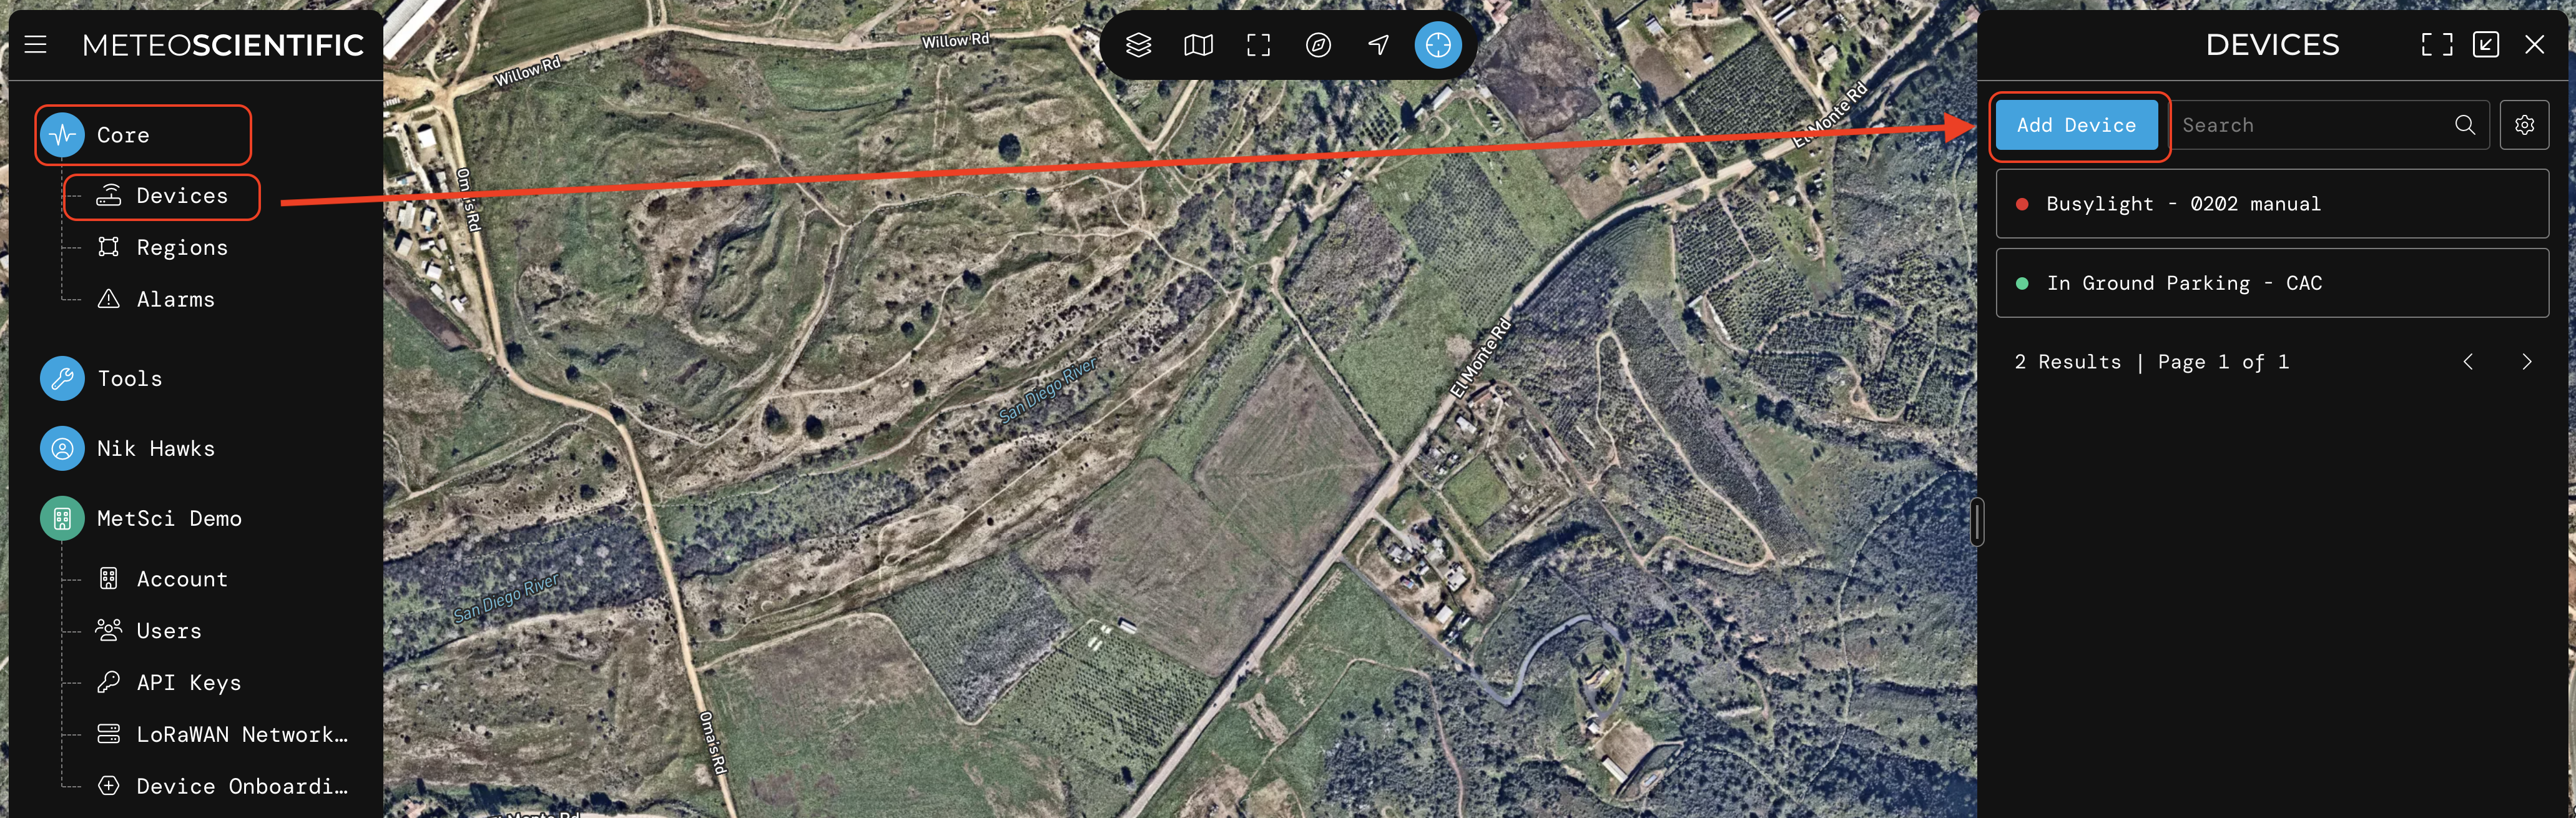
Gather your DevEUI, AppEUI, and AppKey from your Chirpstack account for the Device you want to add, then in the MetSci App, go to Core–>Devices and Add Device, like this:
It’ll display a screen where you enter in all your various EUIs and keys. Fill those in, then hit Save at the bottom.
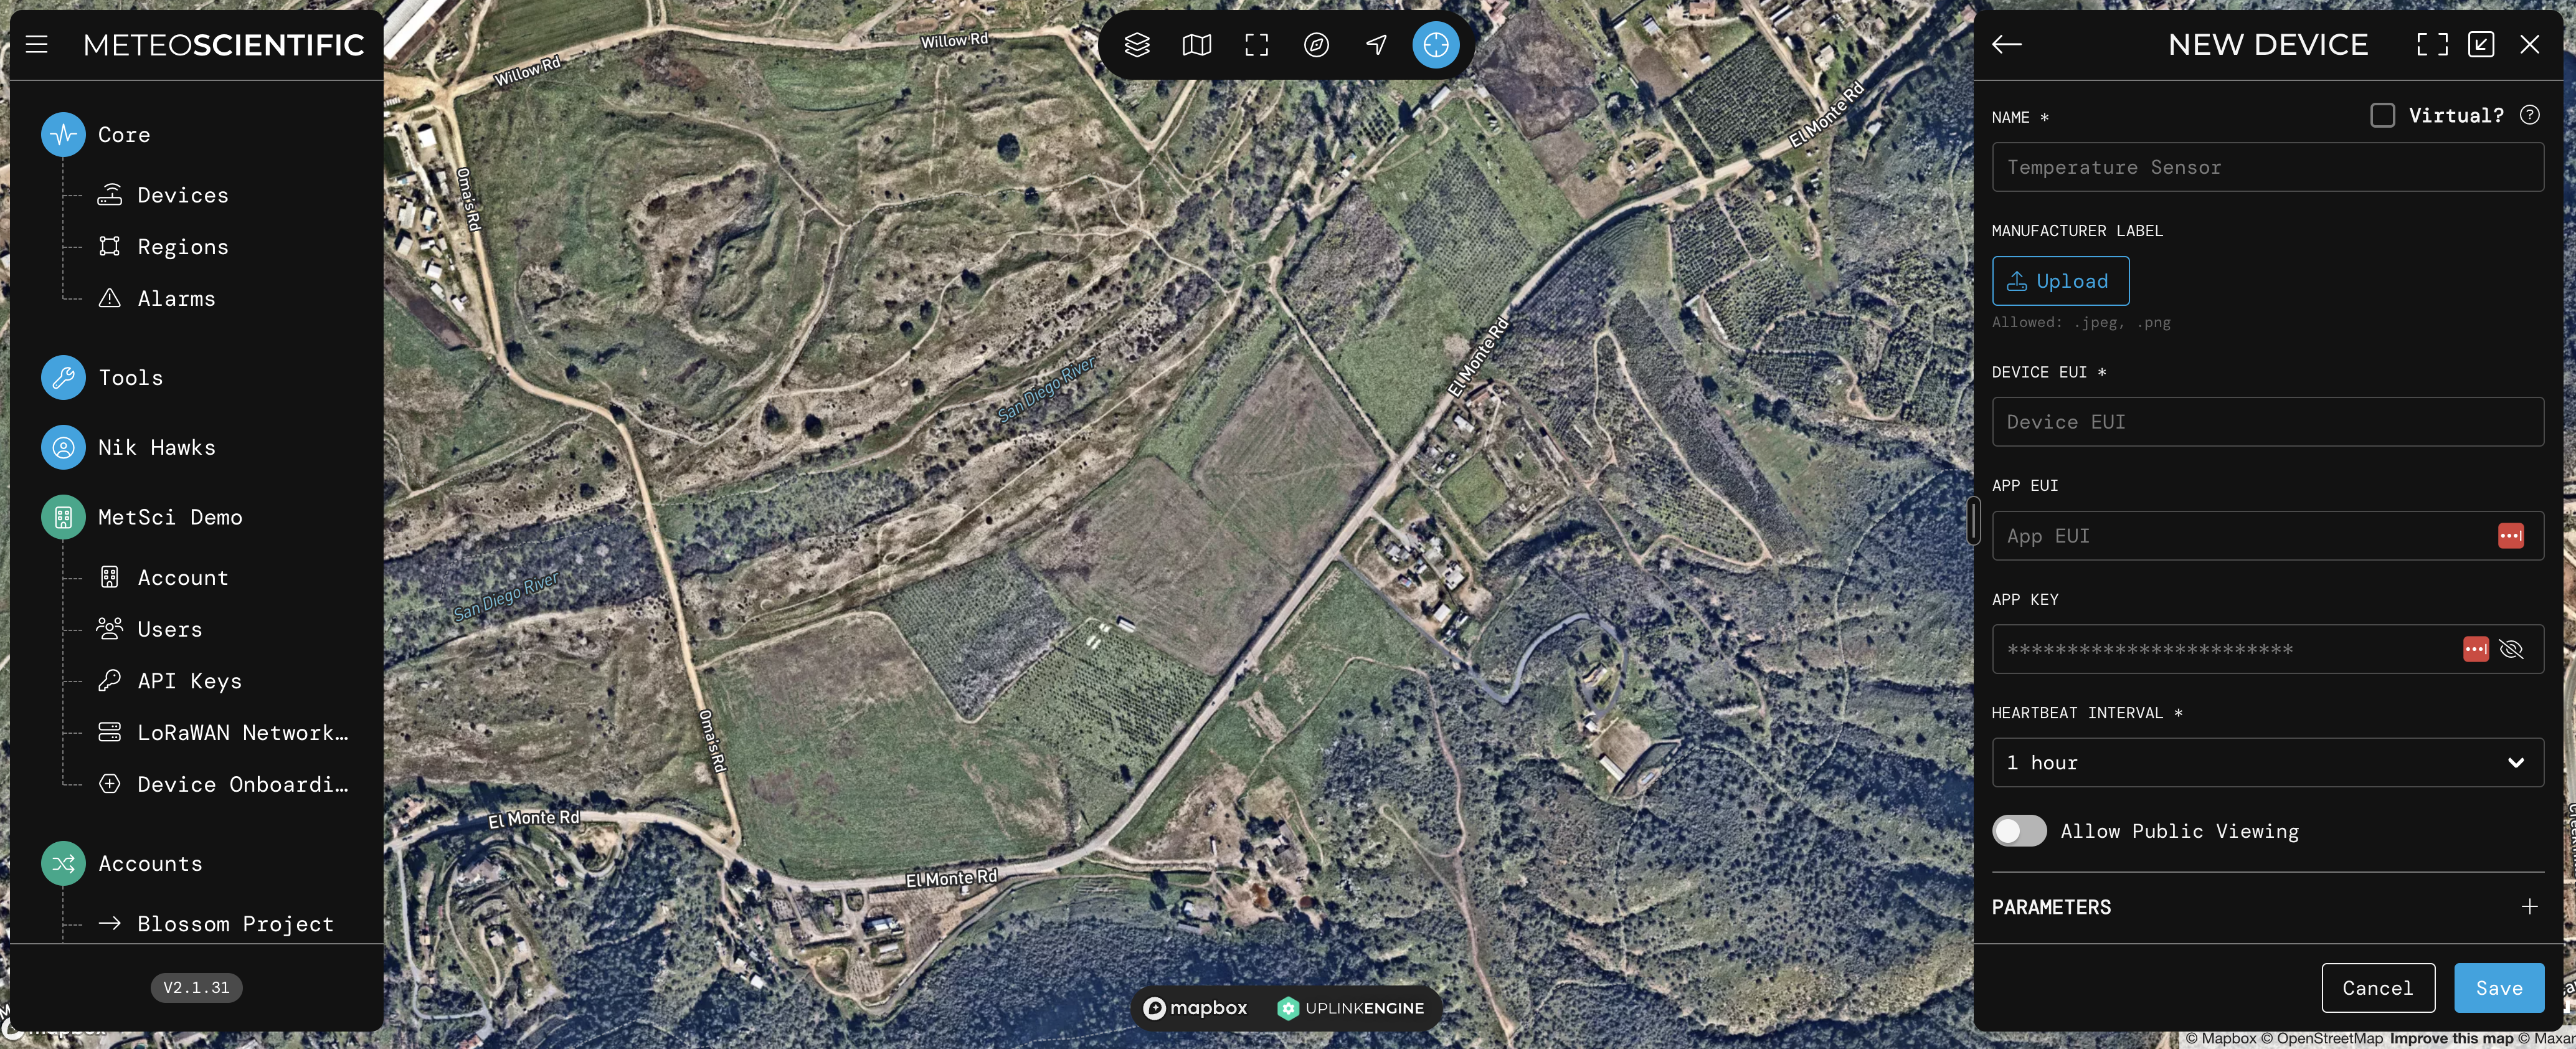
For now, don’t worry about Heartbeat Interval, Public Viewing, Parameters or Position, we’ll fill that in later. Hit Save, and you’ll see your Device.
Look for the “How to Receive Uplinks” tab and expand that, then carefully follow the instructions. It’ll look like this:
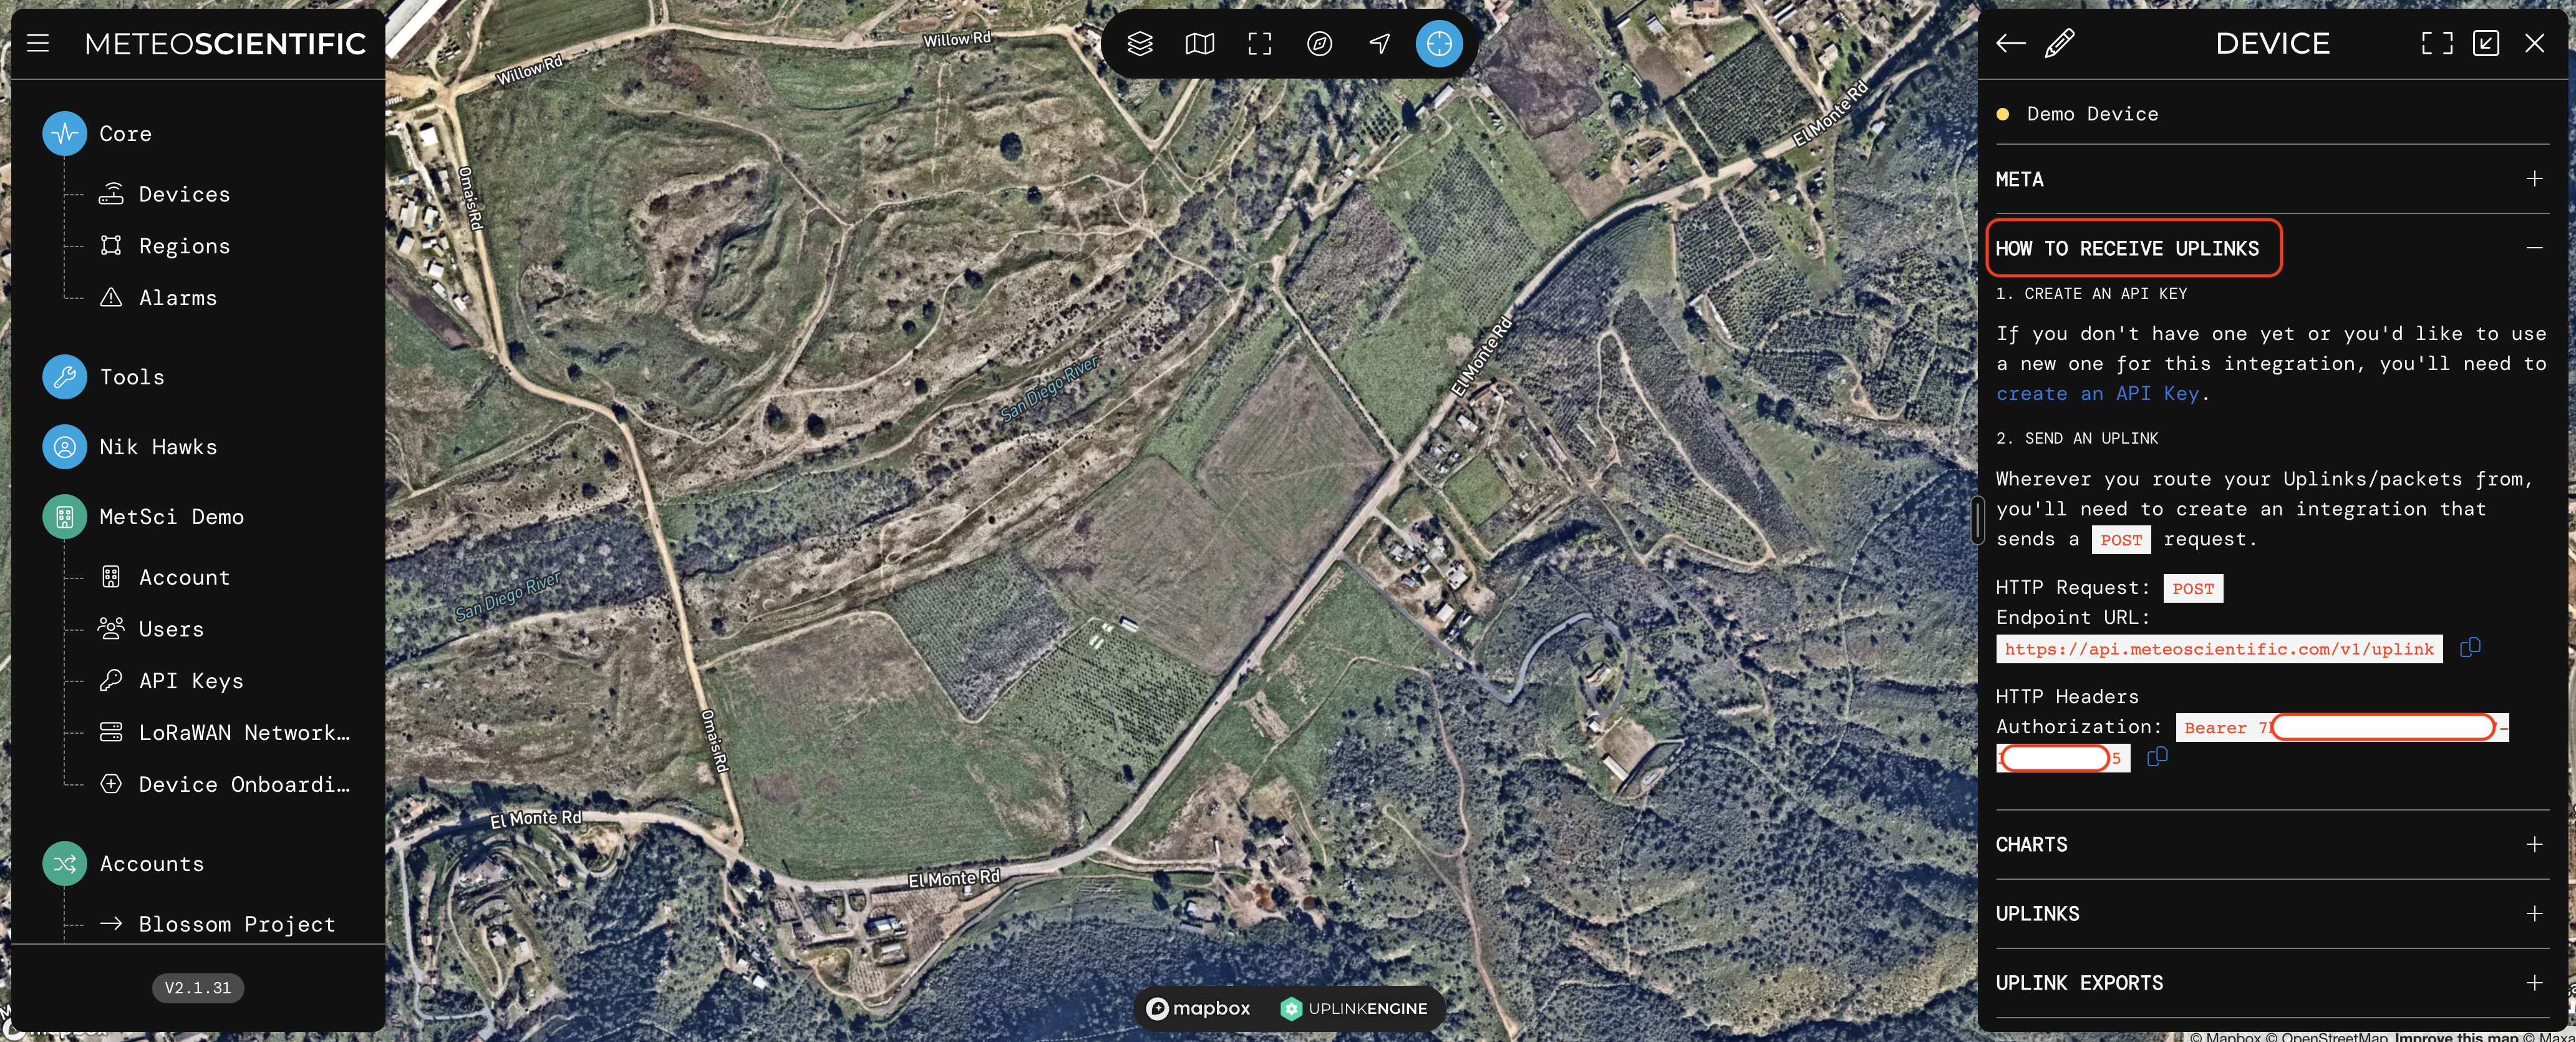
Use the copy/paste buttons to grab your “Endpoint URL” and the HTTP Headers Authorization. We’ll paste those in over on the MetSci Console, back in the Integrations tab we left open from before.
Go back to Chirpstack
In Console, on the Integrations –> HTTP edit box, start by choosing JSON, then fill in the Event Endpoint URL.

Now hit the “Add Header” button, and add in a Header with a “key” of Authorization and a “value” pasted in from your app. That will start with “Bearer” and then have your API key in there. I’ve already done mine, but just for reference, this is what it looks like:

You’re done!
That’s it! You’ve connected your Console with an Integration using an API Key. Wait for your sensor to send a packet, and you’ll see the packet show up in your MetSci app. I’ll save the next step (taking the decoded data from the packet and displaying it in the app) for another post. For now, pat yourself on the back, you’ve made the last big connection in a long set of geeky rules, well done!
If you’re digging this set of instructions, I’d love to have you as a MetSci Console and App customer. However, I’m more psyched to just have you using Helium in general, so whatever combo of LNS and Integration you use is fine with me. If you’re having trouble, drop me a note in the comments below and I’ll do my best to help you out!
Rock ‘n roll!
Leave a Reply