So you’ve read the piece on the Helium Bridge and you want to use one to bring your favorite non-LoRaWAN sensor data onto the Helium Network? Rad!
Let’s start off with the current limitations, just so you don’t get all hot and bothered then realize what you wan’t ain’t doable yet. Right now, it works “out of the box” with 4 sensors:
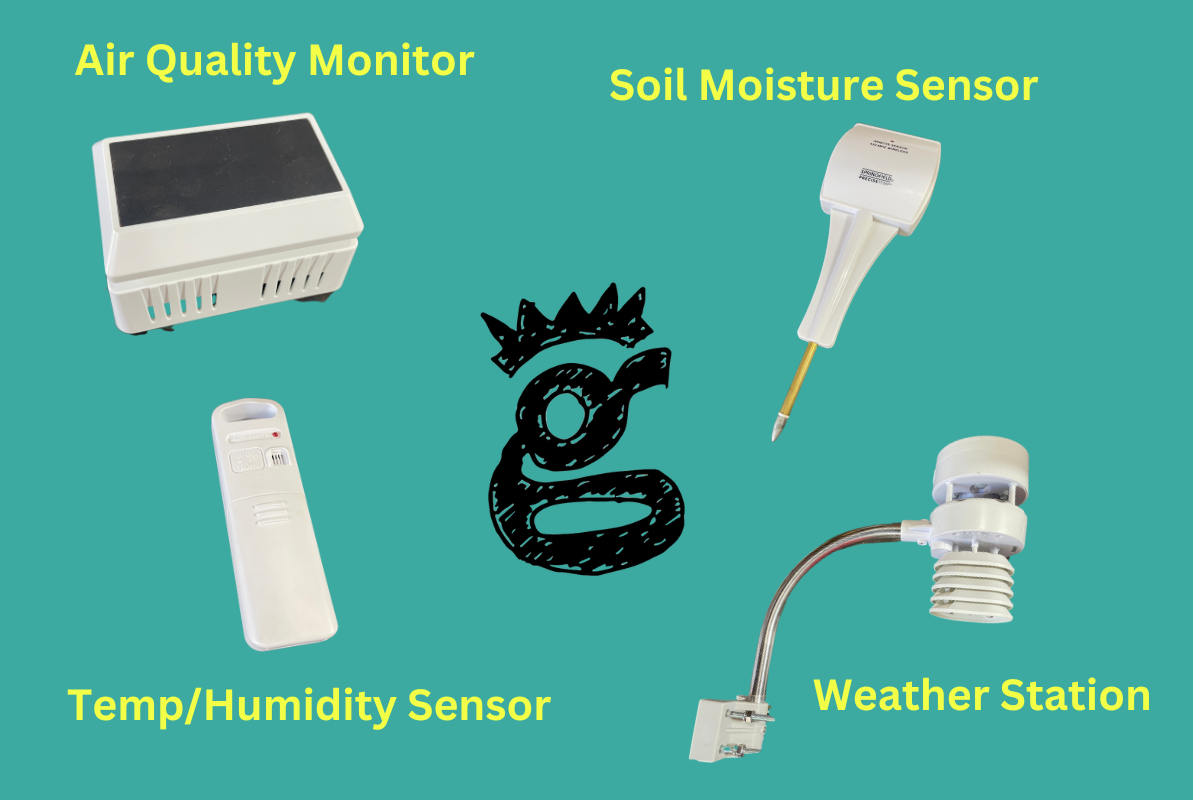
- WS80 from Fine Offset (Ecowitt), a small weather station.
- WH45 from Fine Offset/Ecowitt, an air quality monitor
- Acurite 592TXR Indoor/Outdoor Temp/Humidity sensor
- Springfield PreciseTemp Soil Moisture
For the WS80 specifically we’ve published a specialized set of instructions so you can make some changes regarding how much it reports on Helium vs how quickly it collects data. You probably don’t want to be sending data out as quickly as it’s collected, every 1.7 seconds, as that would be a fairly large DC bill.
Keep in mind that this is just the beginning, and that doing this project will introduce you to (force you to?) level up your geek chops. This is not a small “build an Ikea table” project. If you’ve never done this before, plan on about 3 weekends to put everything together so you can reliably build a bunch of Bridges.
You’ll be ordering PCBs and components, soldering them together, and programming what you’ve built. It’s really cool, and we’ll walk you through step by step so it’s as easy as possible, but be ready to hang in there a bit!
If you want to use the Bridge with other protocols like BLE or ANT+, you’ll need to take the hardware basics and do some tinkering, or wait a bit as we continue to tinker as well and add more options.
You can find the a detailed set of instructions over on Github for how to build a Helium Bridge. In this post, I’ll add in a few explanatory points and help guide you through some of the things that aren’t intuitively obvious to us less-geeky types.
Let’s think of doing this in three distinct stages:
- Assembling the hardware
- Programming the device
- Using it with specific sensors
Assembling the Hardware
Ok, so step one is to order the PCB, or Printed Circuit Board that will be the base of the Bridge. To do that you’ll go to the Github and download what’s called a “Gerber File”. You’ll find that in the “pcb” folder, here.
You’ll then upload the Gerber to a place that’ll print ’em for you. We used OSH Park, which you can find here. When you go there, you’ll seen the options to upload your files right on the main page.
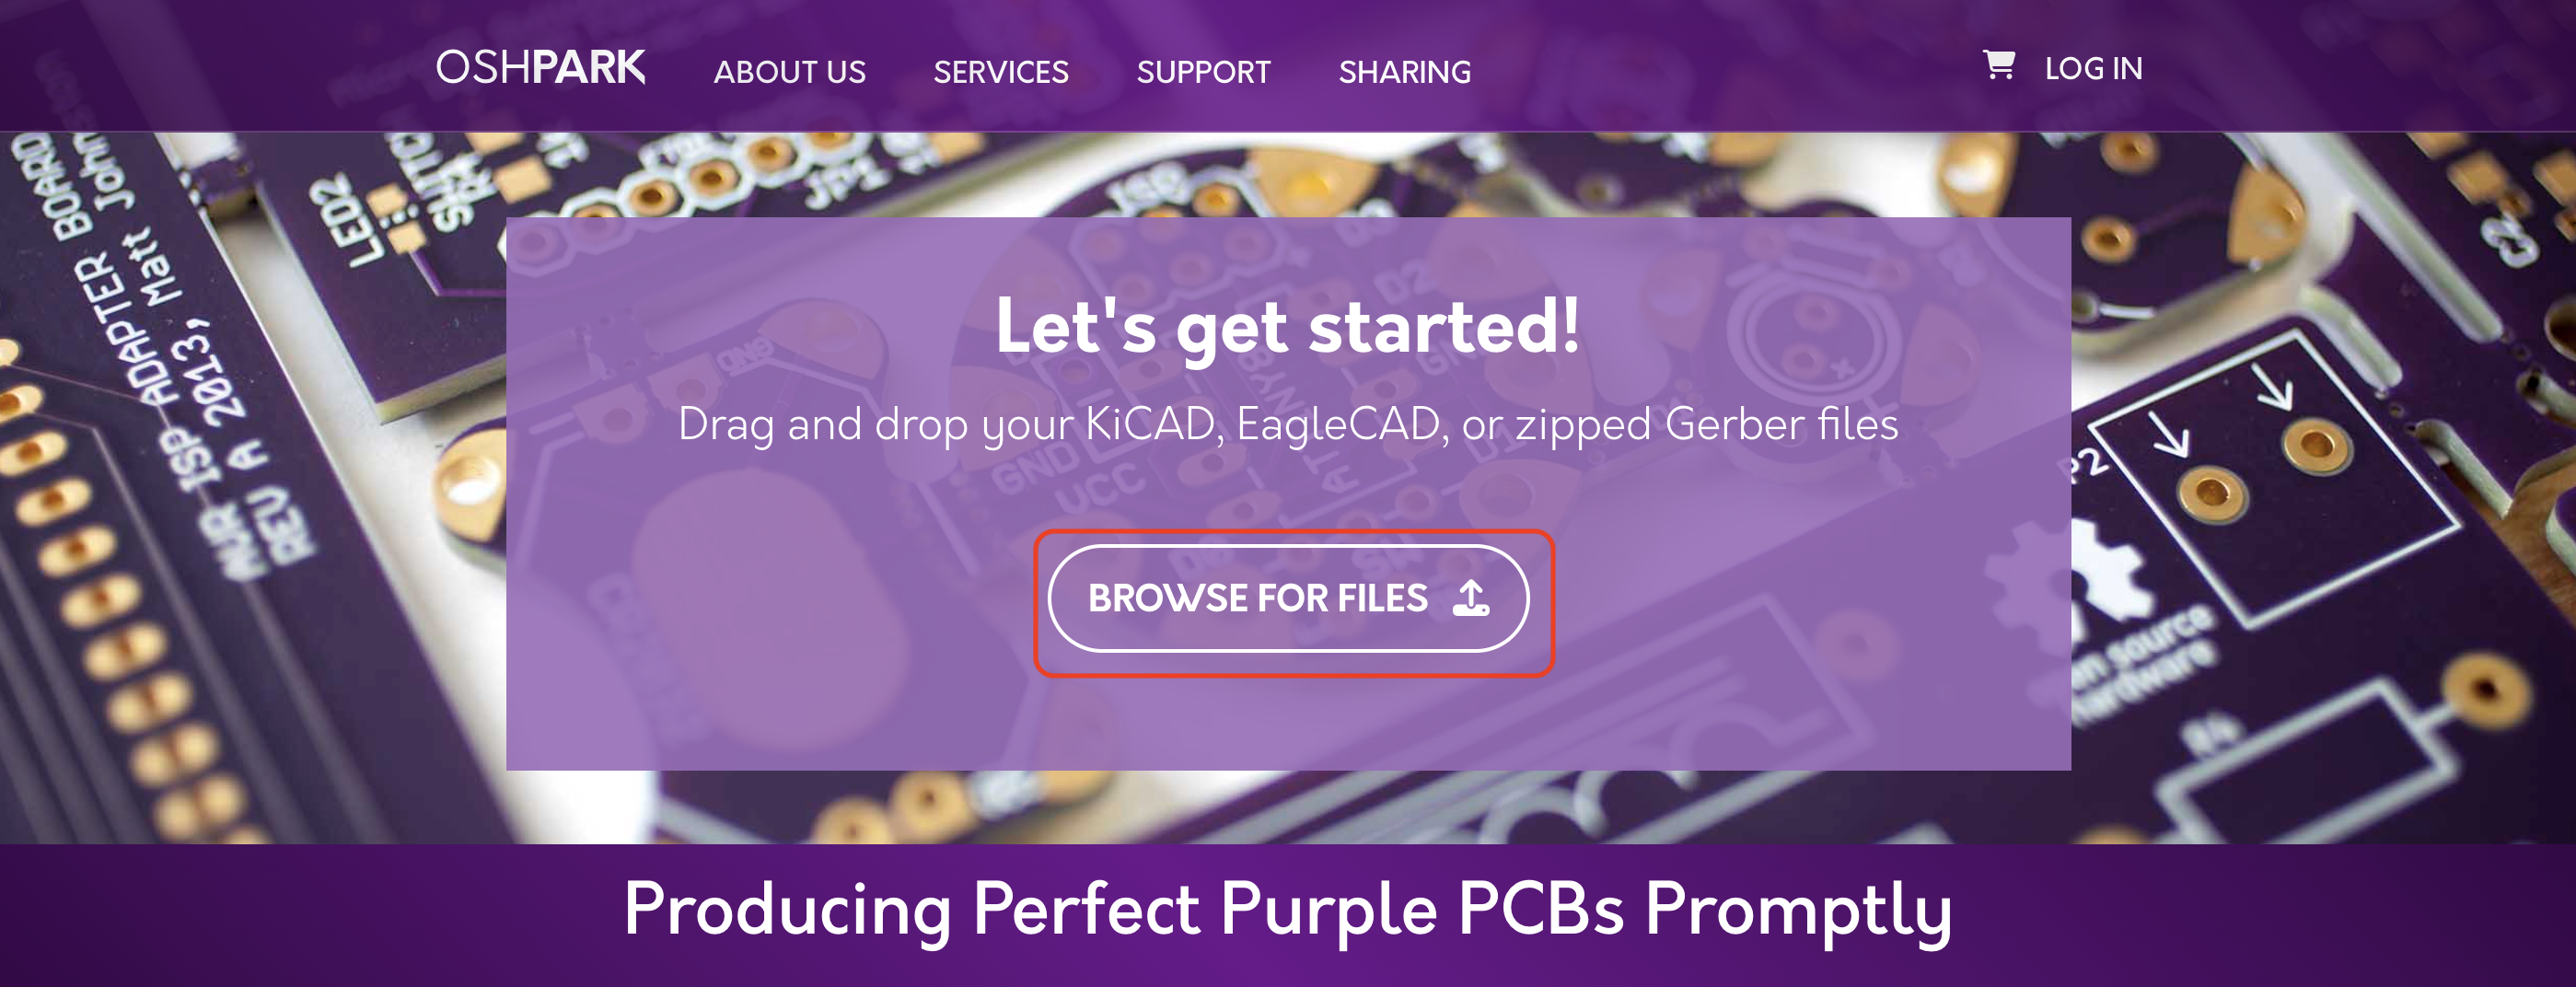
It can be a little confusing going through the ordering process, and it seems to change every few months or so. The important parts are to make sure everything lines up correctly and to make sure you order what’s called a “mask” when you order the board. Trust me, this’ll make applying the solder paste much easier.
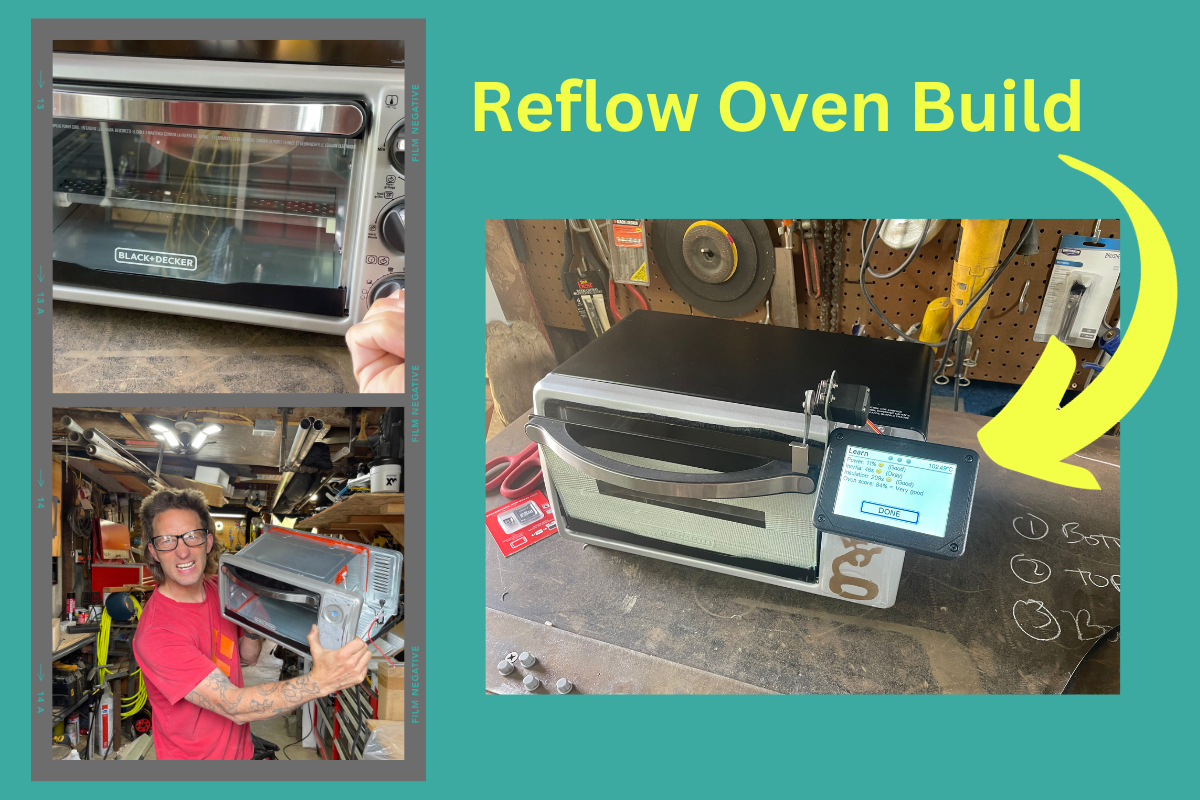
You see, we’re NOT going to hand solder this board. You’re going to use what’s called a “Reflow Oven” to attach the various components. You can buy one of those, or, way more fun, you can build one! We built the Controleo3 from Whizoo using their kit and a toaster oven!
Once you have (or have access to) a reflow oven, you’ll need the board and the components to put in and “cook it” as well as consumables like solder paste to make the electrical connections.
Everything you’ll need to buy or have on hand other than the reflow oven is listed in the Githhub. Rather than double-listing ’em (and risking have separate lists in different places), I’d just go over there and put in your orders. It can take a few weeks to get everything in.
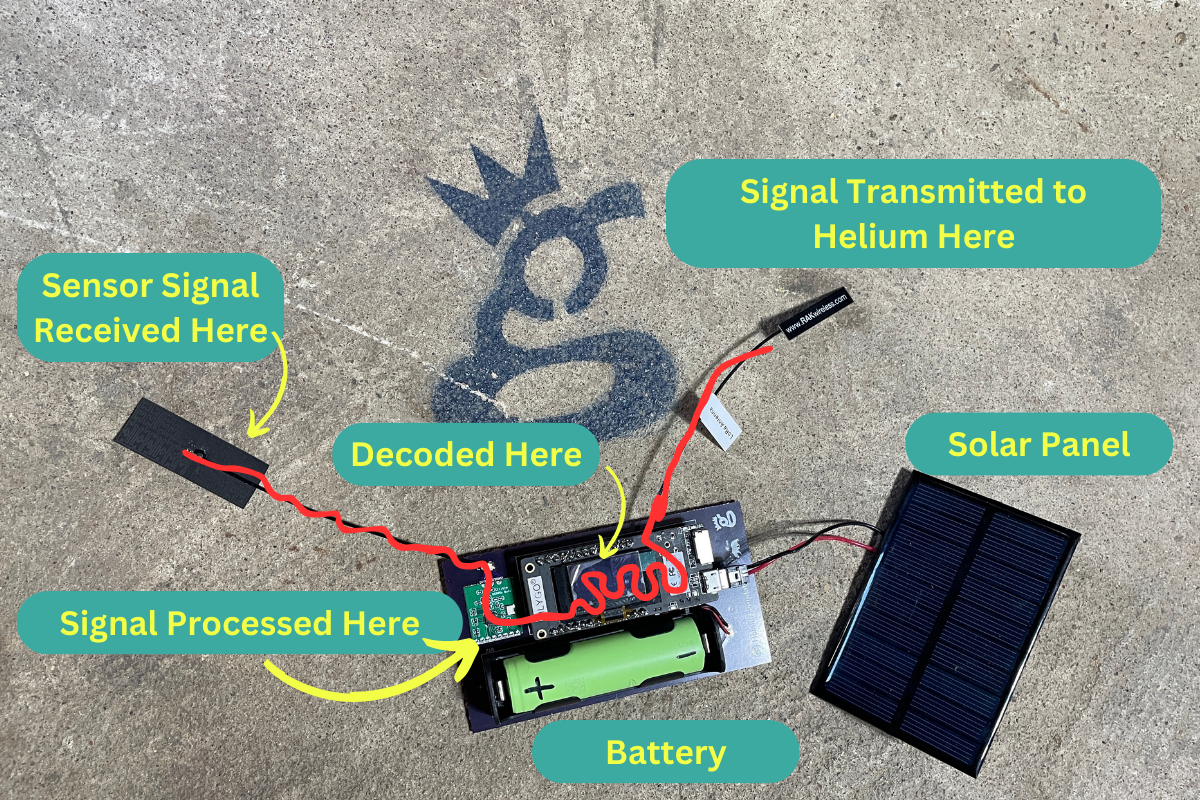
In big picture terms, the PCB is the structure to which the brains (the Lilygo computer), the radio (the CC1101), the power (the 18650 battery), the charging source (the solar panel) and the receive & transmit antennas to attach to. You could connect all those manually (that’s how we started), but it can be a little tricky to do that, and using the PCB makes for a much cleaner final project.
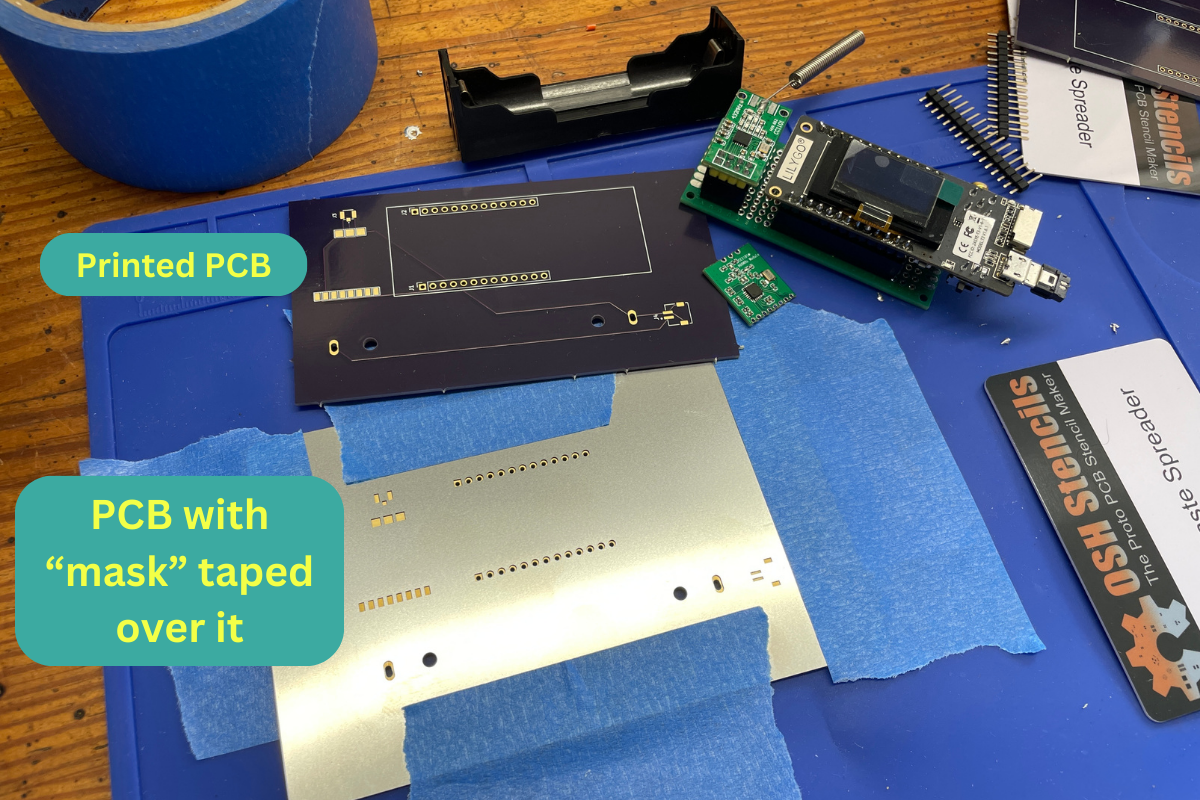
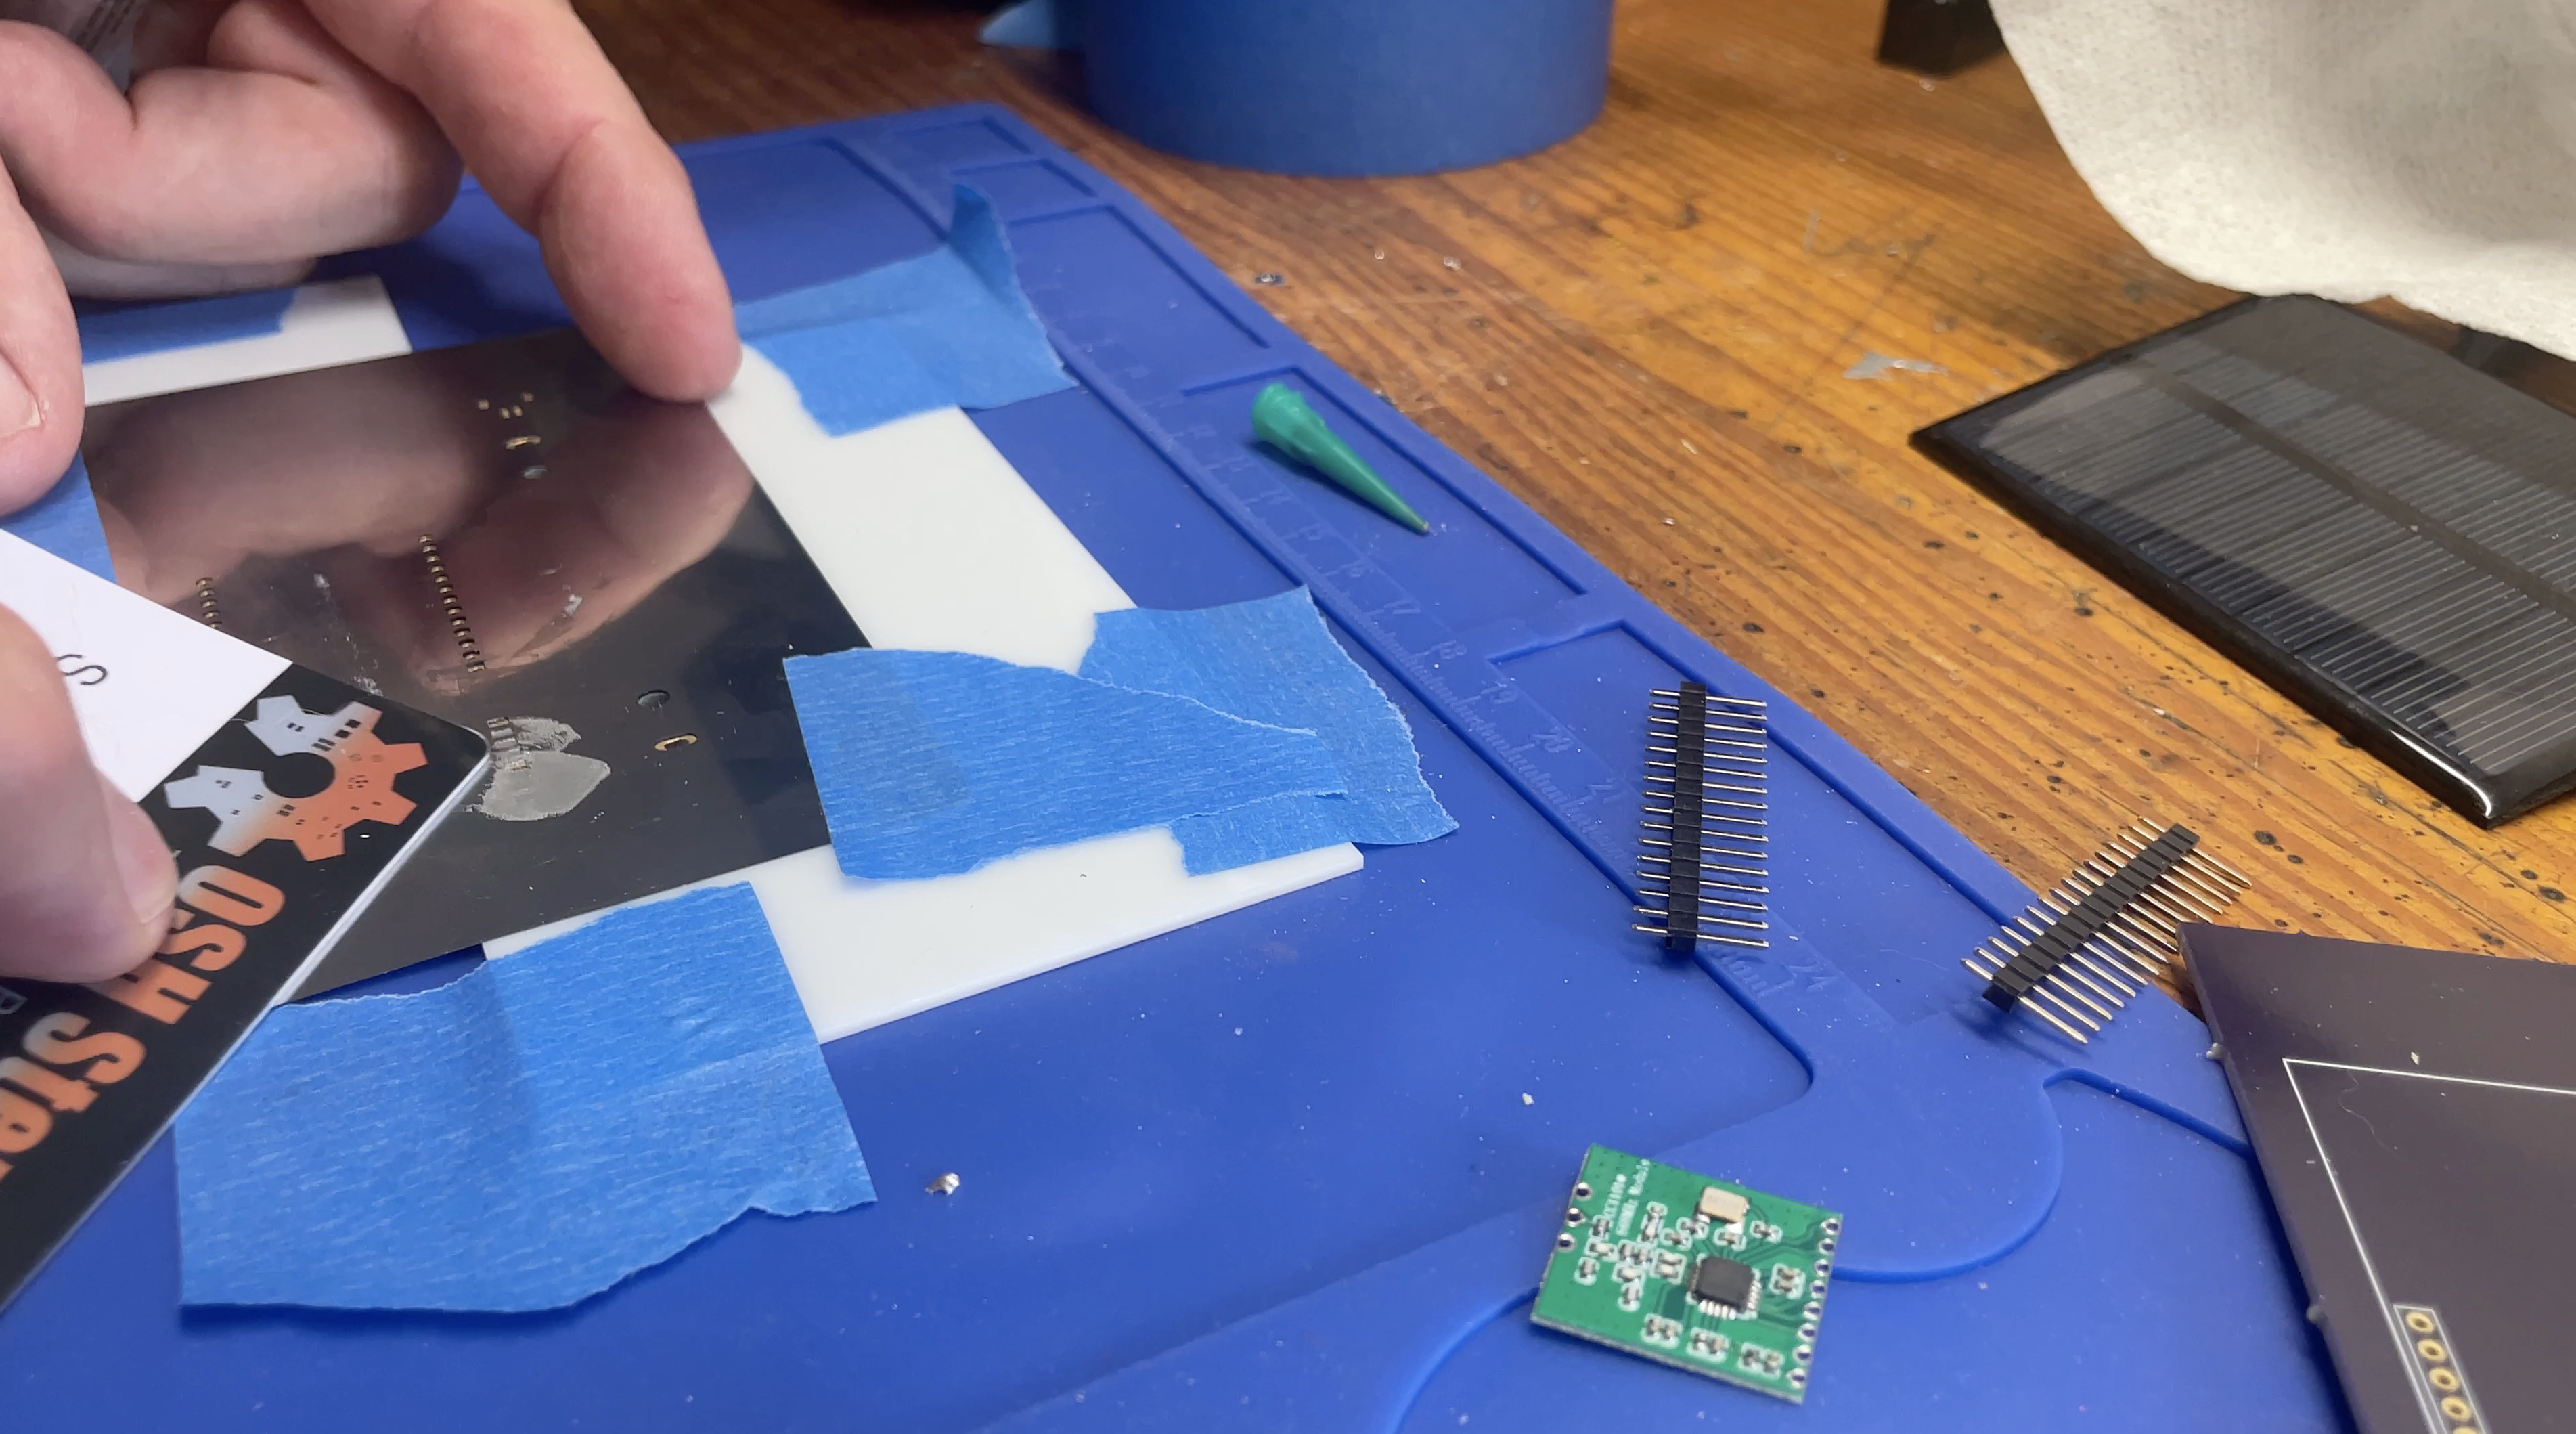
Here’s the printed PCB and a PCB with the “mask” taped over it and ready to have the solder paste applied. Note how the holes in the mask line up with the places where the solder paste will need to go on the board.
Using a card (usually supplied with the mask), smear on the solder paste once you have the mask taped on. Remember to tape the board to the mat first so it doesn’t slide under the mask.
Once you’ve got your components placed, carefully remove the mask, then slide everything into your reflow oven and cook it!
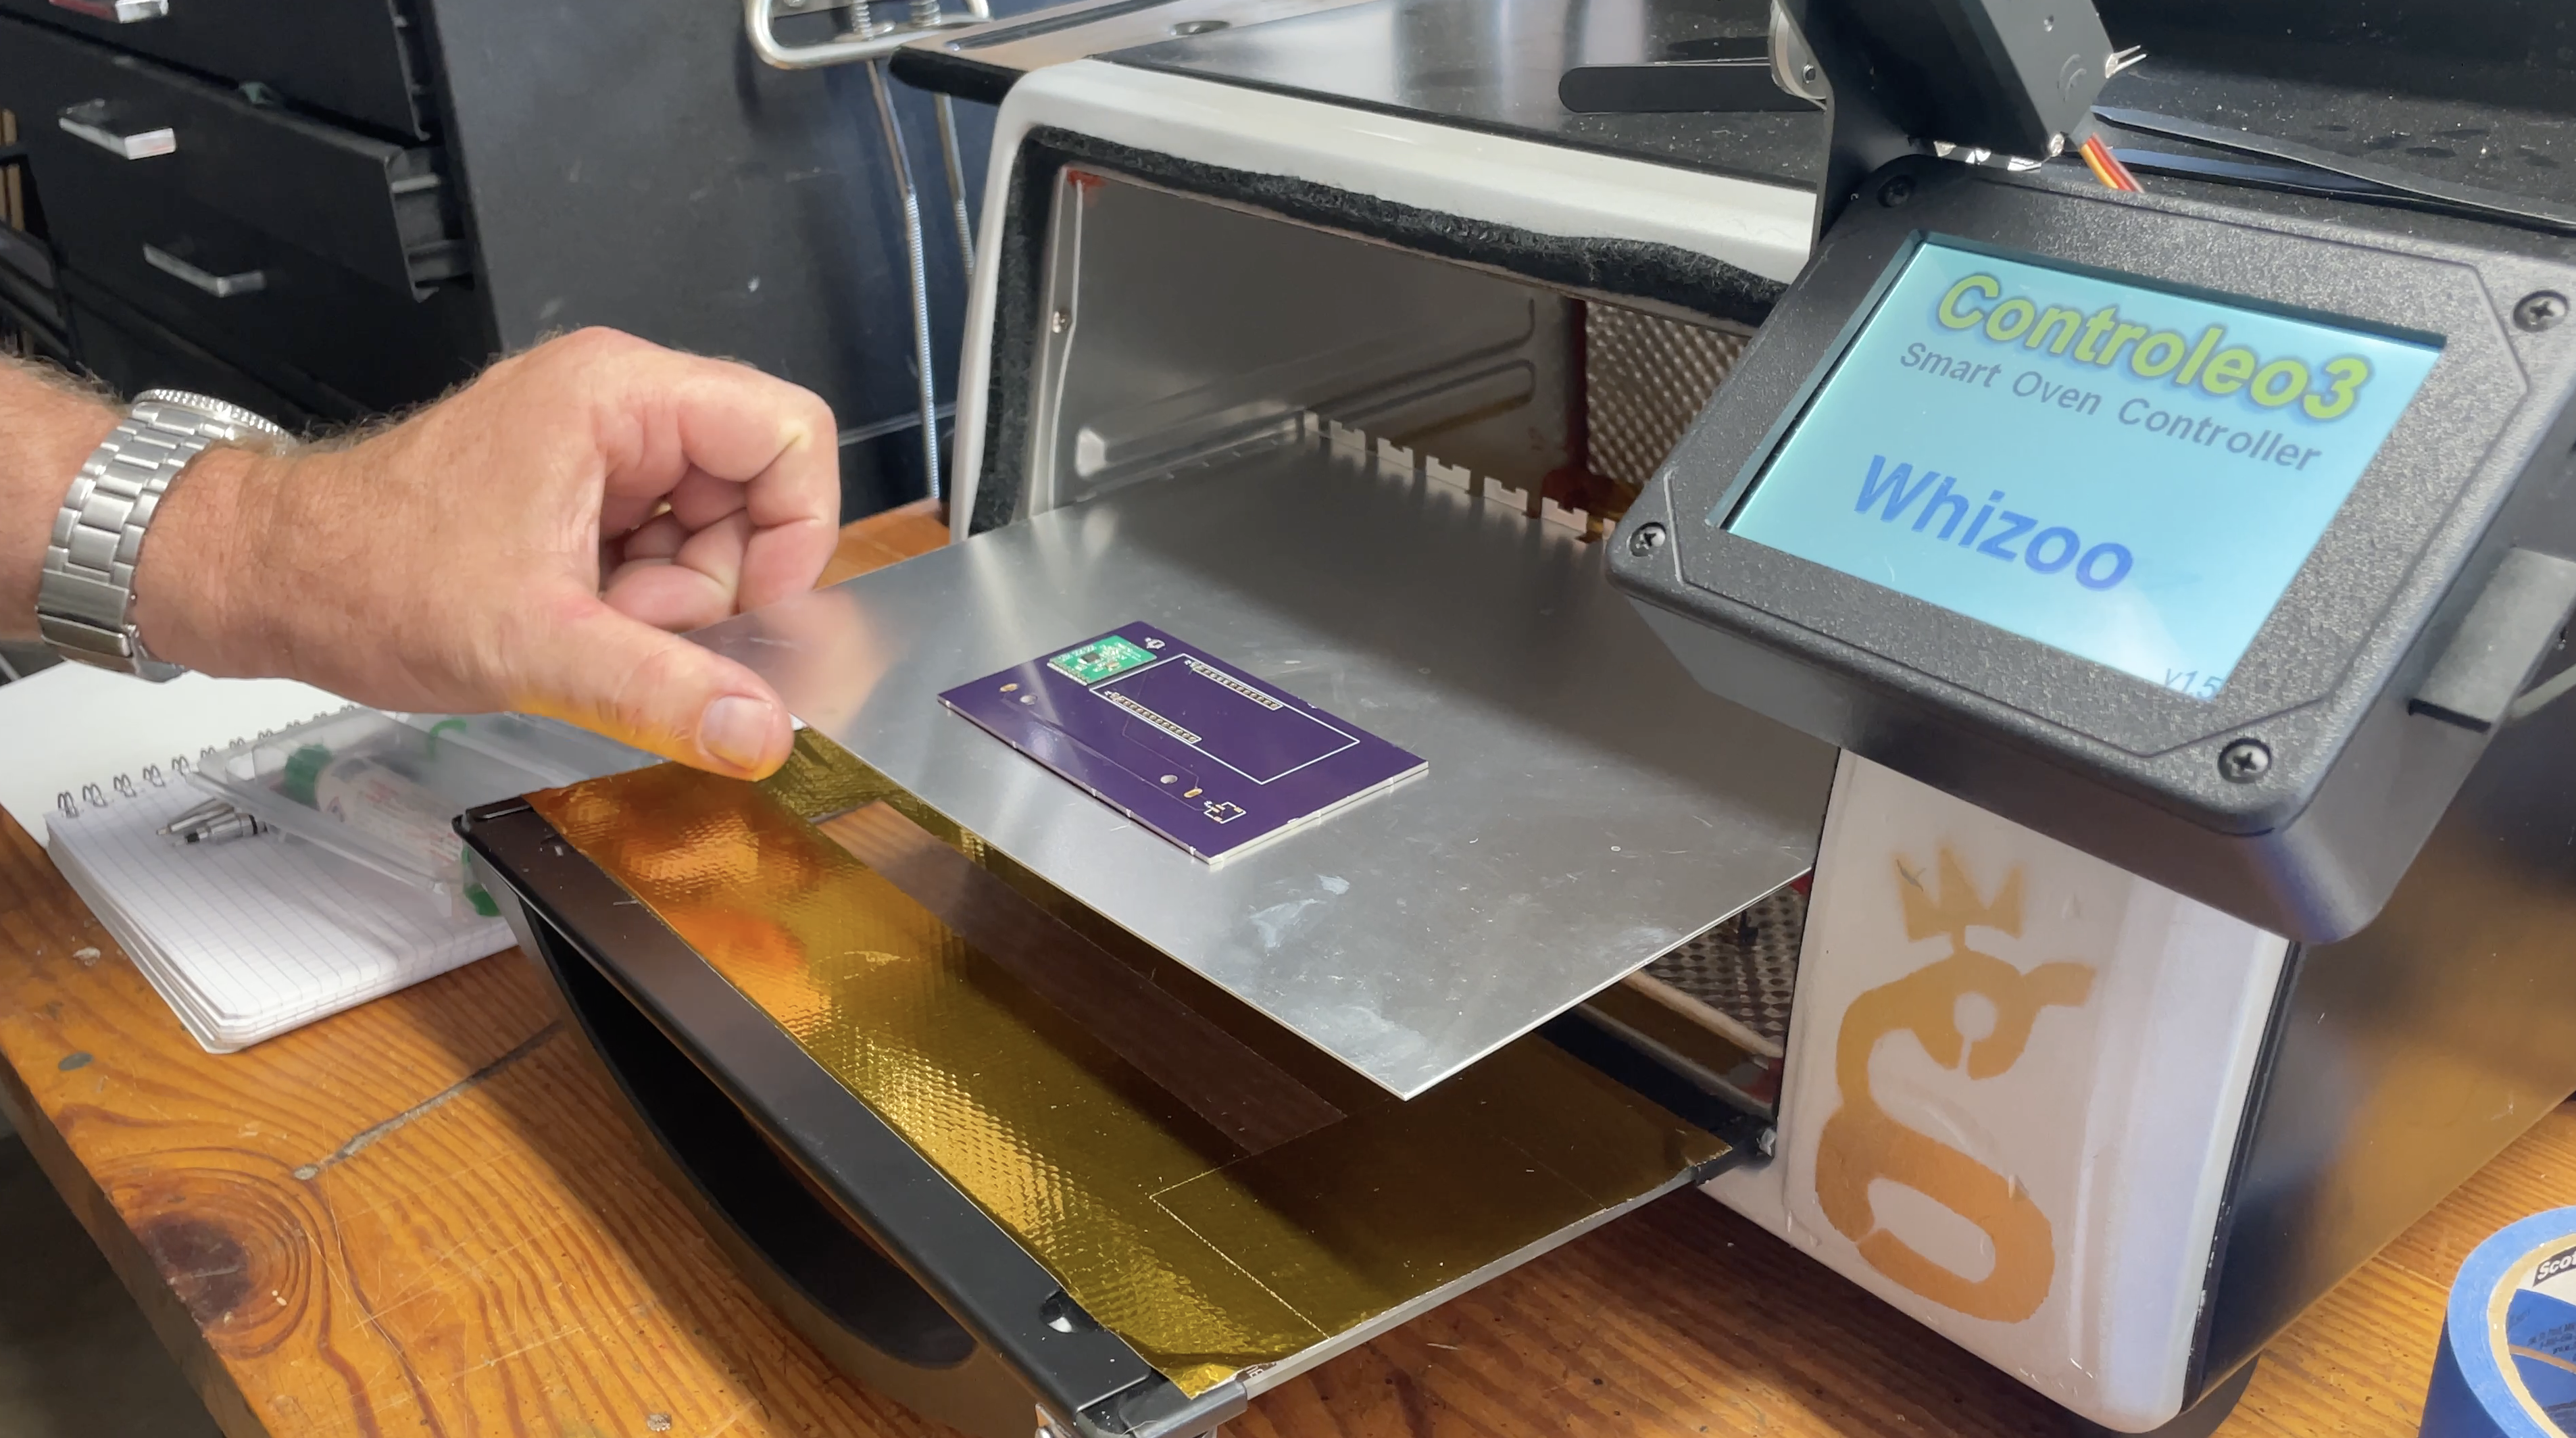
Here’s the PCB after we added solder paste and the CC1101 (the square green board). We got a little ahead of ourselves on this one and cooked it before we added the UFL connector (right below the green board). 🙂
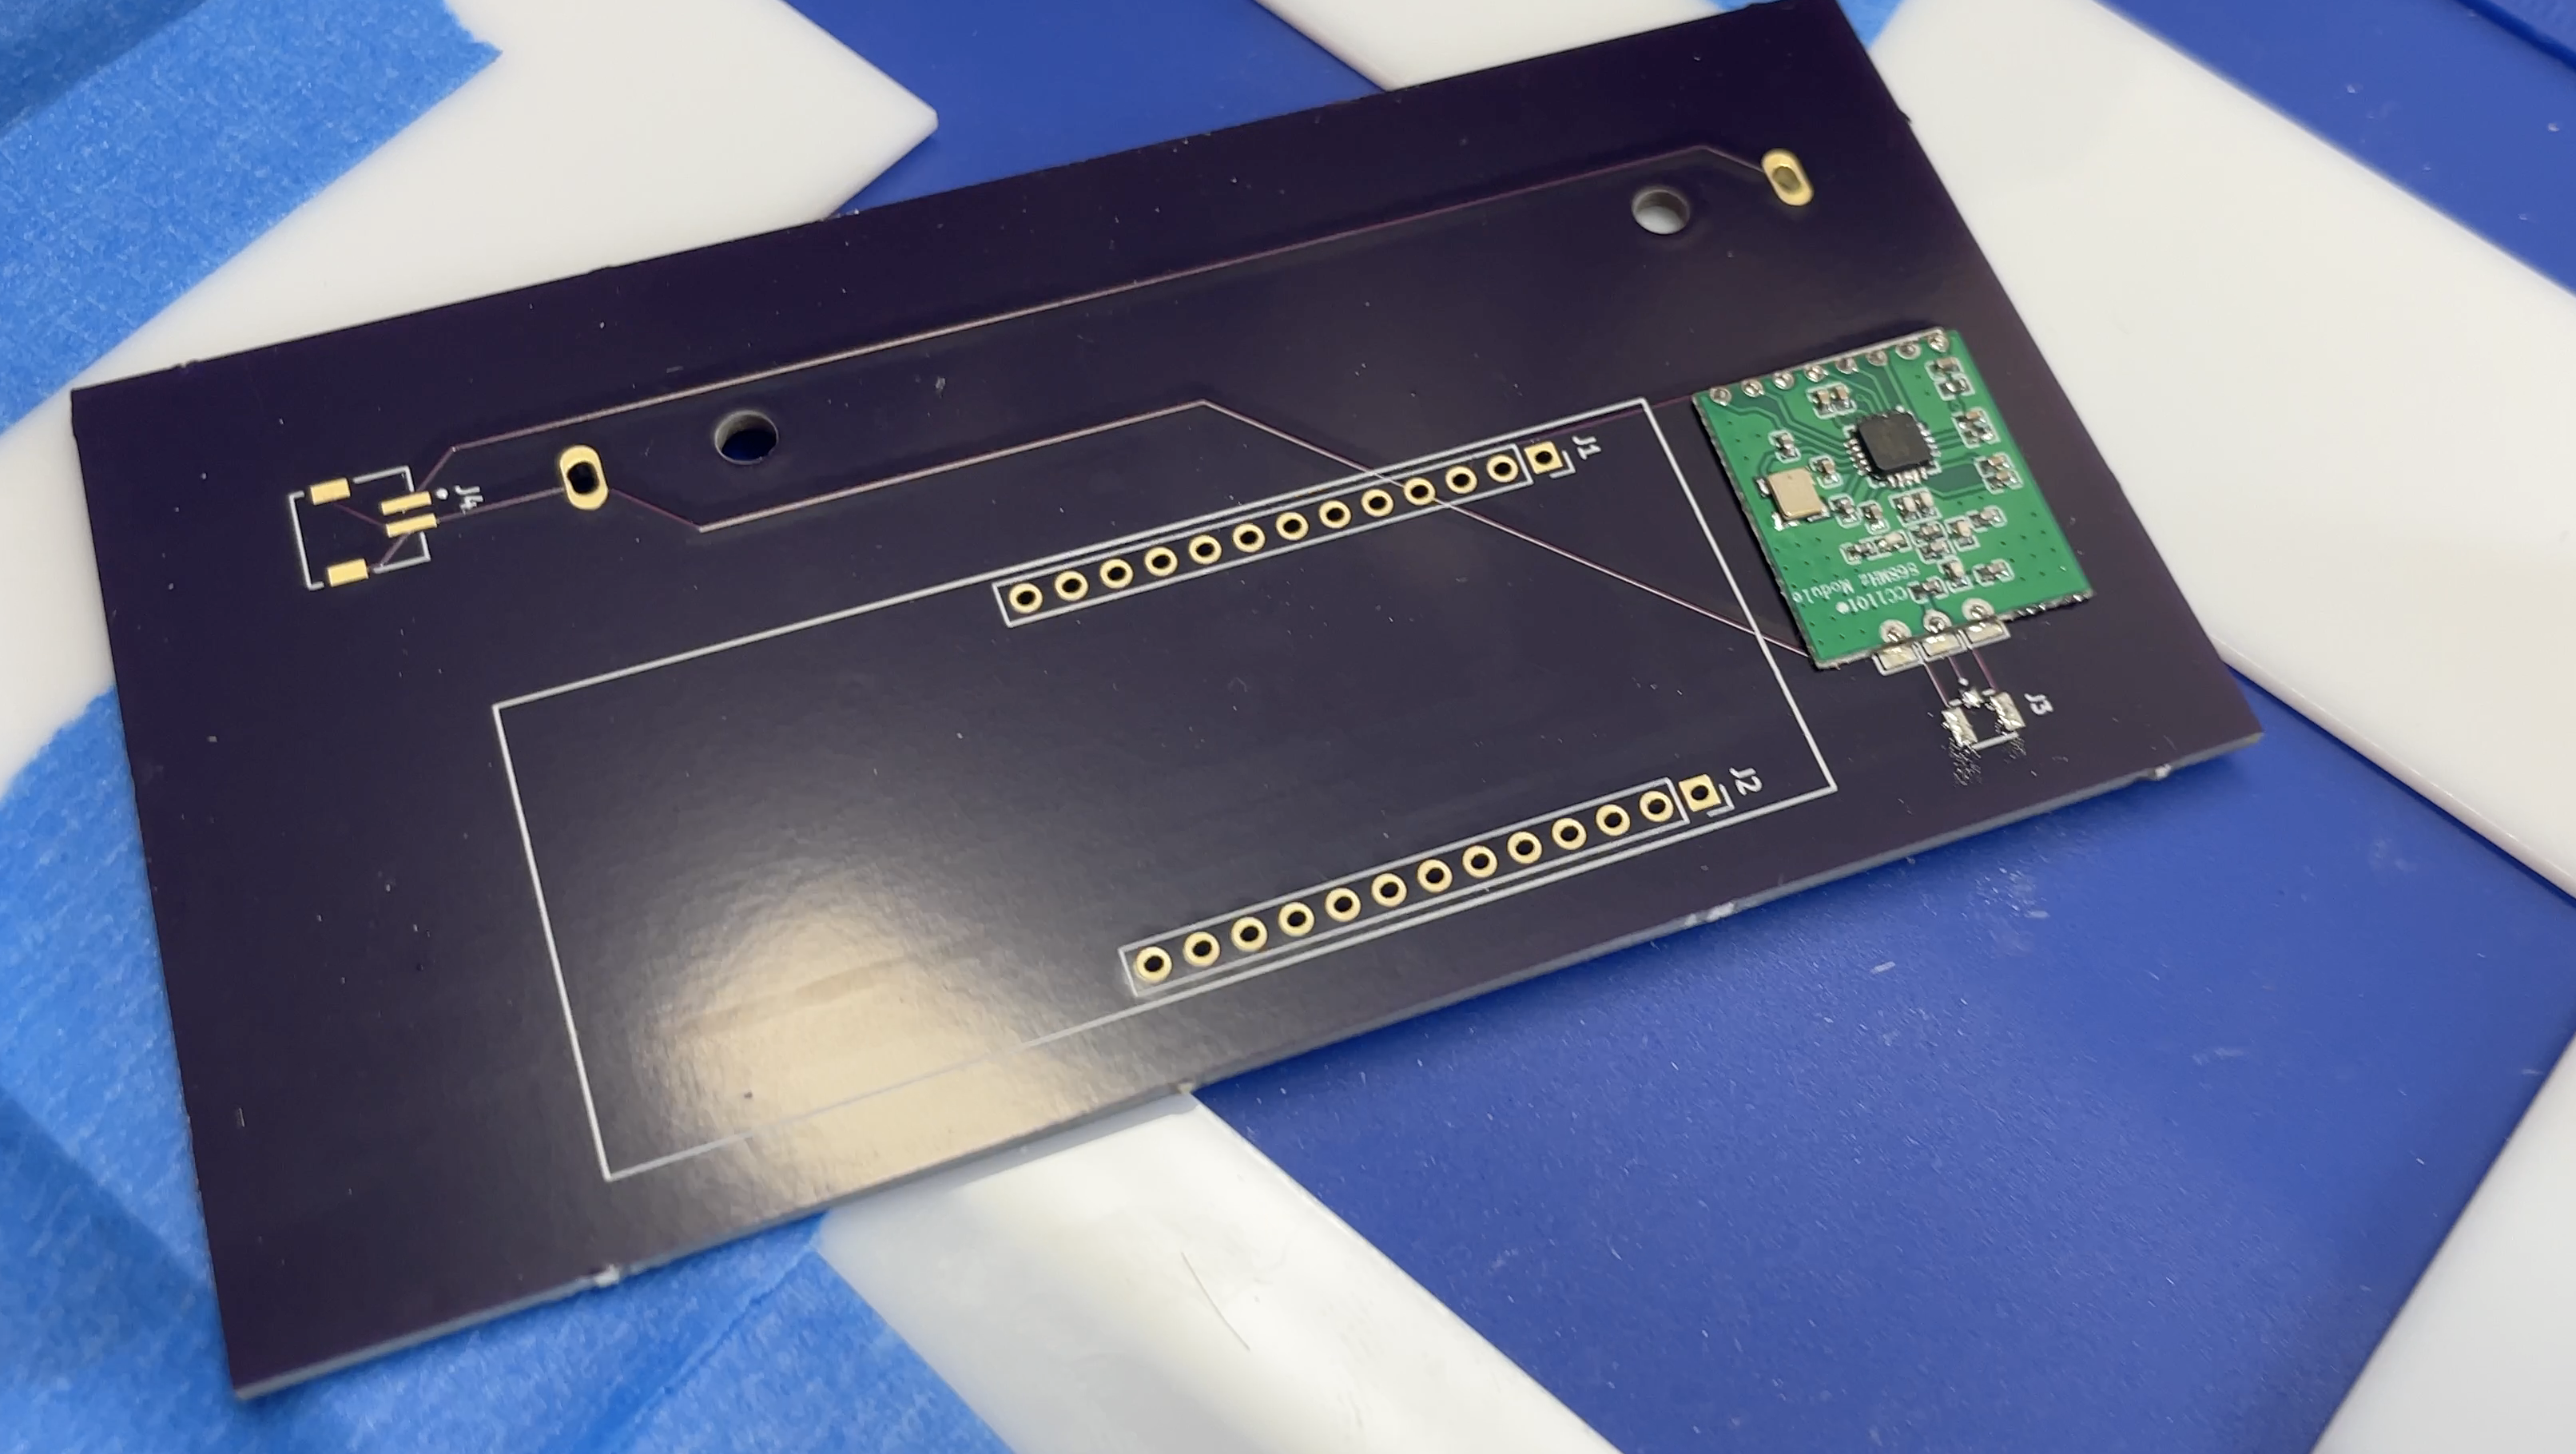
Ok, so that’s cool. You’ll end up doing a little hand soldering, but nothing crazy.
While it may seem confusing to read about this, once you have all the components in front of you it will make far more sense, and you can basically “see” the signal flow.
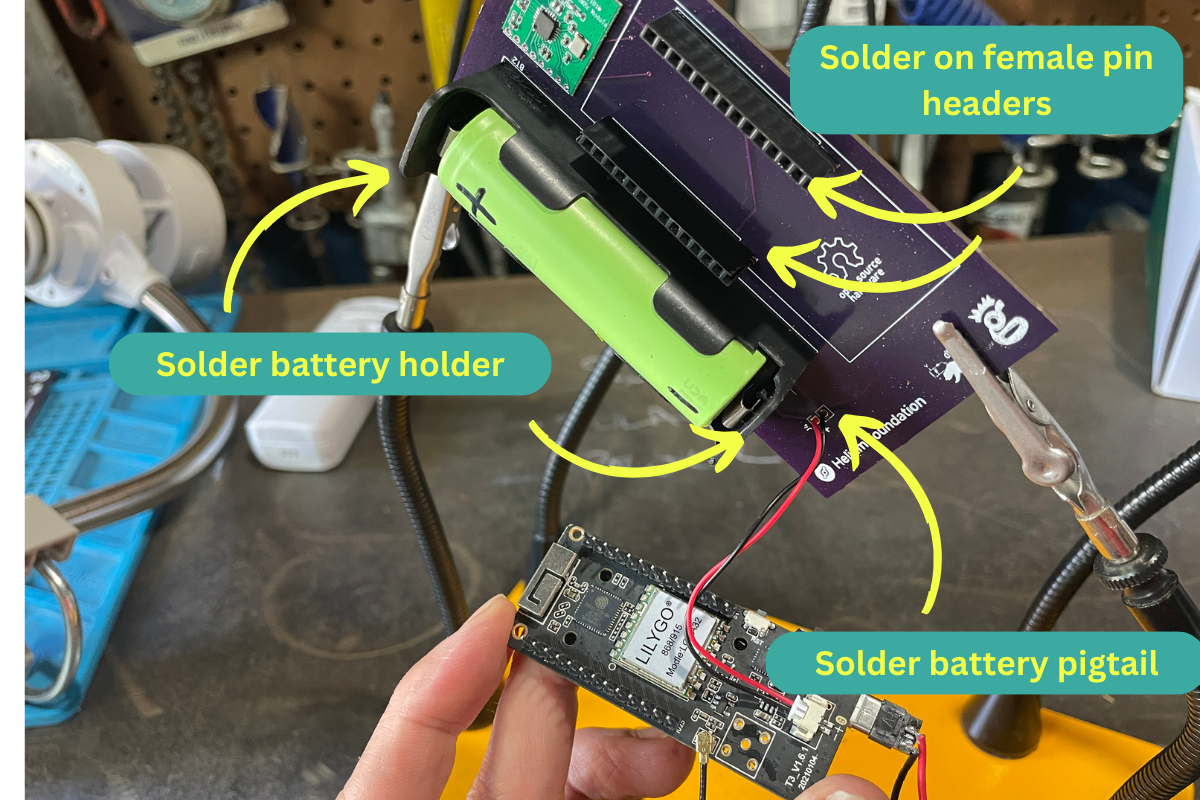
Pay careful attention to the Github instructions, especially the parts about polarity on the battery. Oh, and don’t lay this thing down on a metal surface with the battery in; it’ll short! Ask me how I know…
Once you’ve got it all together, but BEFORE you put in the battery or connect the solar panel, you’ll connect to the LilyGo (the thing with the red squiqqly line over it in the picture above) with a PC and program the thing.
Programming the Device
I’ve always found programming any of these boards to be a little finicky, which has almost always been a result of my ignorance and ineptitude. Read the directions carefully, go slowly, and if you have any problems jump on over to the GK Discord and look for the Helium Bridge channel; we’d love to help out!
If you use Platformio (which is what we used and recommend) and you haven’t before, it’ll be much trickier to start, but once you’re up and running with Platformio it’s universally liked far more than other options. So, prepare for a(nother) steep learning curve. Rad, right?
The step-by-step version is over on Github. If you have questions please drop ’em here or jump into the Discord link above.
Using It With Sensors
Ok, so as it currently stands you can use with sensors listed above. Some of them are on 433MHz (the soil moisture sensor and the temp/humidity sensor listed above), and some are on 915Mhz (the weather station and the air quality monitor above).
As thousands of sensors are out there, it’s not practical to list every single option and configuration. You’re heading off a little into the wilderness here as you add more and more sensors. If you don’t find that fun, this may not be for you. 🙂
Keep in mind that the Bridge doesn’t distinguish between what it hears; it’s not like it’s just “listening” for one device. If there is a weather station and an air quality monitor in range, it’ll pick up and retransmit both sets of data. We’re not sure of the limits here as far as how many devices an individual Bridge can handle. For now, if the signals overlap in being received, you’ll lose a reading.
It’s reasonable to think you’d easily handle 5–10 sensors per device, but that’s not a guarantee.
The data is separated out in the decoder, so you can have a couple different sensors all flowing through one Bridge and getting separated out in the Decoder on whatever Console you’re using.
One of the cool things Dirk did was write the decoder so you don’t have to adapt it for Helium Console or the MeteoScientific Console; it’ll just work. Neat, right?
Areas for Further Exploration
- Level up MQTT — Have each sensor have its own named MQTT topic.
- Adding more sensors — Modify the rtl_433 esp libarary and add more sensor decoders to the javascript decoder
- In the WS80 version of the code, we have a bunch of features like “sleep to save power”, reporting on battery status, and aggregating data. Integrating some of those functionalities into the LMICnode.cpp would be pretty rad.
Leave a Reply