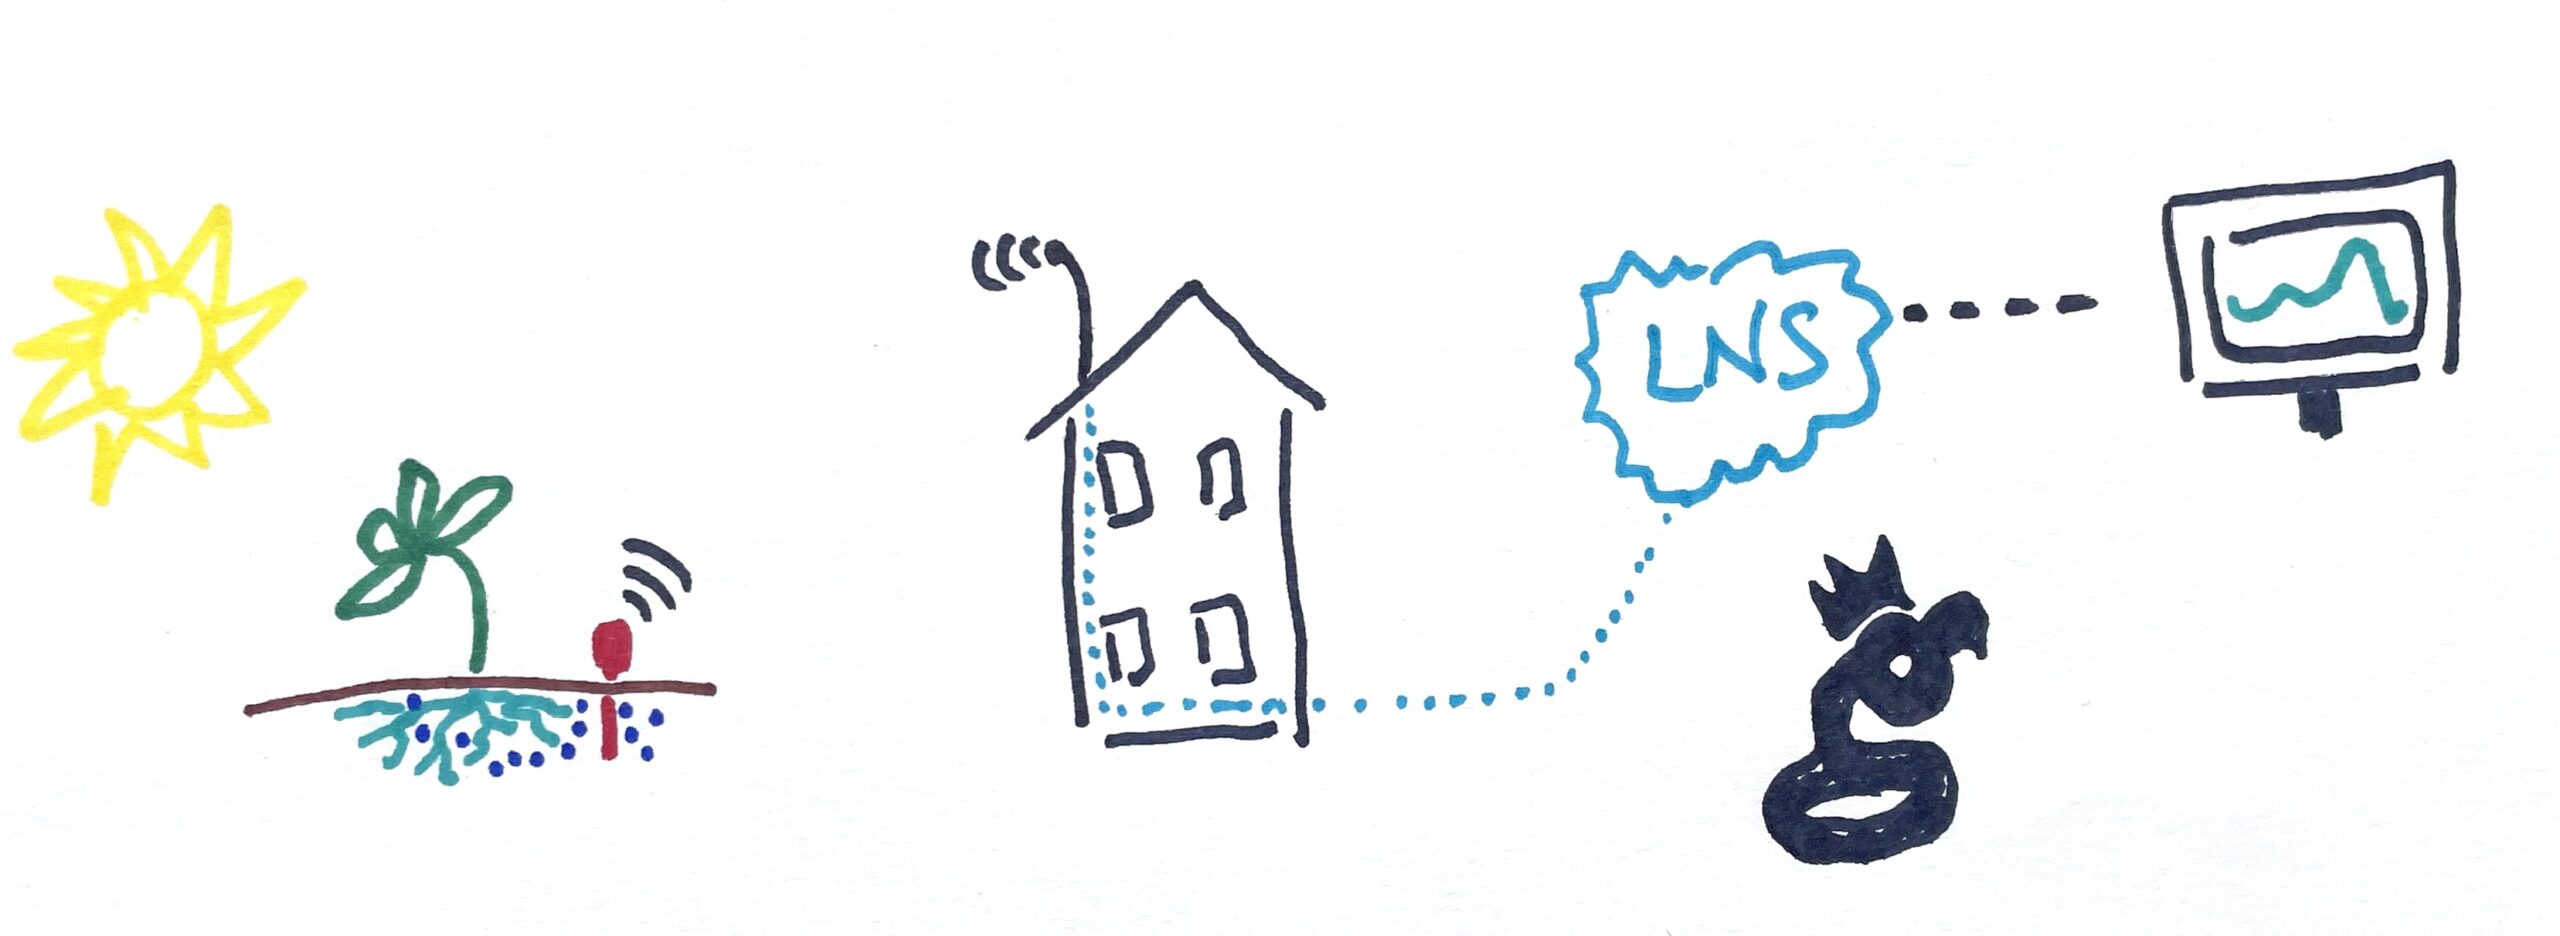
At the beginning of Helium’s LoRaWAN, the ability to route a packet from a device through the Hotspot network to wherever you wanted it to go was a service provided either Helium Inc or eventually, the Helium Foundation. That routing happened through the Helium Console, which was a custom built LNS (LoRaWAN Network Server). An LNS is the thing that manages all the packets of data on a LoRaWAN.
Devices sense the data and transmit it, Hotspots receive the data and pass it to an LNS, the LNS routes the data to the entity who pays for it and keeps track of who sent what where and when. That’s a lot of w’s.
Helium Console had a few limitations. First, for a normal user you could only have 10 devices on it. It was always only ever meant to be a demonstration or “intro to Helium” tool.
Second, it was very expensive for the Helium Foundation to run. This was fine to cover in the early days, but in order for the network and market to fully mature, solutions provided by the market need to evolve. In order for those to evolve, there can’t be a “free” competitor. That explains why the Helium Console is being phased out a long while from now (my guess is end of 2024) to make room for anyone to run an LNS to run their sovereign LoRaWAN applications. (Thanks to Abhay for the improvement on that statement!)
Short version? The Helium ecosystem is ready for businesses to be built.
So, as a network user, where does that leave you?
The first option is Chirpstack, and using Paul Pinault’s (disk91 on Discord) technical expertise, I’m running one that you can try. The LNS is being run under the MeteoScientific name as part of my “how to run a Helium business” series.
It’s free to create an account, and you get a few hundred data credits for free when you sign up so you can test drive it. After that, data credits cost $.0001 each. If you had a device that sent 3 parameters (say, temperature, humidity, and air pressure) once an hour, that would cost you [.0001 x 3 x 24 x 365] about $2.63/year.
Want to try it out? Let’s get started. First, go to console.meteoscientific.com and create an account. Once you’ve signed up and you’re in, look to the left, where you’ll see the basic menu.
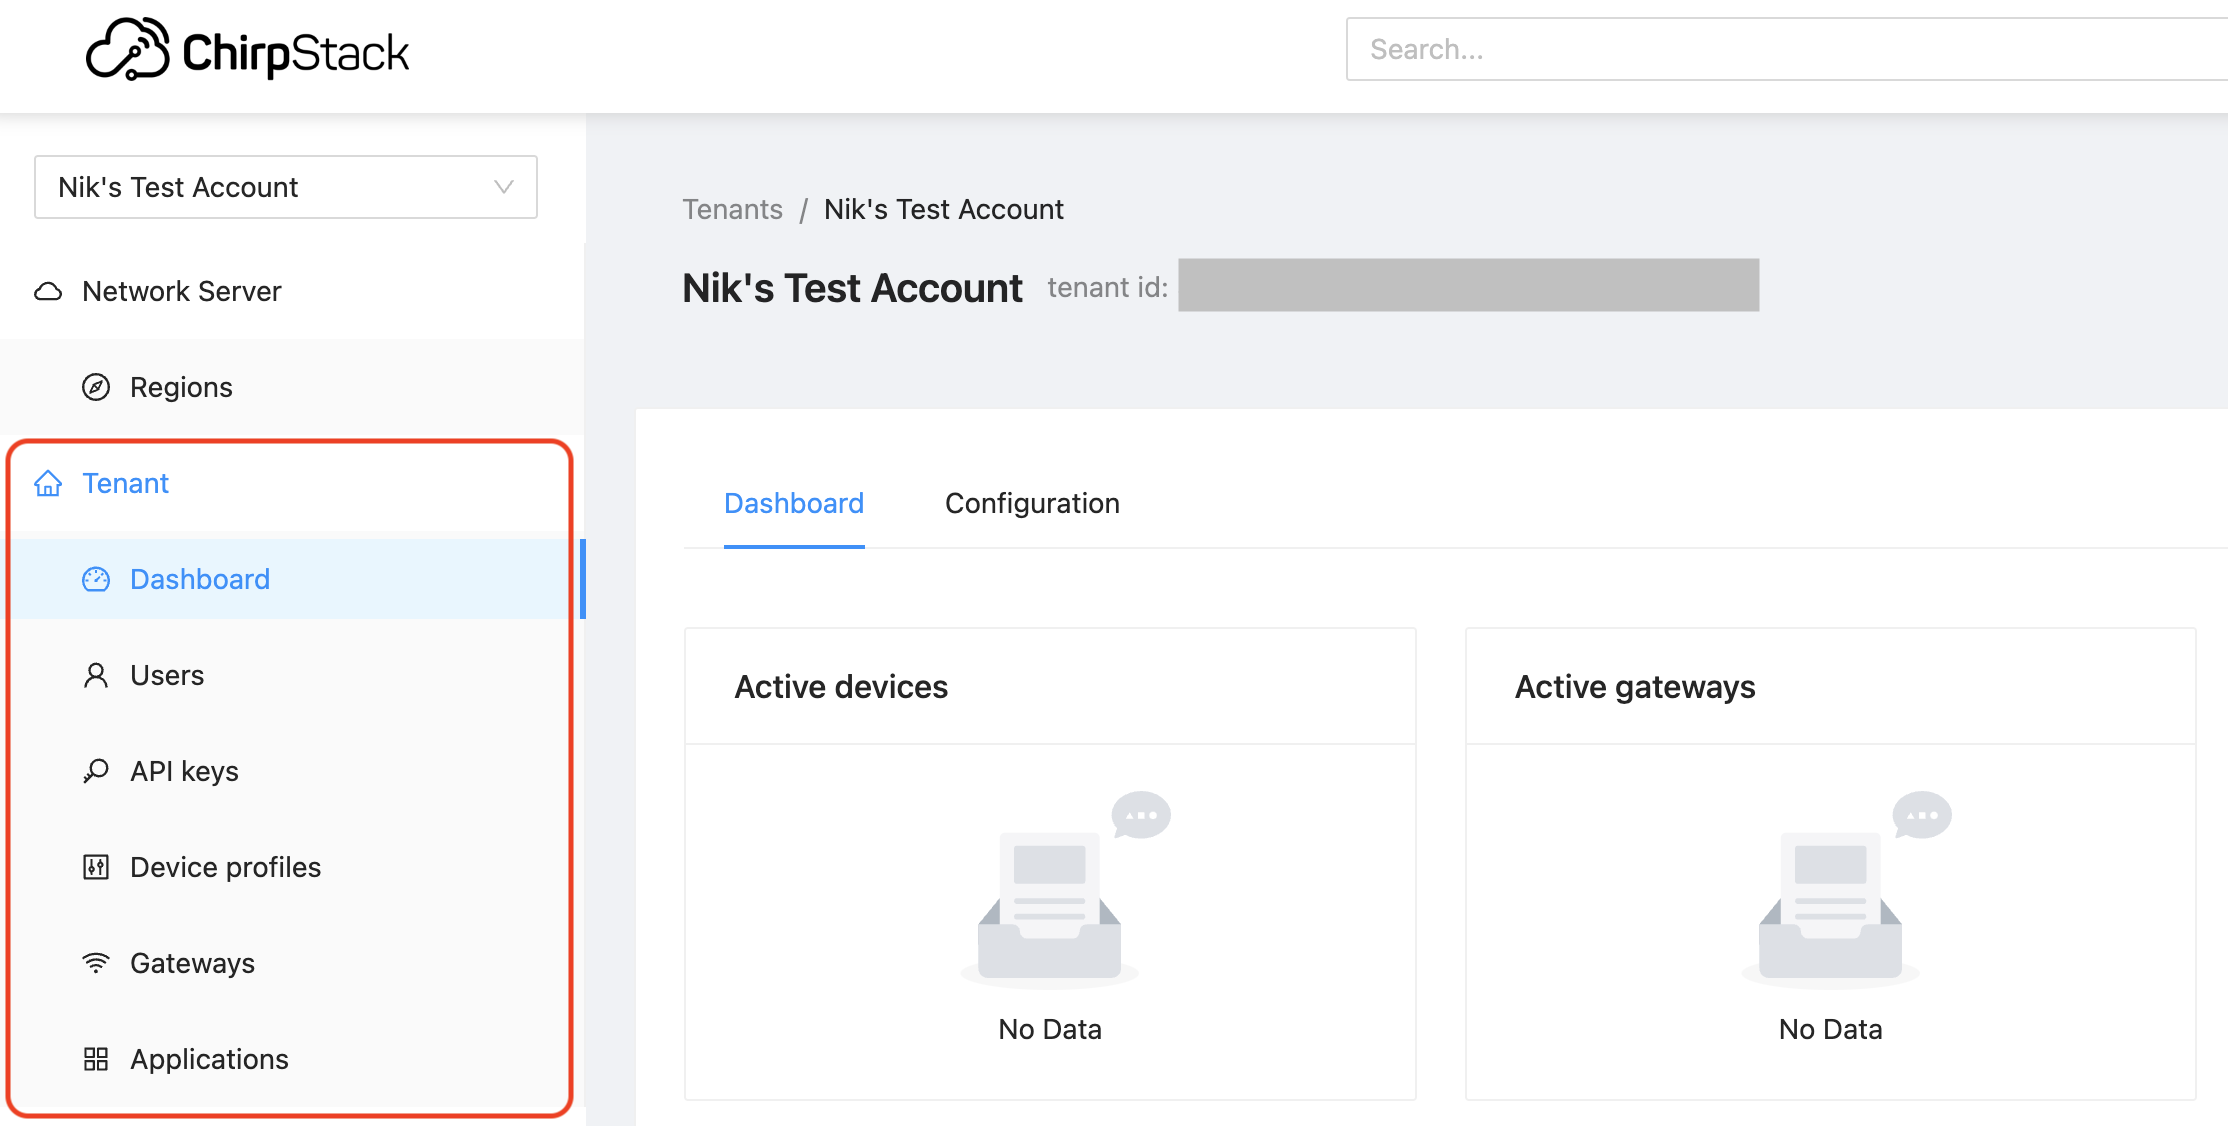
This is a little different than the old Helium Console, but don’t panic, I’ll walk ya through it. For now you should see a couple hundred credits up in the top right of your screen, that’s plenty to get a device on and get started.

The first thing you’ll want to do is decide what device you’re going to onboard. In my case, I’ll be using the MakerFabs LoRaWAN Soil Moisture Sensor, which you can buy here. I’ve written about how I’m using it, how to print a 3D enclosure for it, and it’s predecessor all on this blog, feel free to review any of those links if you need to. It looks like this:
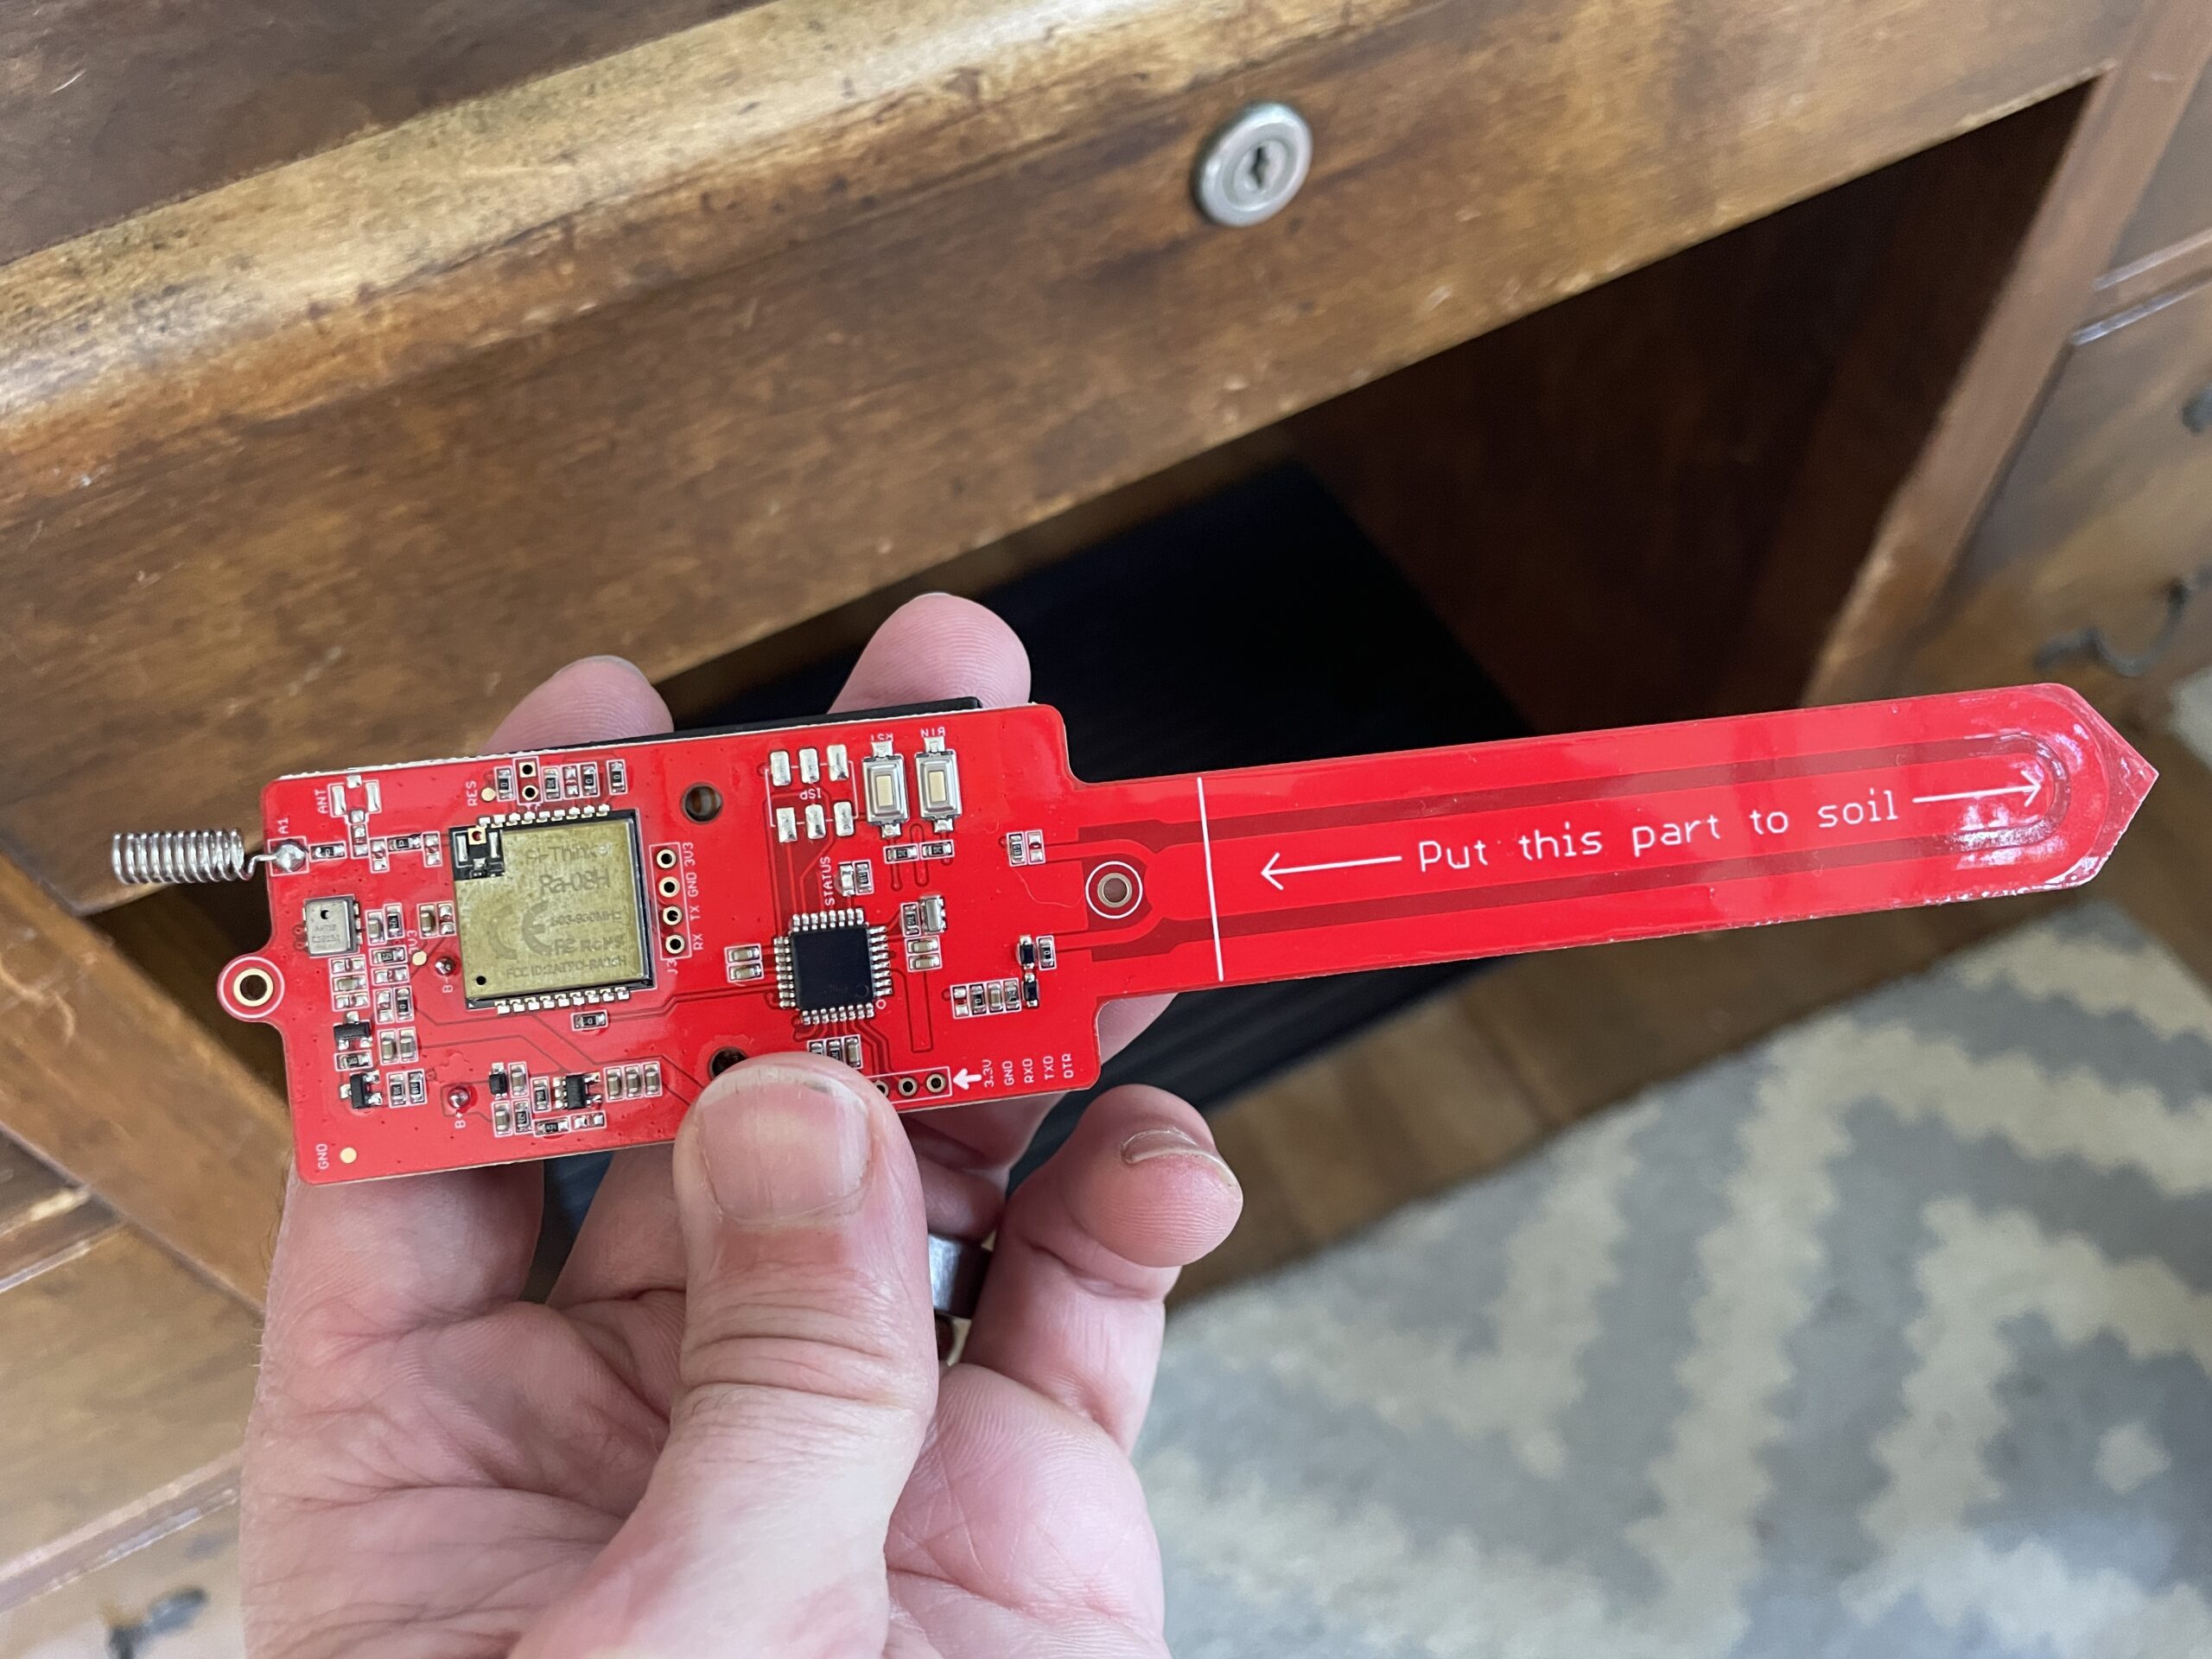
Pretty simple, right? Now, if you’ve gotten a sensor on Helium before you may be tempted to skip ahead and “just figure it out”, which you can do if you know 2 things. First, Chirpstack doesn’t use AppEUIs. Second, Chirpstack doesn’t have a menu item for Devices; those are found in Applications. You can muddle through it from there if you’d like, or you can continue following along step by step.
Step 1: Create a “Device Profile”. Chirpstack (and I) make this super easy in this case by already having a template in the MetSci (short for MeteoScientific) LNS. You can find it by going to “Device profile” in the menu and hitting the “Add Device profile” button on the top right.
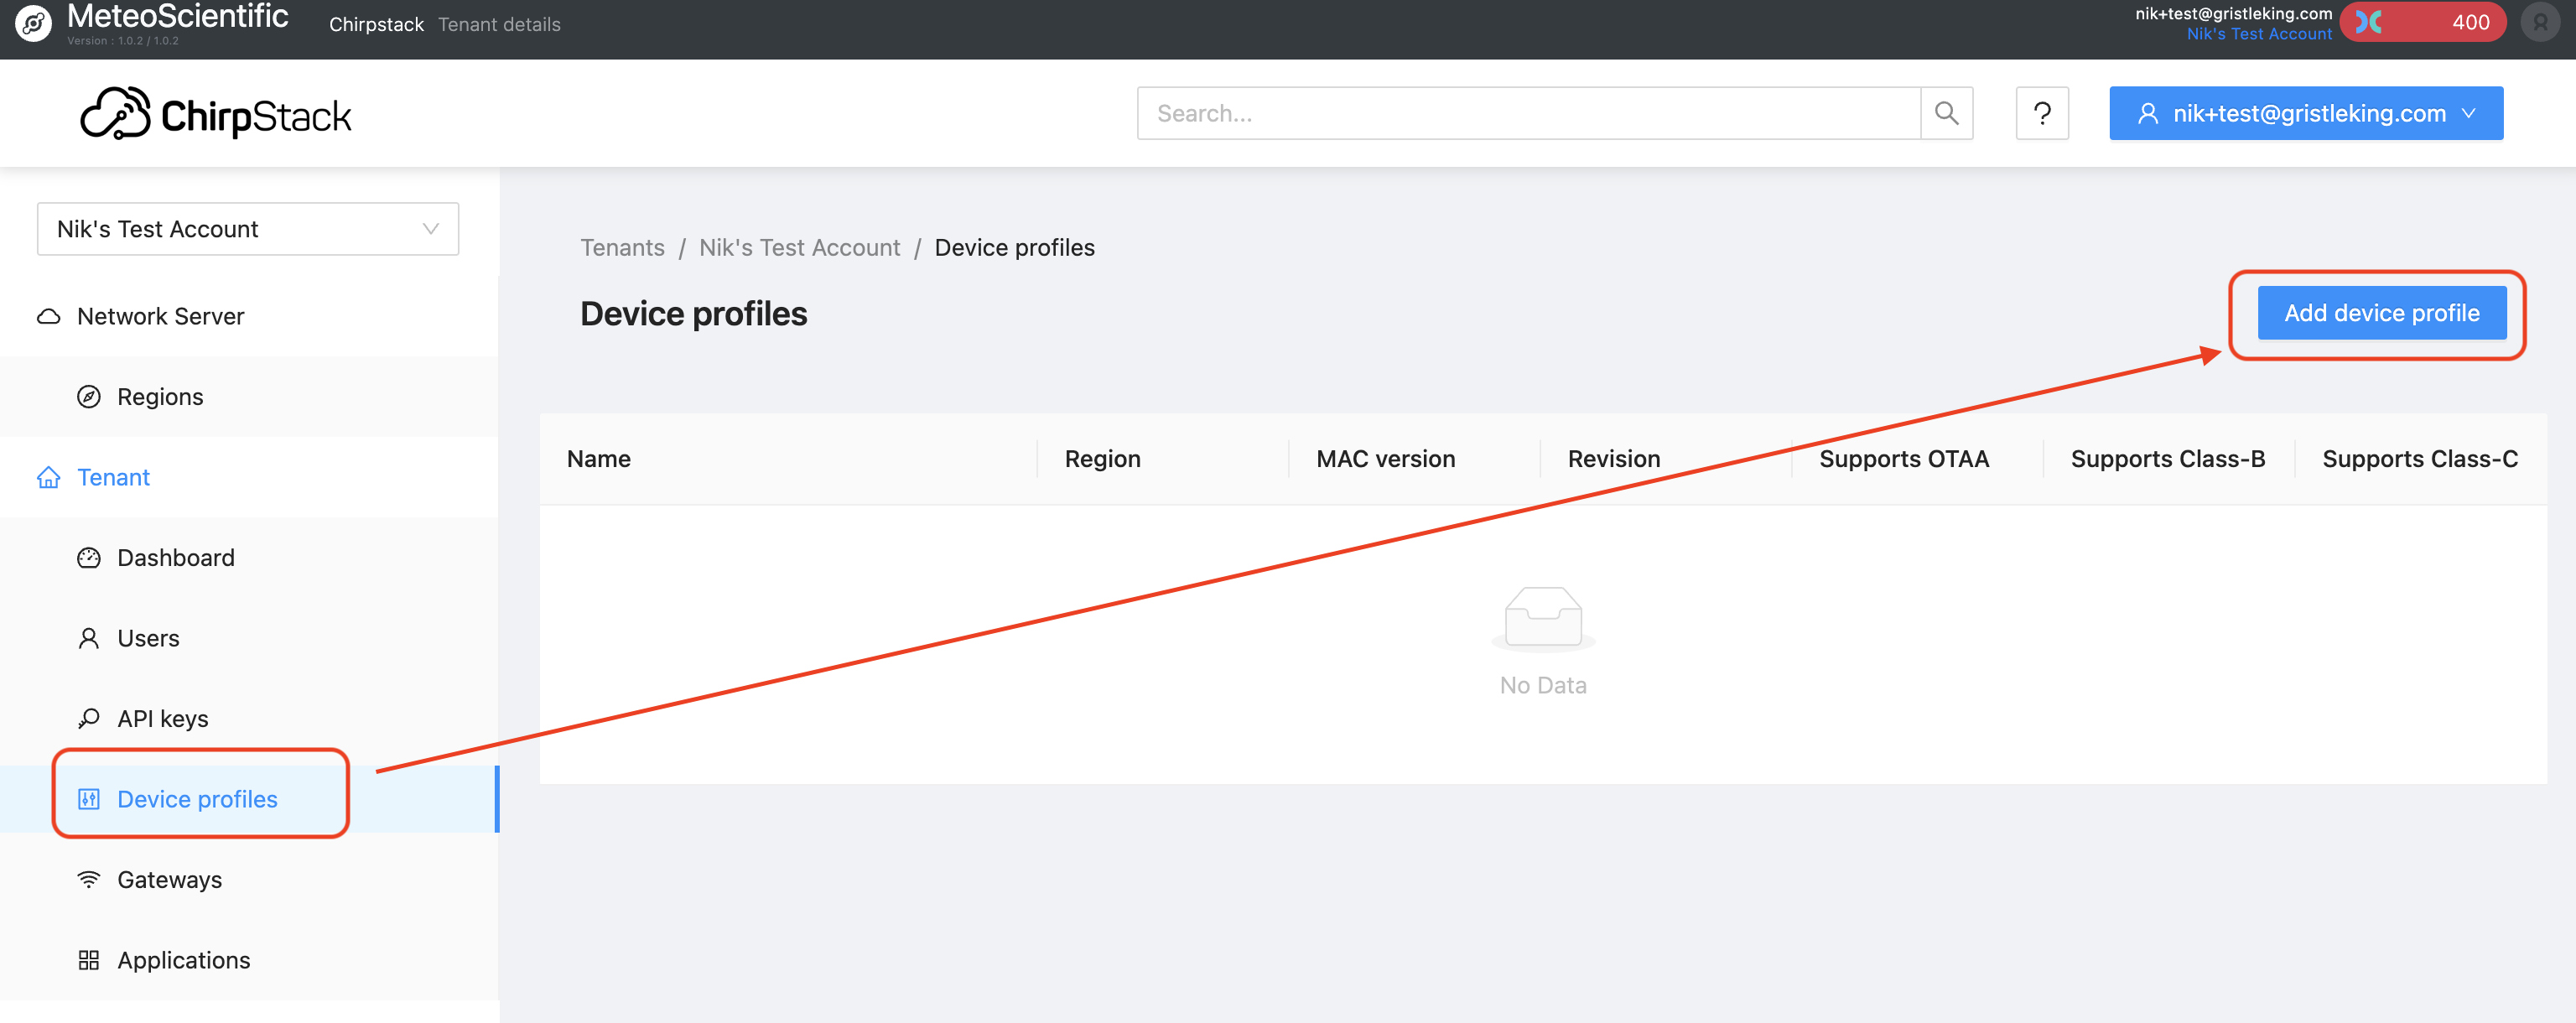
When you hit that “Add device profile” button you’ll see a page with a ton of choices, including the “Select device-profile template” blue button. More on that later. Most choices are self-explanatory, some of ’em are new to many of us. If you’re onboarding something other than the soil moisture sensor I’m using in my example, I’d suggest leaving the defaults as they are and changing just the Name, Description, and Region to match what you’ve got:
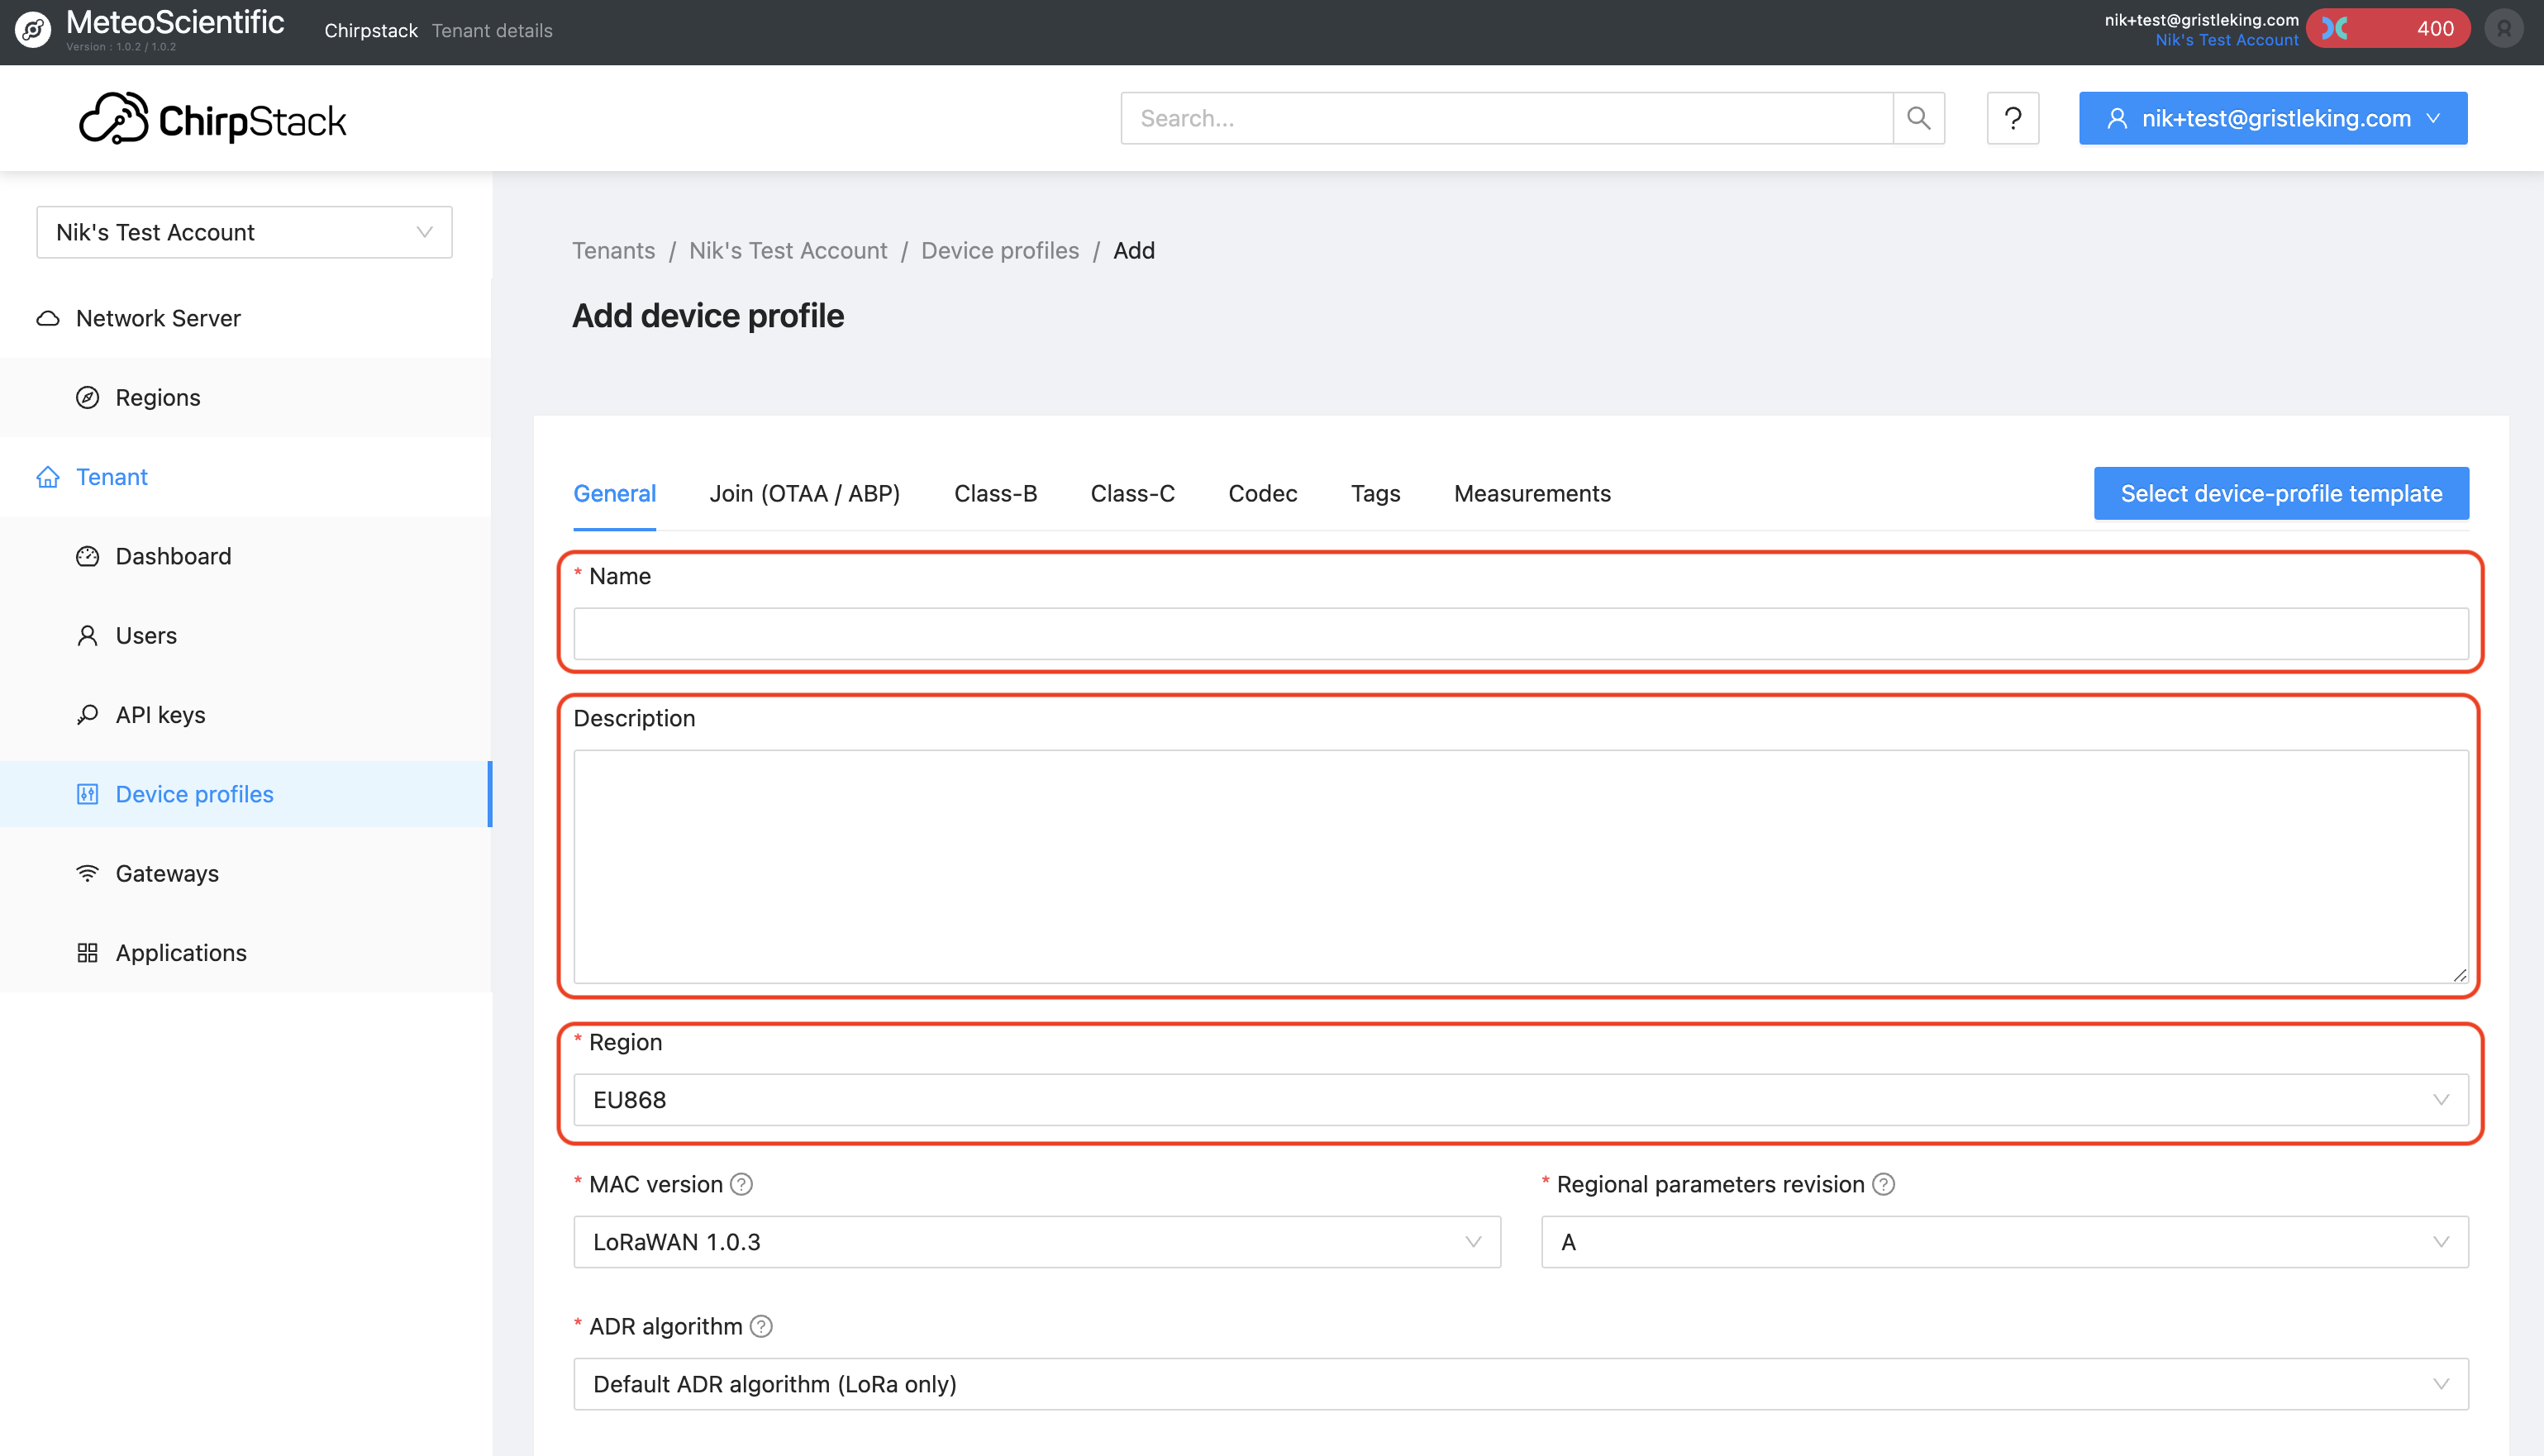
If you’re using the soil moisture sensor (and you’re in the US915 region), I’ve made this wicked easy; just hit the “Select device-profile template” button, and look for “MakerFabs”, then keep clicking all the obvious choices. That will load up the template for you with a US915 region. Even if you don’t have this sensor, feel free to use this as a little reference point on your new Console journey!

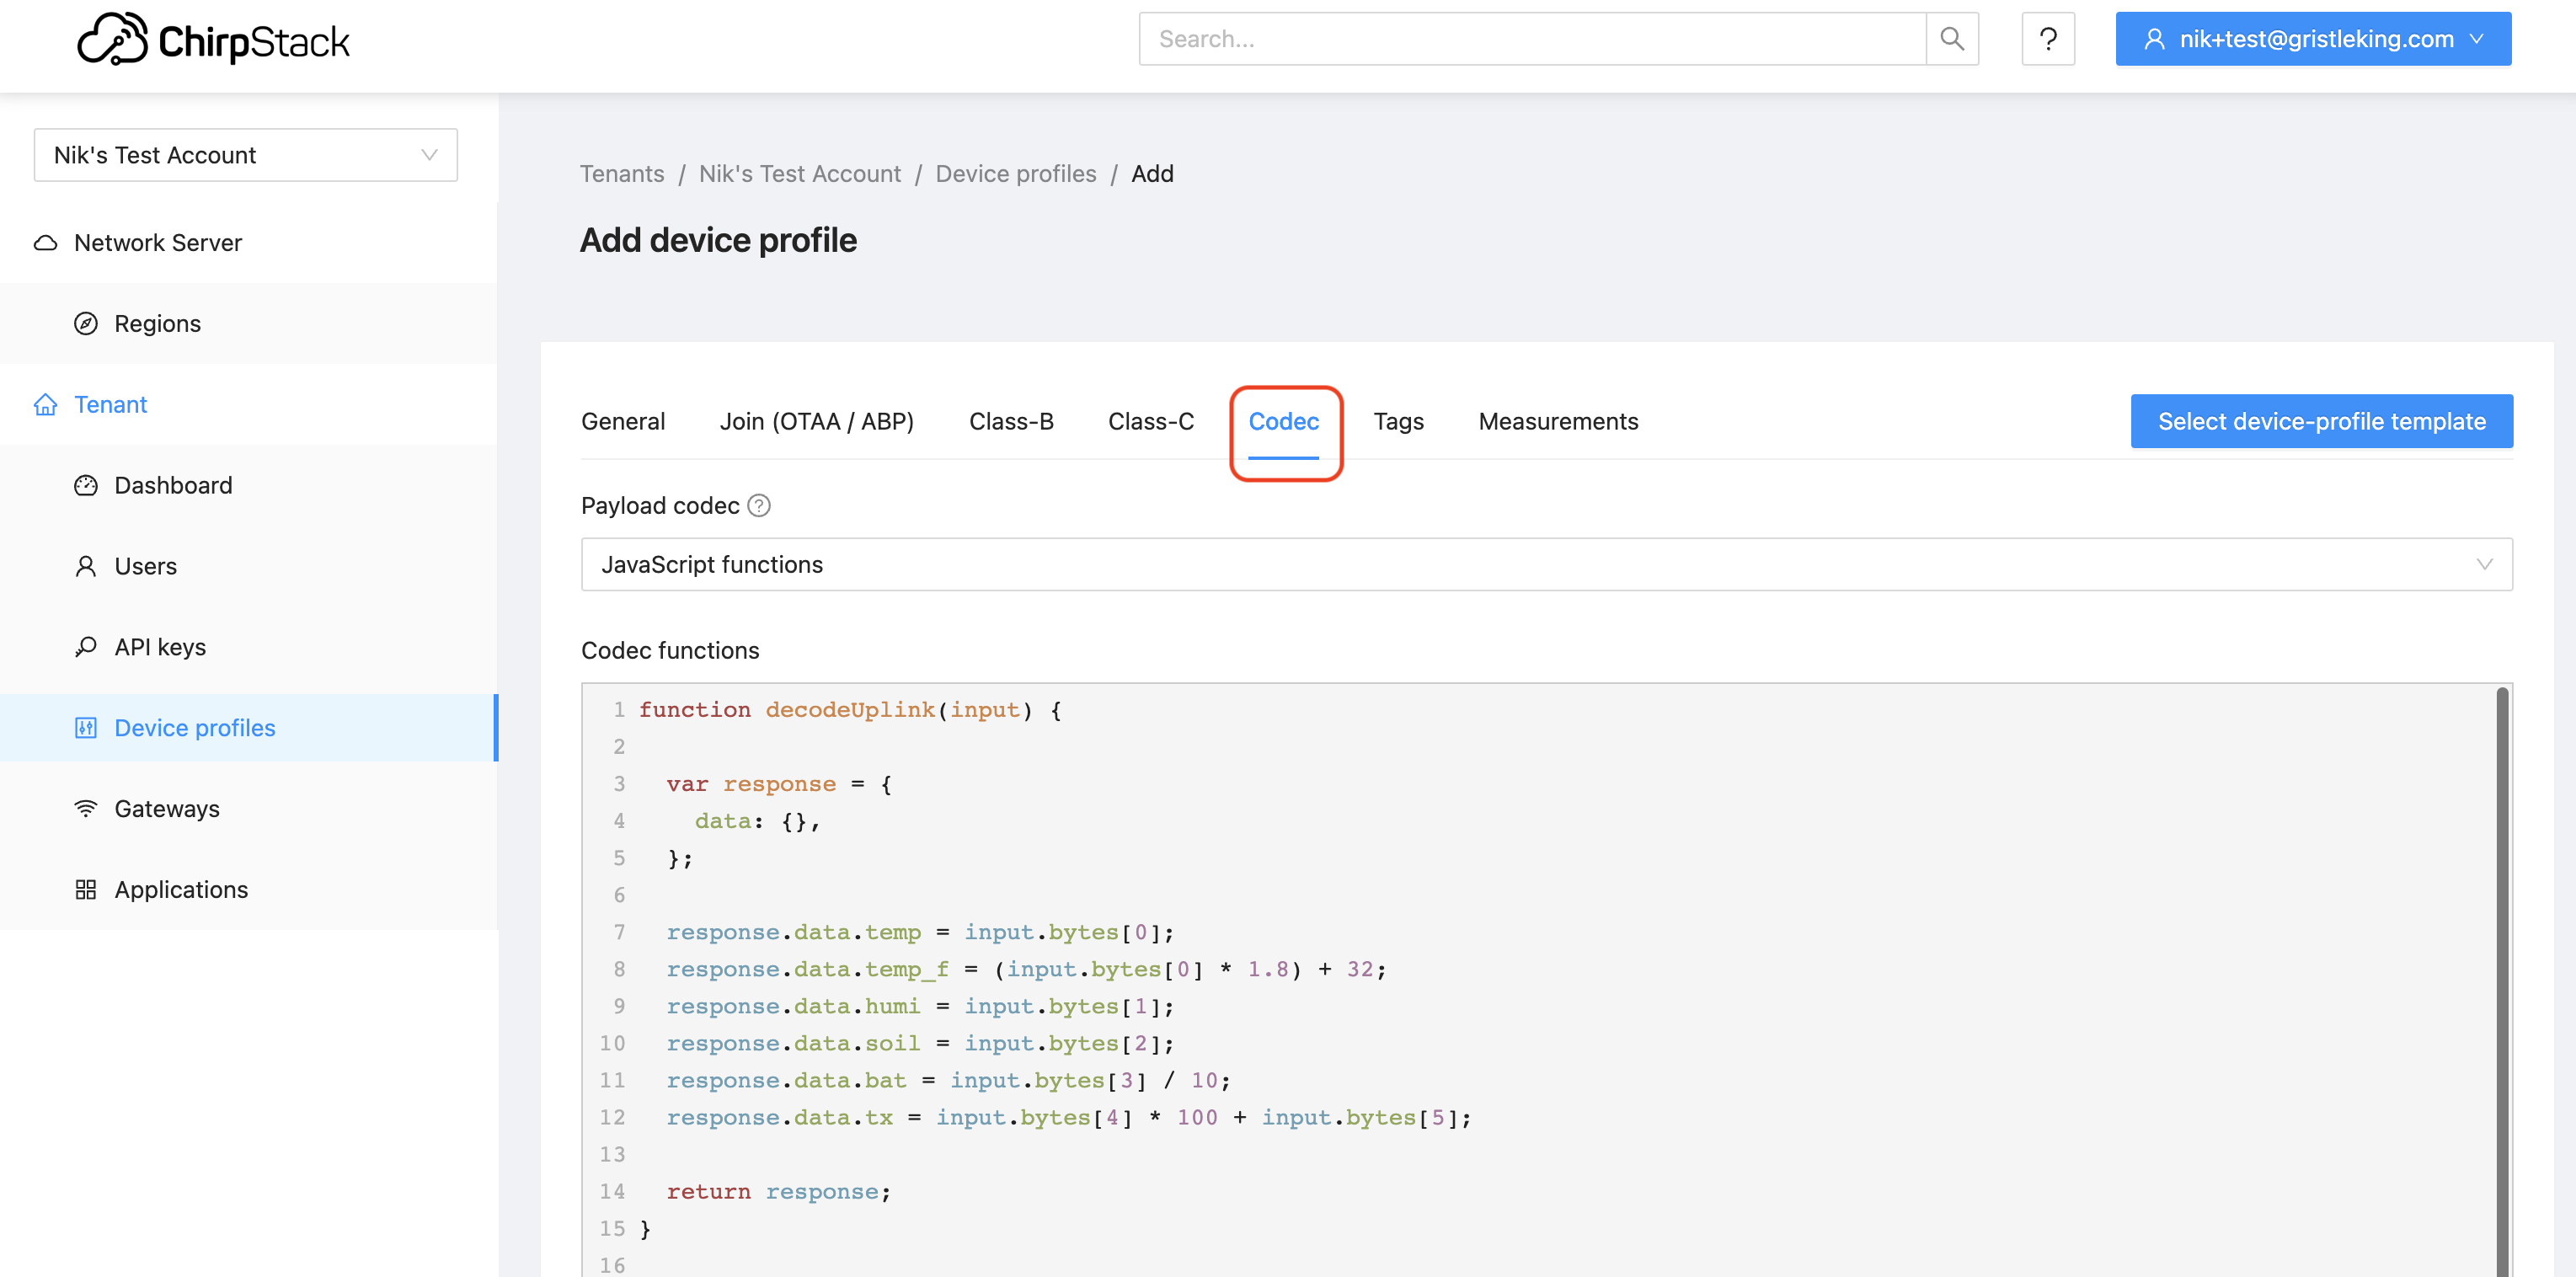
Now, there’s an important step if you’re using a different device: You’ll need to add in the “codec”, which we used to call a “decoder”. For the SMS (Soil Moisture Sensor) template, it’s already loaded in. If you’re using something else, make sure you look for the Codec tab and add in a decoder (usually you can find it on the interwebz and copy/paste it in. Remember to “Submit” when you’re done making all your edits to the General tab and the Codec. Here’s where to find the Codec tab:
Cool, so now we have a “Device profile” and we’ve added the codec. What’s next? In Helium, we’d add a Device. In Chirpstack, we add an Application.
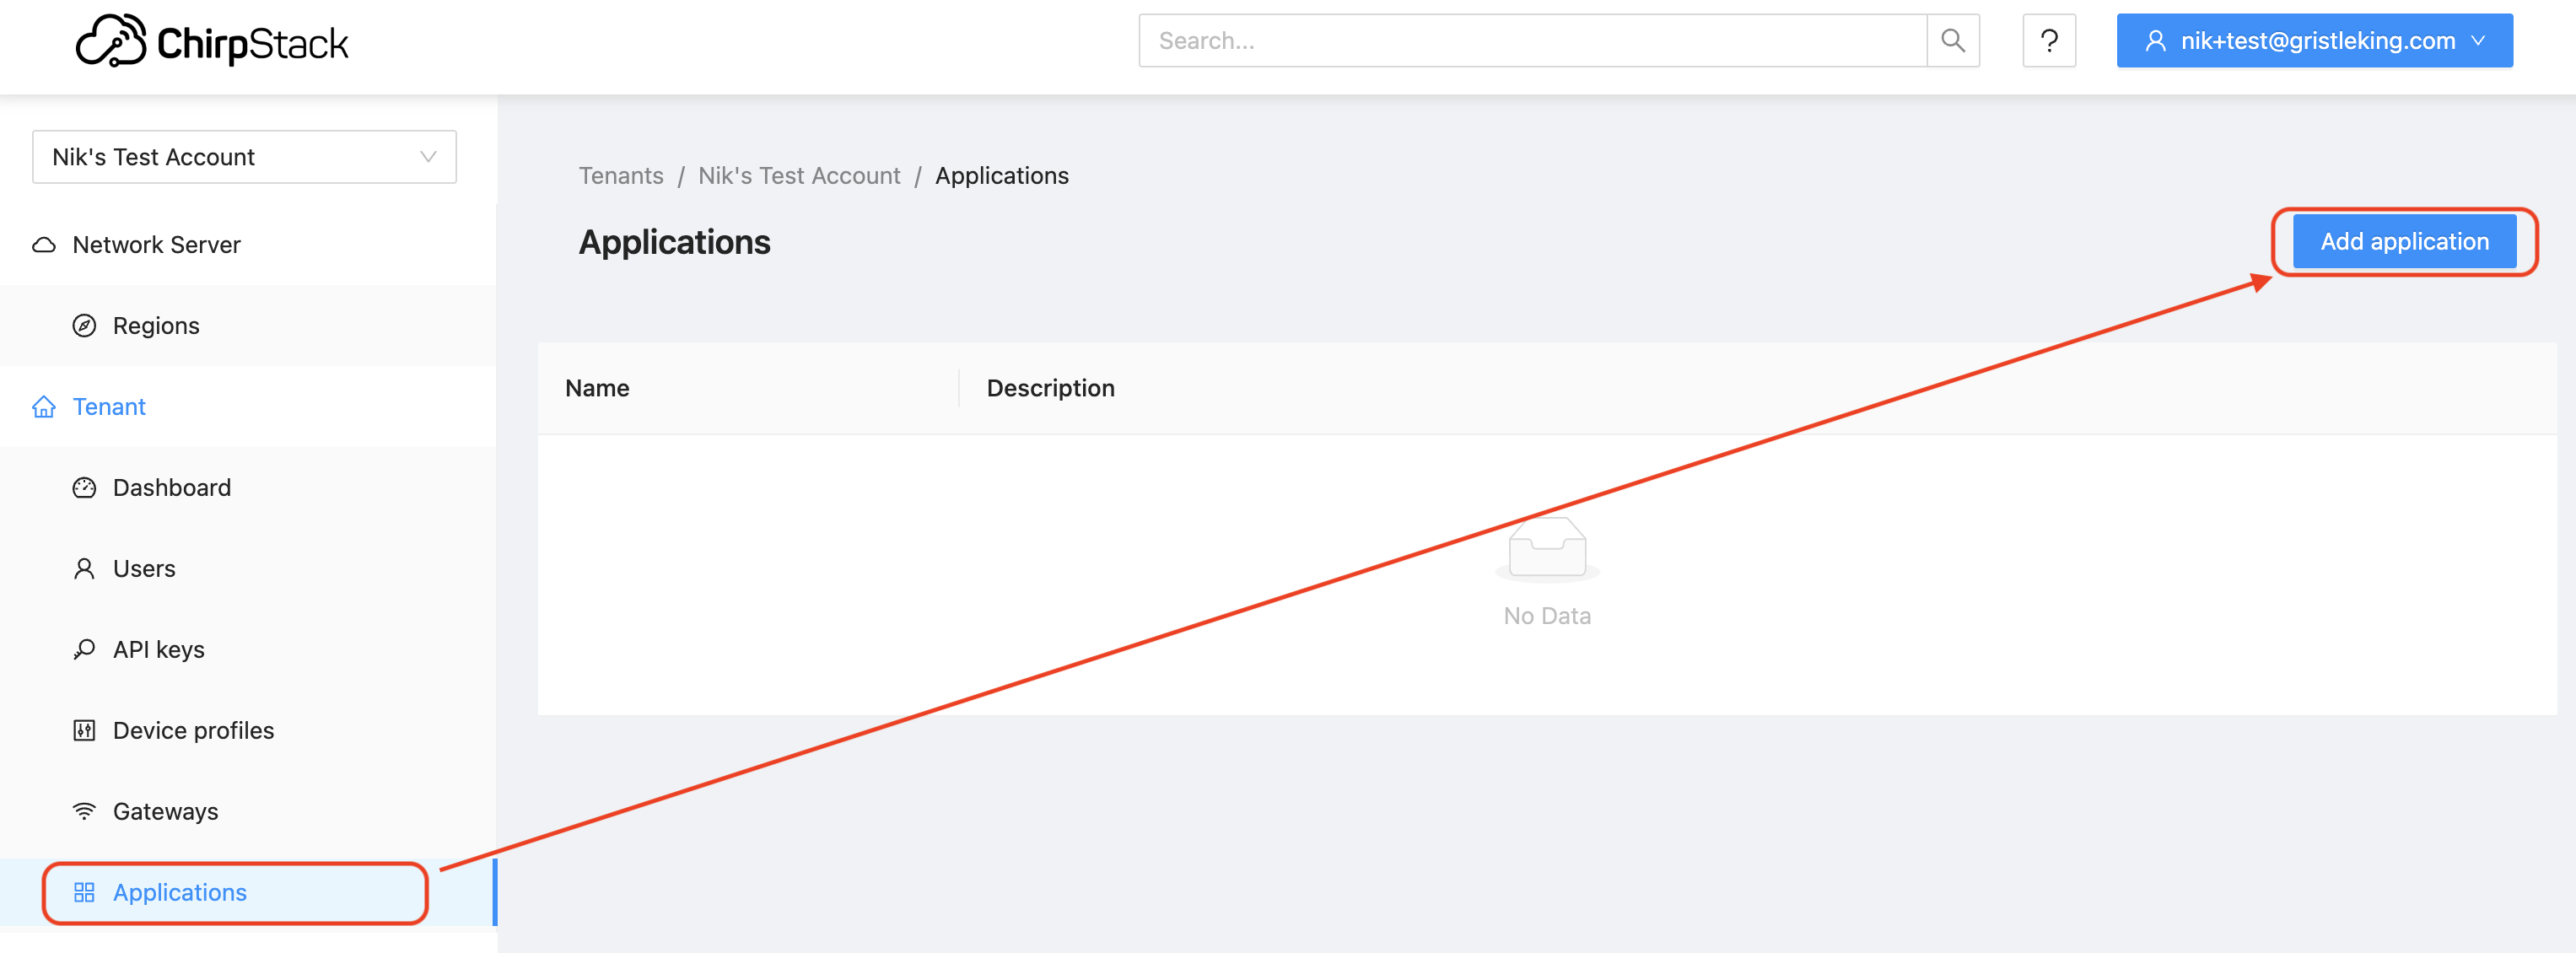
Head down to Applications, and (obviously?) hit the Add application button.
This’ll bring up something that seems blindingly obvious and redundant: The “Name” and “Description” of the Application. We’re almost there, so bear with this; it’ll make more sense when we finish the next step of adding a Device. I know, I know, it’s confusing. Just keep going.
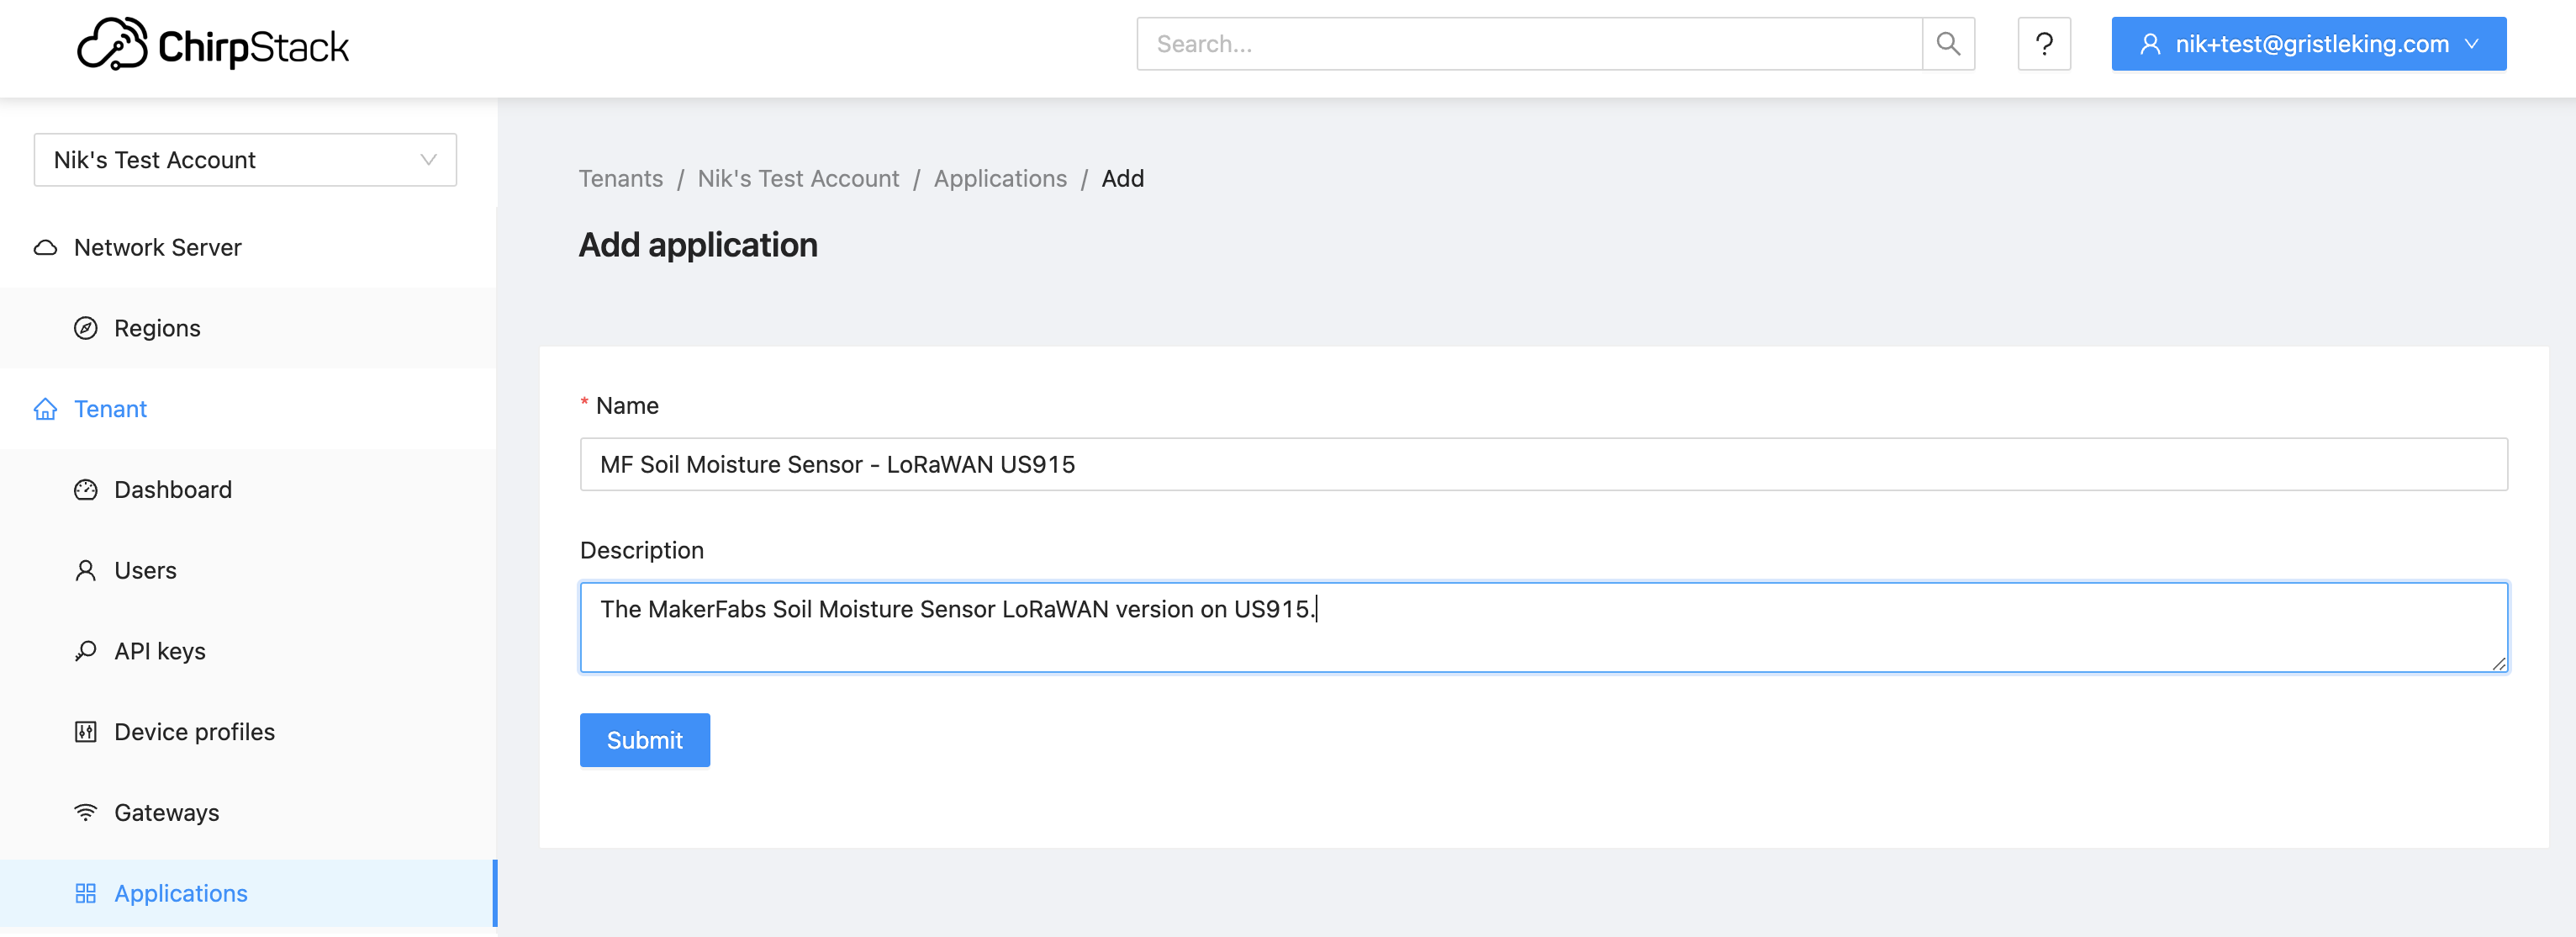
Now, one way to use an Application is that you’re using 2 sensors that are the same sensor but in different regions (US915 and EU868, one for me, one for my auntie in England’s garden), or you might be using them for different properties and so they have different sending requirements (every hour vs once per day). They could pull from the same or different templates, depending on how you want to set them up. For one device it won’t make much sense, but Helium ain’t about running just one device…
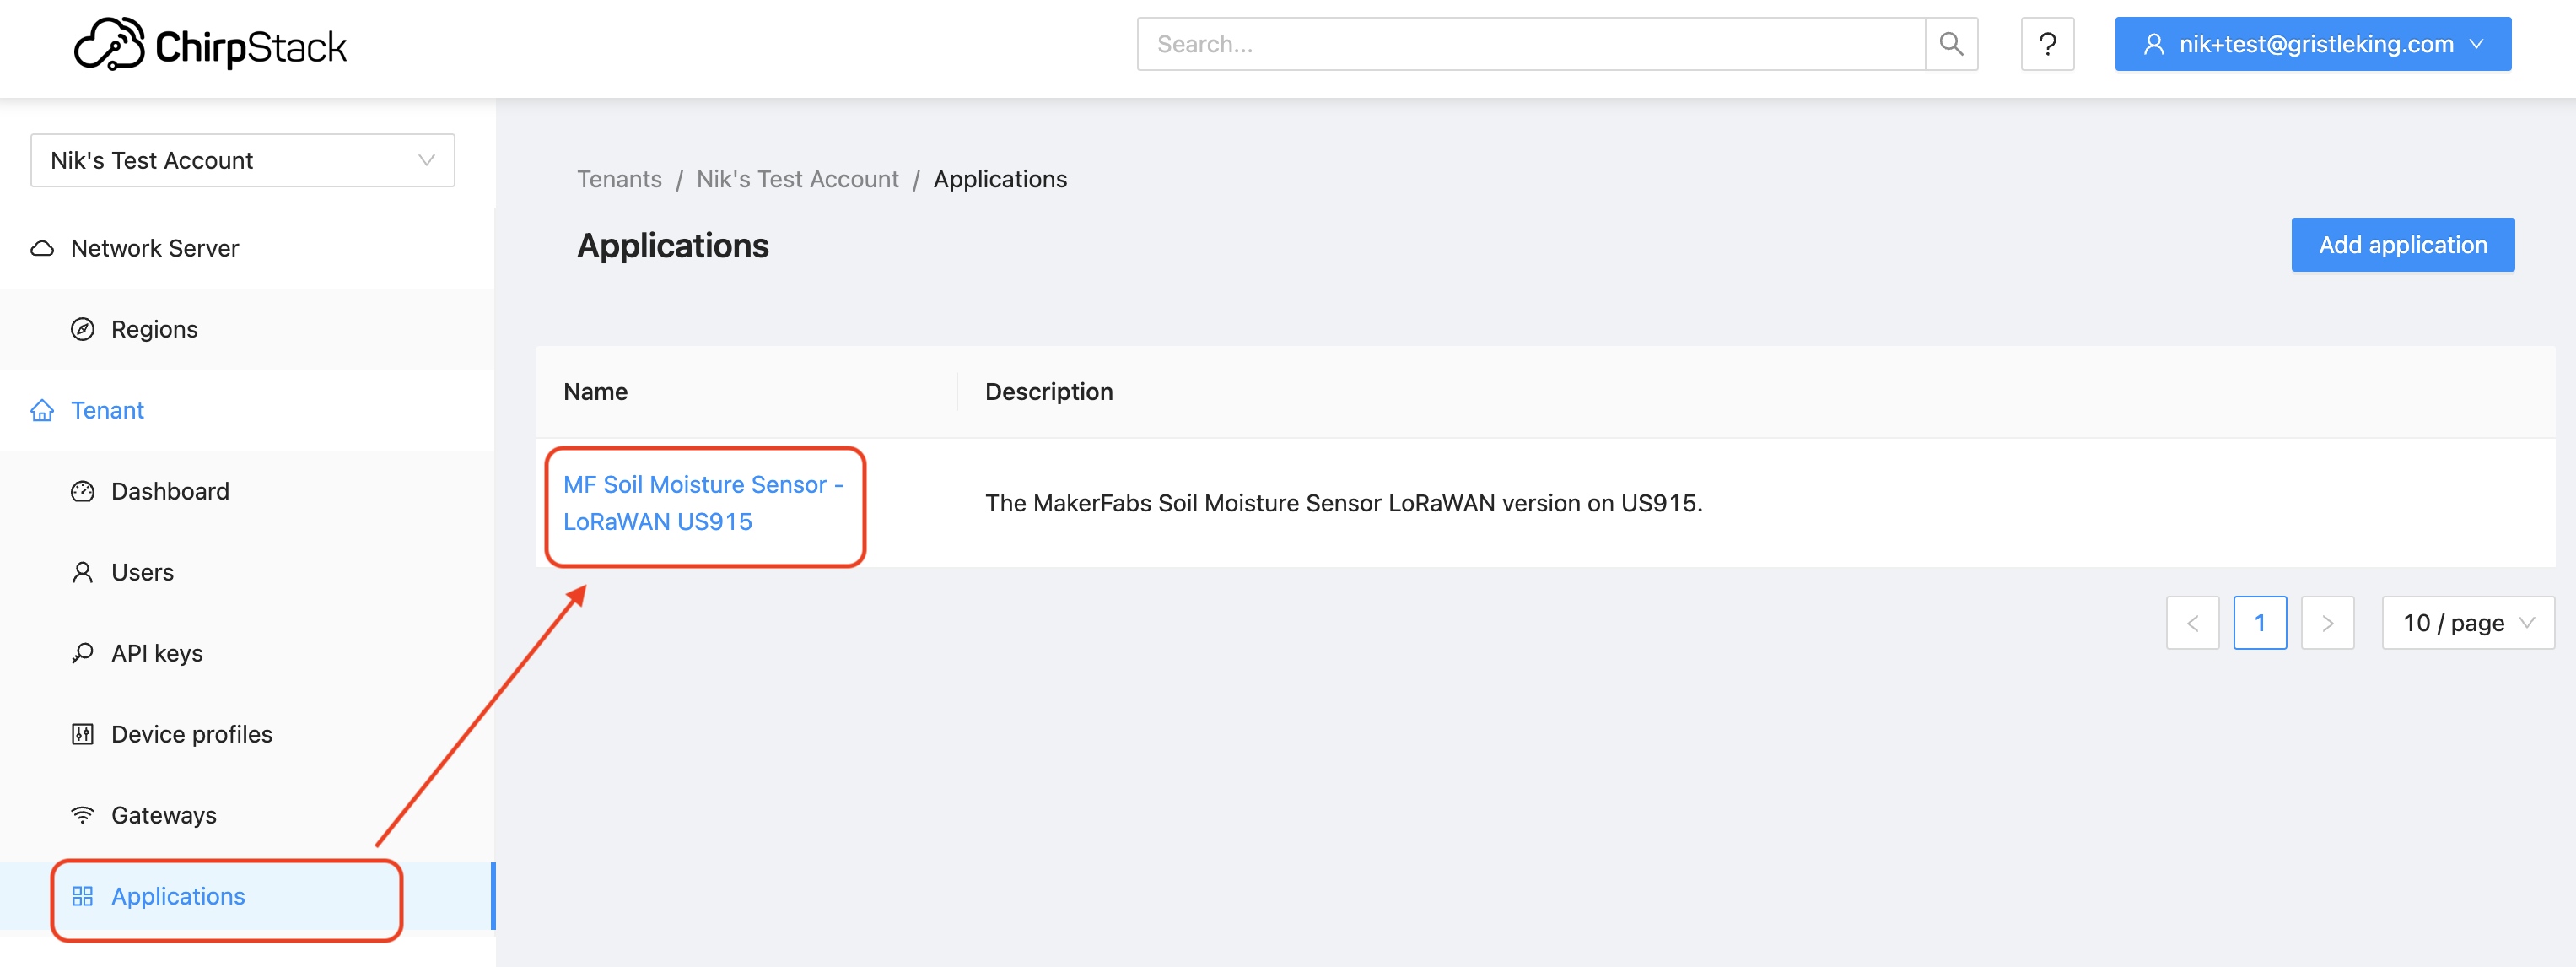
Woohoo, let’s add a device! Now that we have an Application, from the Applications tab in the main menu, choose the application you just made:
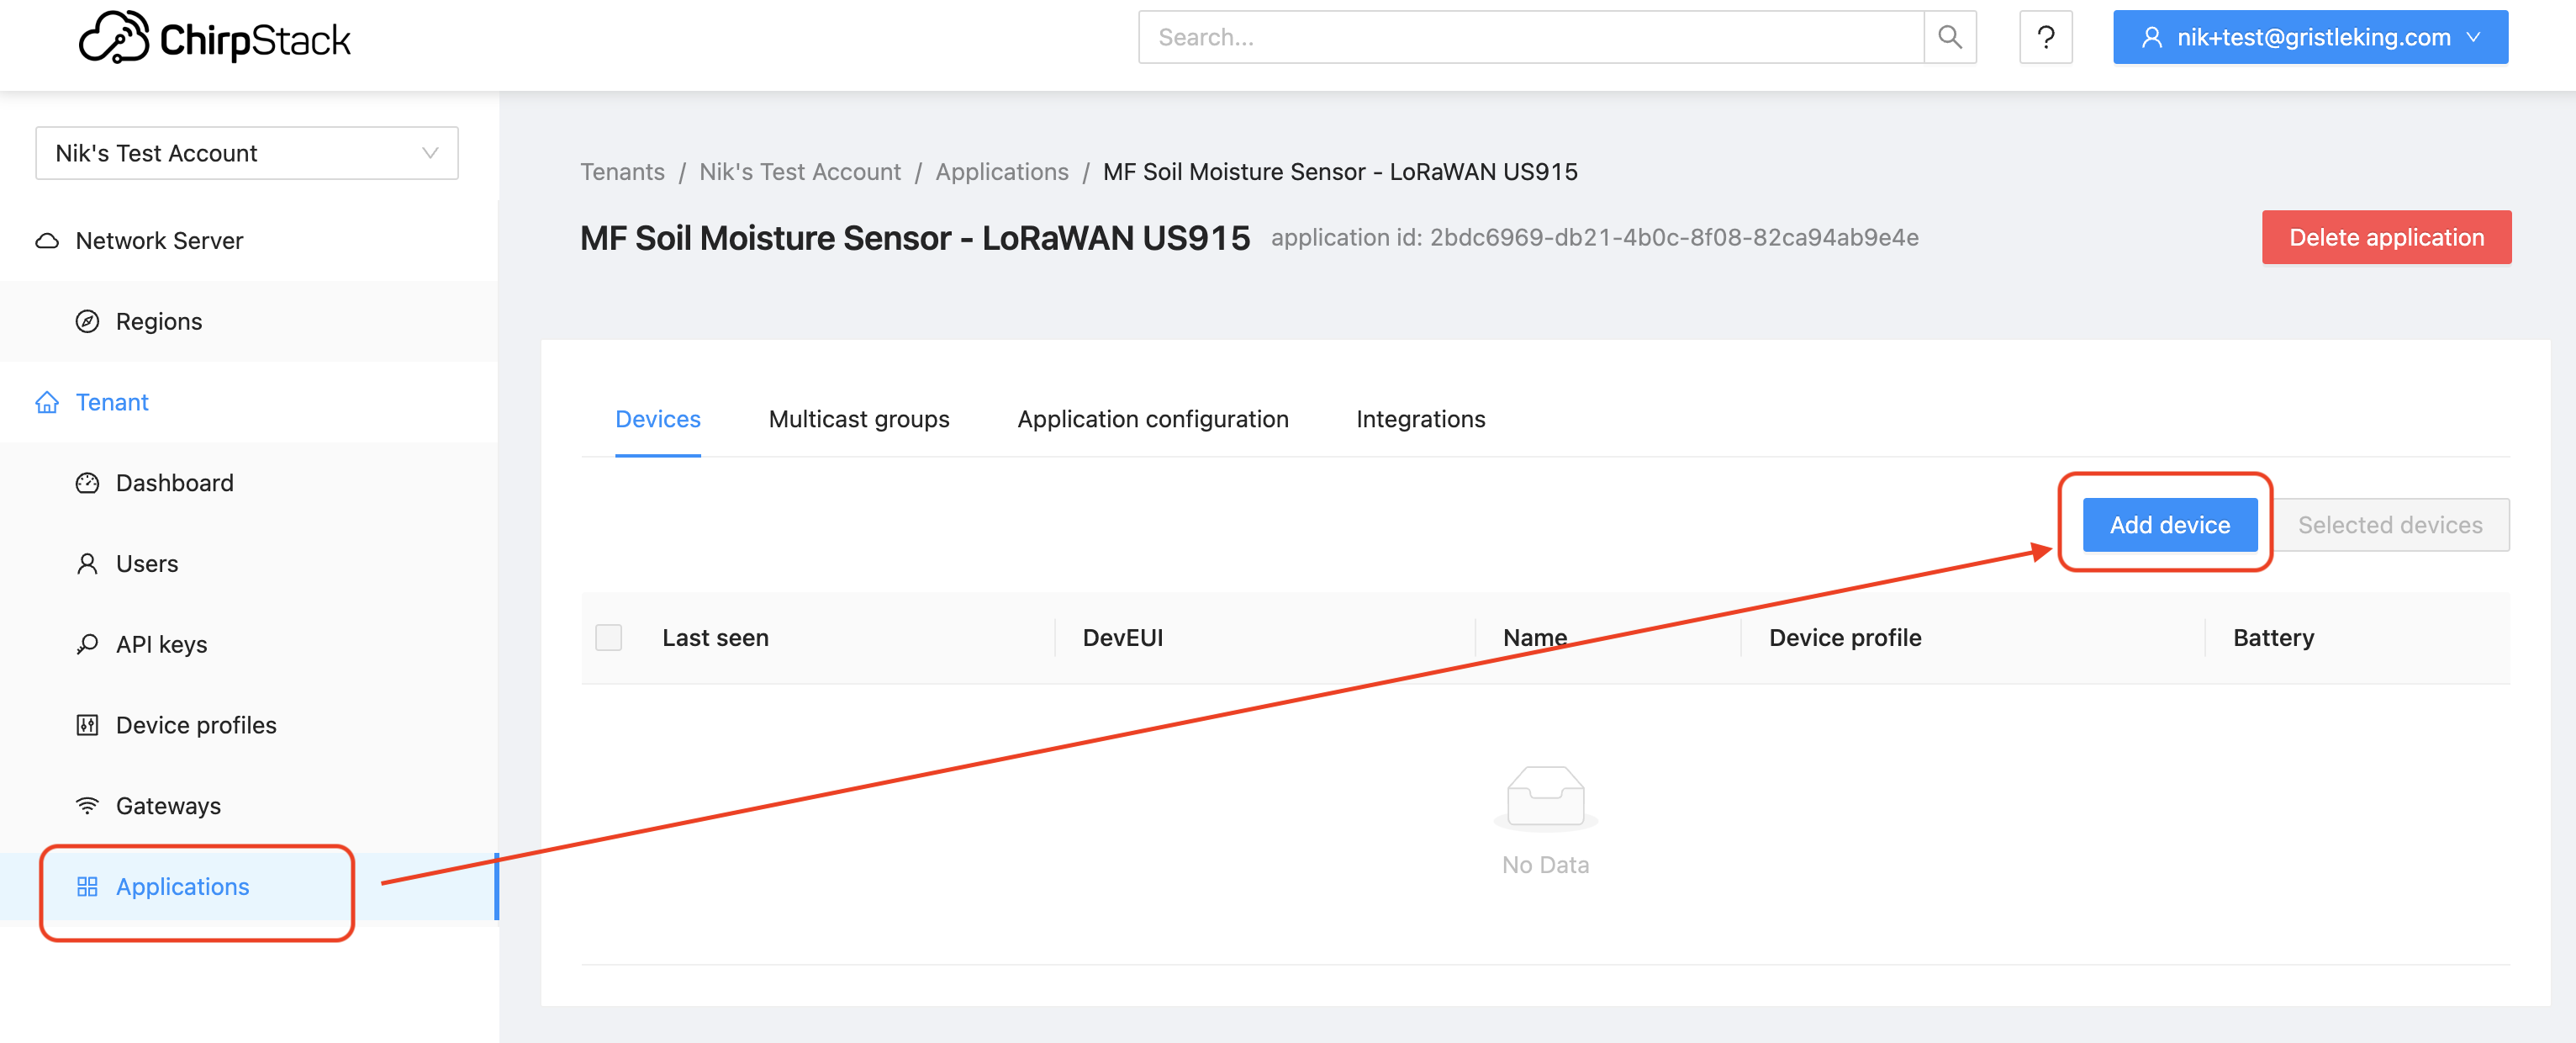
Then hit the blue “Add device” button.
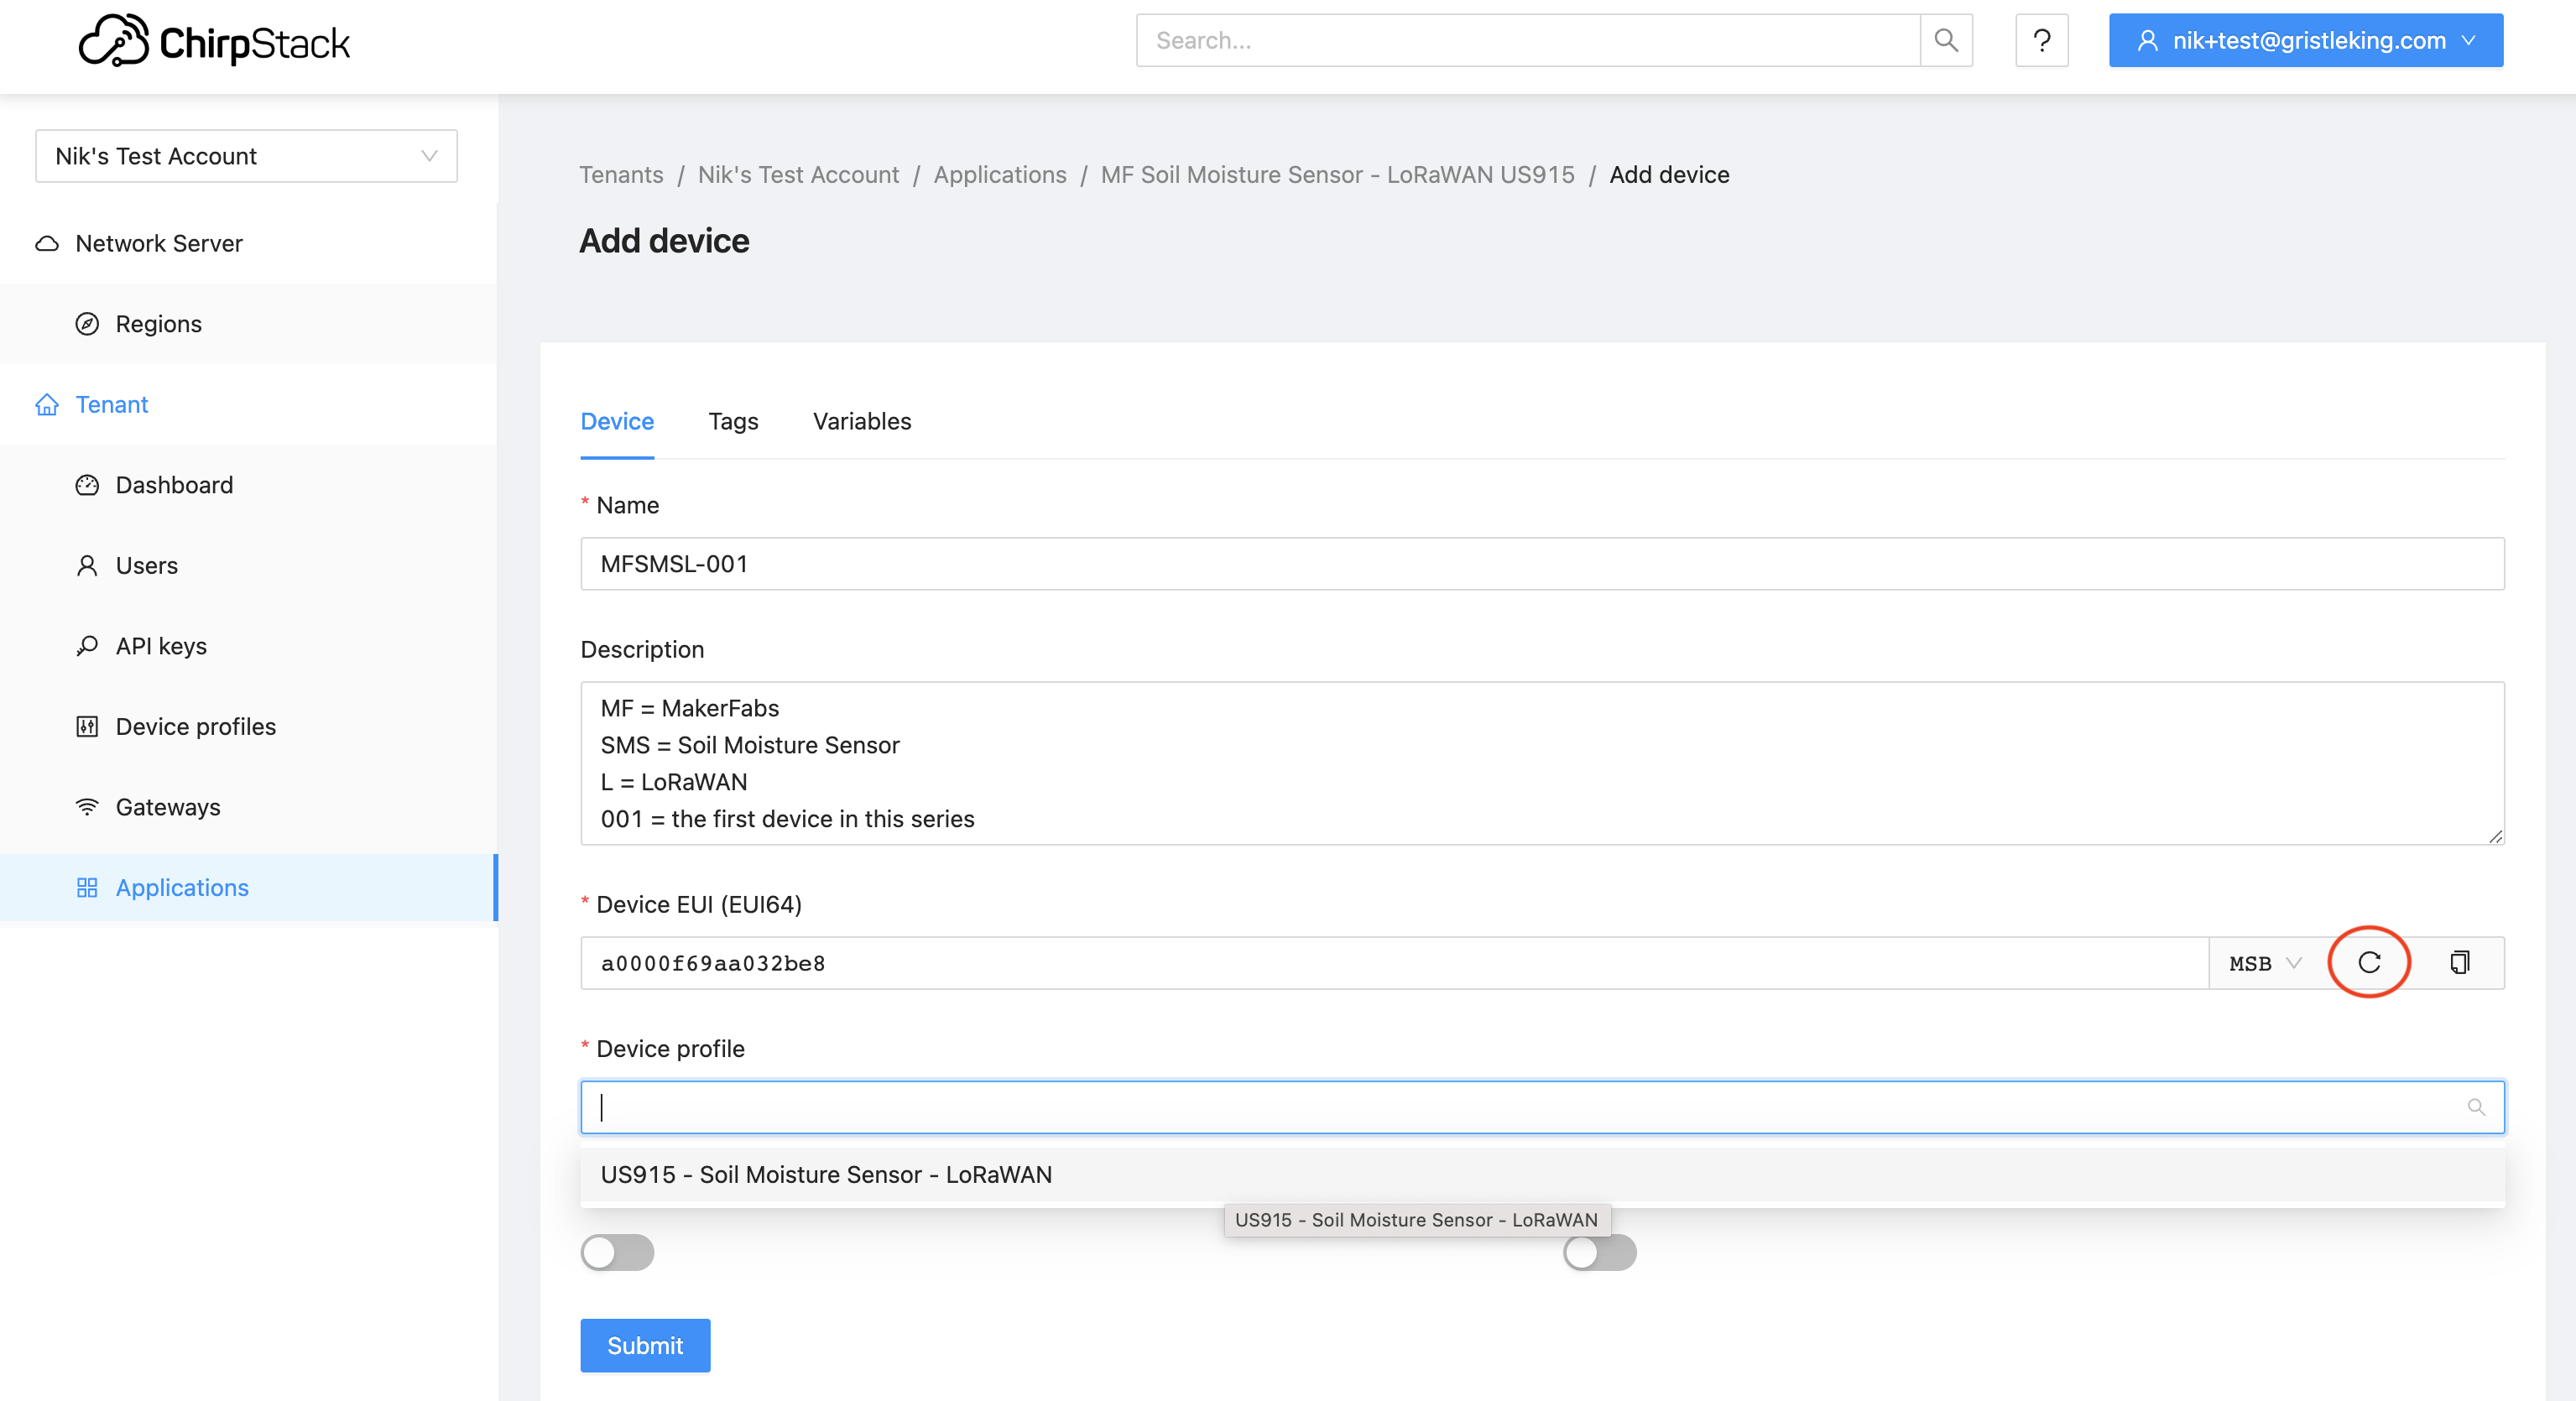
That’ll bring you to the device page. I like to fill out the description fully, with a reminder to myself of the naming convention I’m using, although that may only be on the 001 of each device. On the Device EUI you can fill in what you have or have Chirpstack generate a DevEUI for you by hitting the little circle/arrow button. For Device Profile, choose the (only) option
Once you’ve filled all that in, hit Submit at the bottom, which will take you to the “Application key” tab up in OTAA keys on the Application menu. You can use the same circle/arrow button to generate an App Key (if you’re going to load that onto your device), or you can type in the AppKey if one came with the sensor.
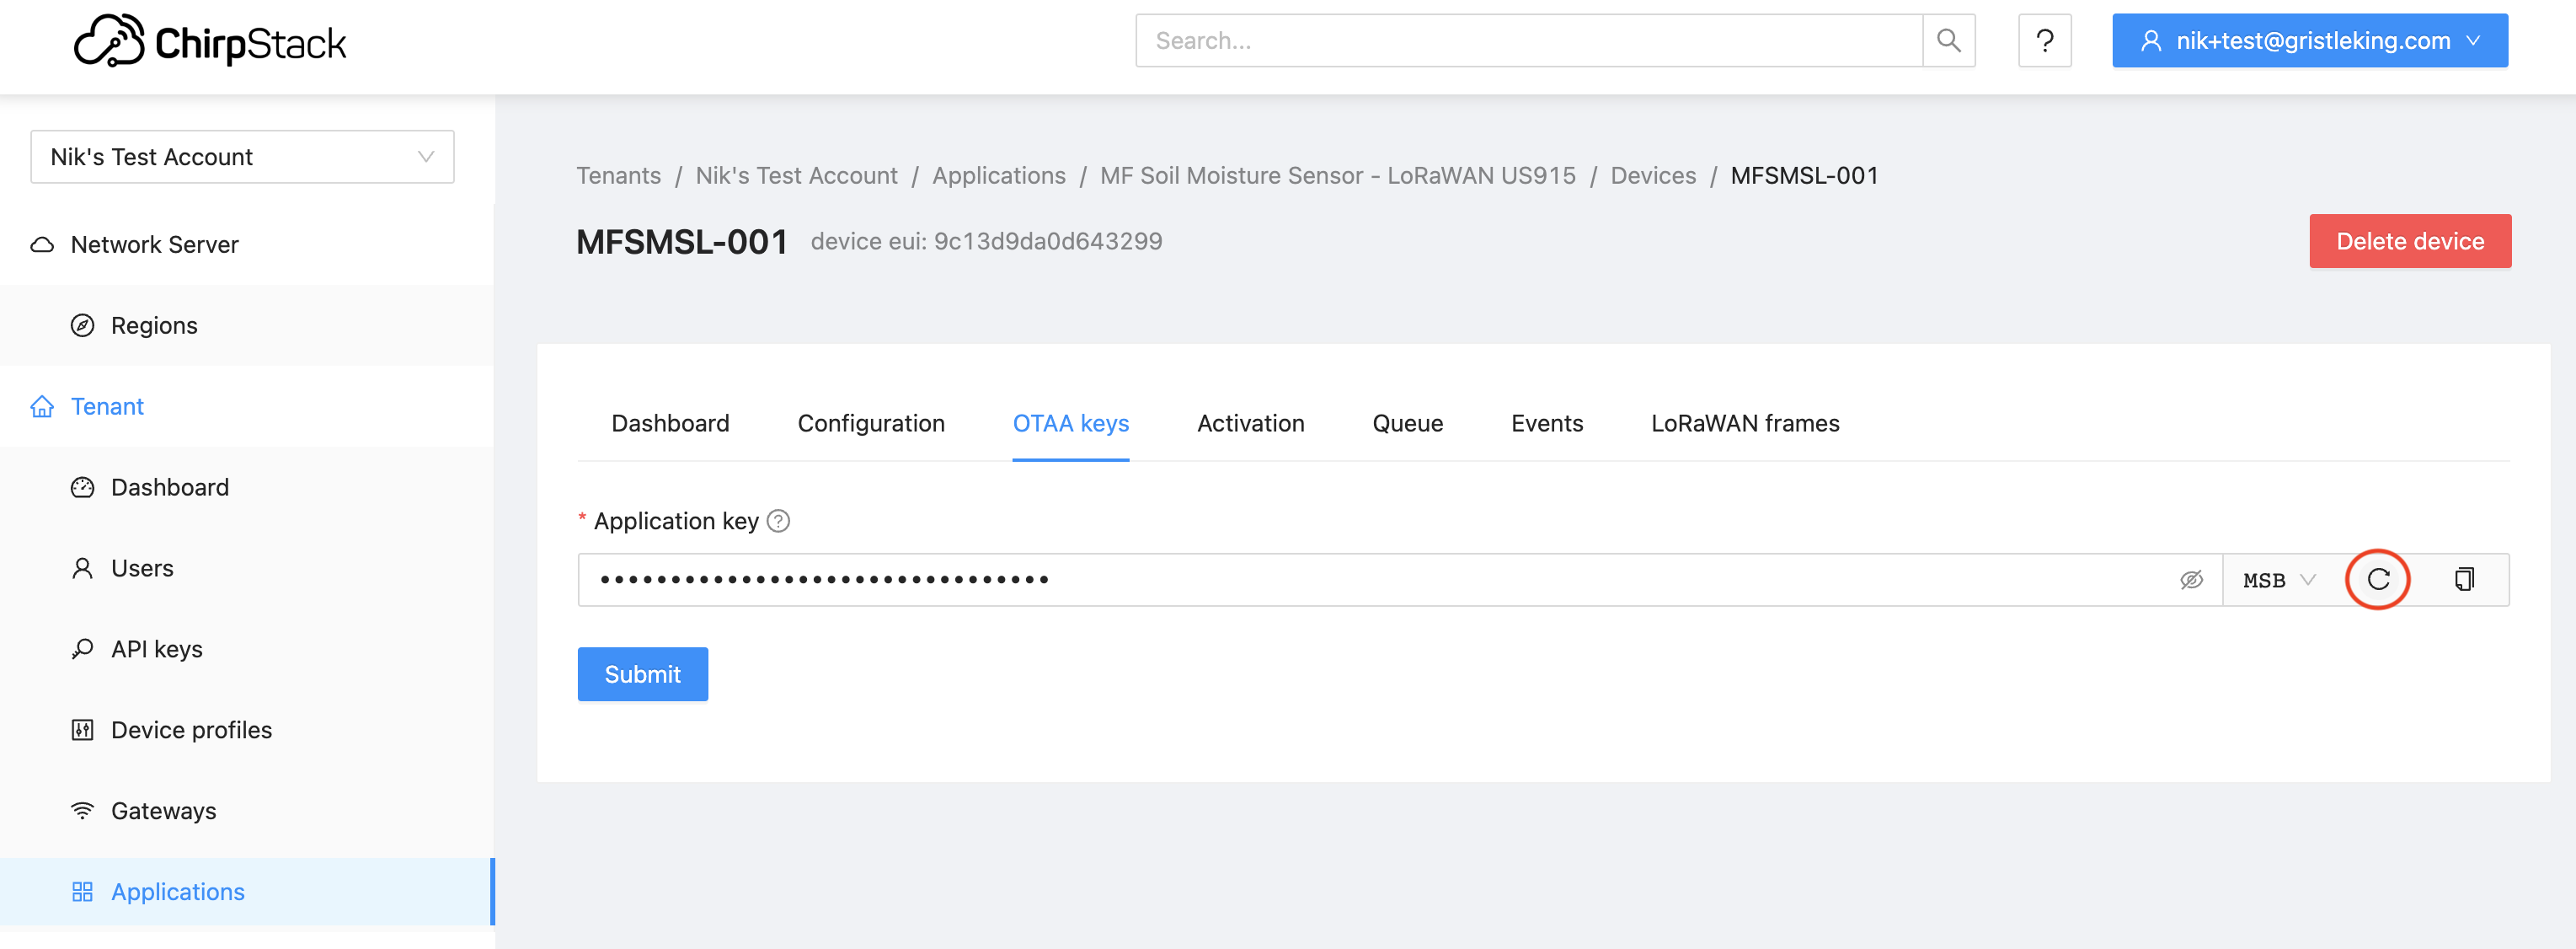
There is no APPEUI in Chirpstack! This can be a bit jarring to you, and in some cases you’ll have to enter in all zeros for your AppEUI if you’re programming your device (which is what I do for this device in Platformio).

Whew, we’ve done all the Chirpstack work we need to do! If your device came with pre-programmed keys you’ll use, you should add batteries and it *should* fire right up. You’ll see that in Applications / [your application] / Devices / [your device].
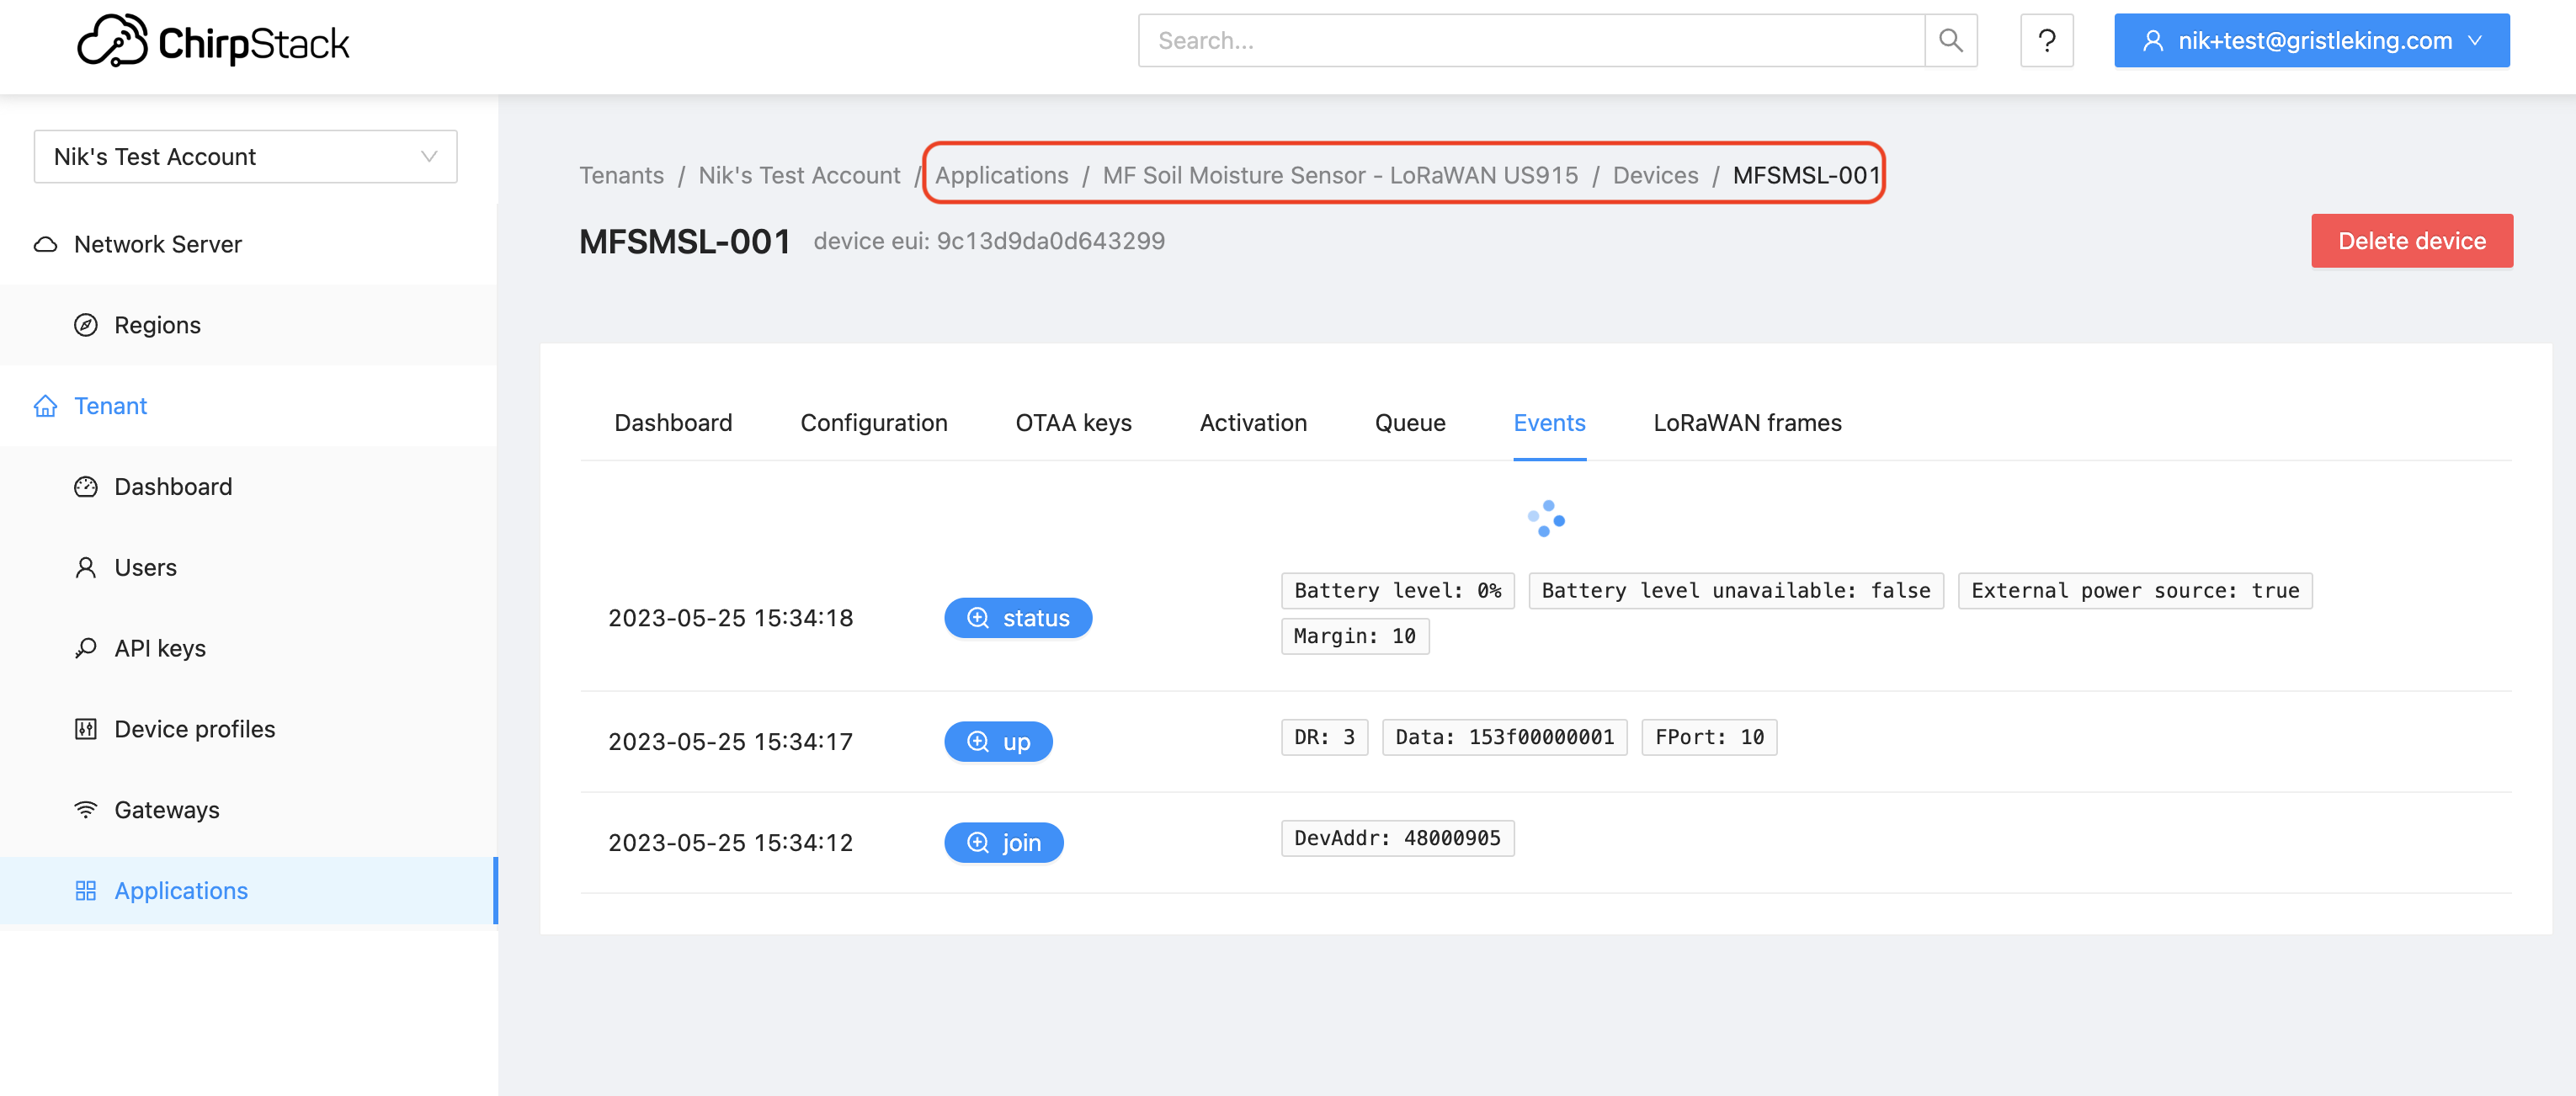
In that case I didn’t have any batteries in it, I just used the Upload and Monitor and power from the USB on Platformio. Looks like it’s reporting correctly!
Very cool, right? Feel free to try it out, and let us know if you find any bugs; this is still pretty new, so we haven’t worked out all the kinks yet. If you want a head start on this rad new world we’re heading into with Helium, this is your chance. Rock on!

Leave a Reply