Over at Meteo Scientific (the business unit I started to run an IoT Sensor as a Service, or iSaaS), I’ve been working on a few projects, one of them around measuring vernal pools in the mountains.
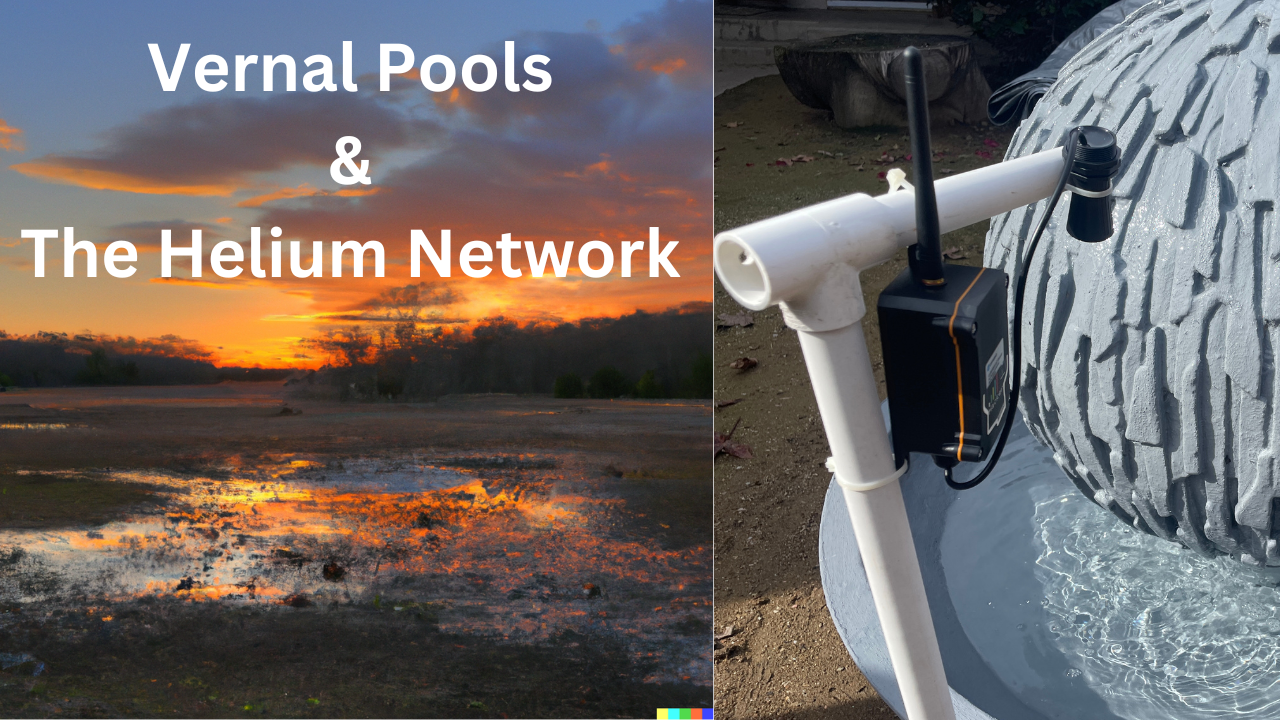
Vernal pools are “one of California’s most endangered wetland natural communities” according to Dave Hogan, head of the Chaparral Lands Conservancy (CLL). They are seasonal pools usually less than a foot deep found on mesas and down in the valleys throughout my home region of San Diego. The CLL has a partnership with the Center For Biological Diversity to monitor these pools, including measuring their depth throughout the short wet season. Up until now, they were measuring the depth by paying contractors to hike out and manually measure each pool. This seemed like a great use case for the Helium network!
With any iSaaS offering, you’ve got three major hurdles to completion.
First is finding a customer. In this case, that was long time friend Dave Hogan, who runs the Chaparral Lands Conservancy. Dave and I have known each other for at least a decade now, and since we don’t get to spend very much time together I was excited to use Helium as an excuse to spend time with one of the most well versed naturalists I’ve met in person.
The next question in running an iSaaS is “Do I have connectivity for my sensor?” With Helium, that’s usually not a problem. It’s got the largest contiguous wireless network in the world, with most places in urban and suburban areas covered. Almost anywhere in San Diego (except deep in remote valleys) has great coverage. Additionally, if we needed coverage in a remote area, I wasn’t worried; off grid IoT connectivity through Helium is a specialty of mine.
The third step with iSaaS is knowing what kind of sensor to use. I checked in with Bryan at Parley Labs as well as Simon over at Datacake, and we decided to look at two different types. A Dragino LDDS20 Non Contact Liquid Level Sensor and an LDDS75 Distance Detection Sensor. I had both in my garage, and after taking a look at ’em, the LDDS75 seemed the appropriate one to use. The 20 needs to be on the bottom of a tank, and these meadow pools ain’t tanks.
As usual when it comes to sensors, they ain’t the easiest things to use and you have to be ready to learn. I jumped on the weekly Hackshare Collective call run by Travis Teague to get help, where Travis, Gray Hat Guy and Nickey walked me through setting up my device.
Step one is adding the device to the Helium Console. I’ve covered the steps to do that in other posts so will skip it here. The Draginos come with all the identifying keys on a sticker on the box, which is nice: DEVEUI, APPEUI, and APPKEY are all right there. I typed ’em in manually and waited for the XOR filter to let the device show up on Console.
Being a “hands dirty” guy, the next thing I did was open it up.
With Gray Hat Guy walking me through it, I checked the battery level (both with and without load) because the device had been sitting in the garage for almost a year.
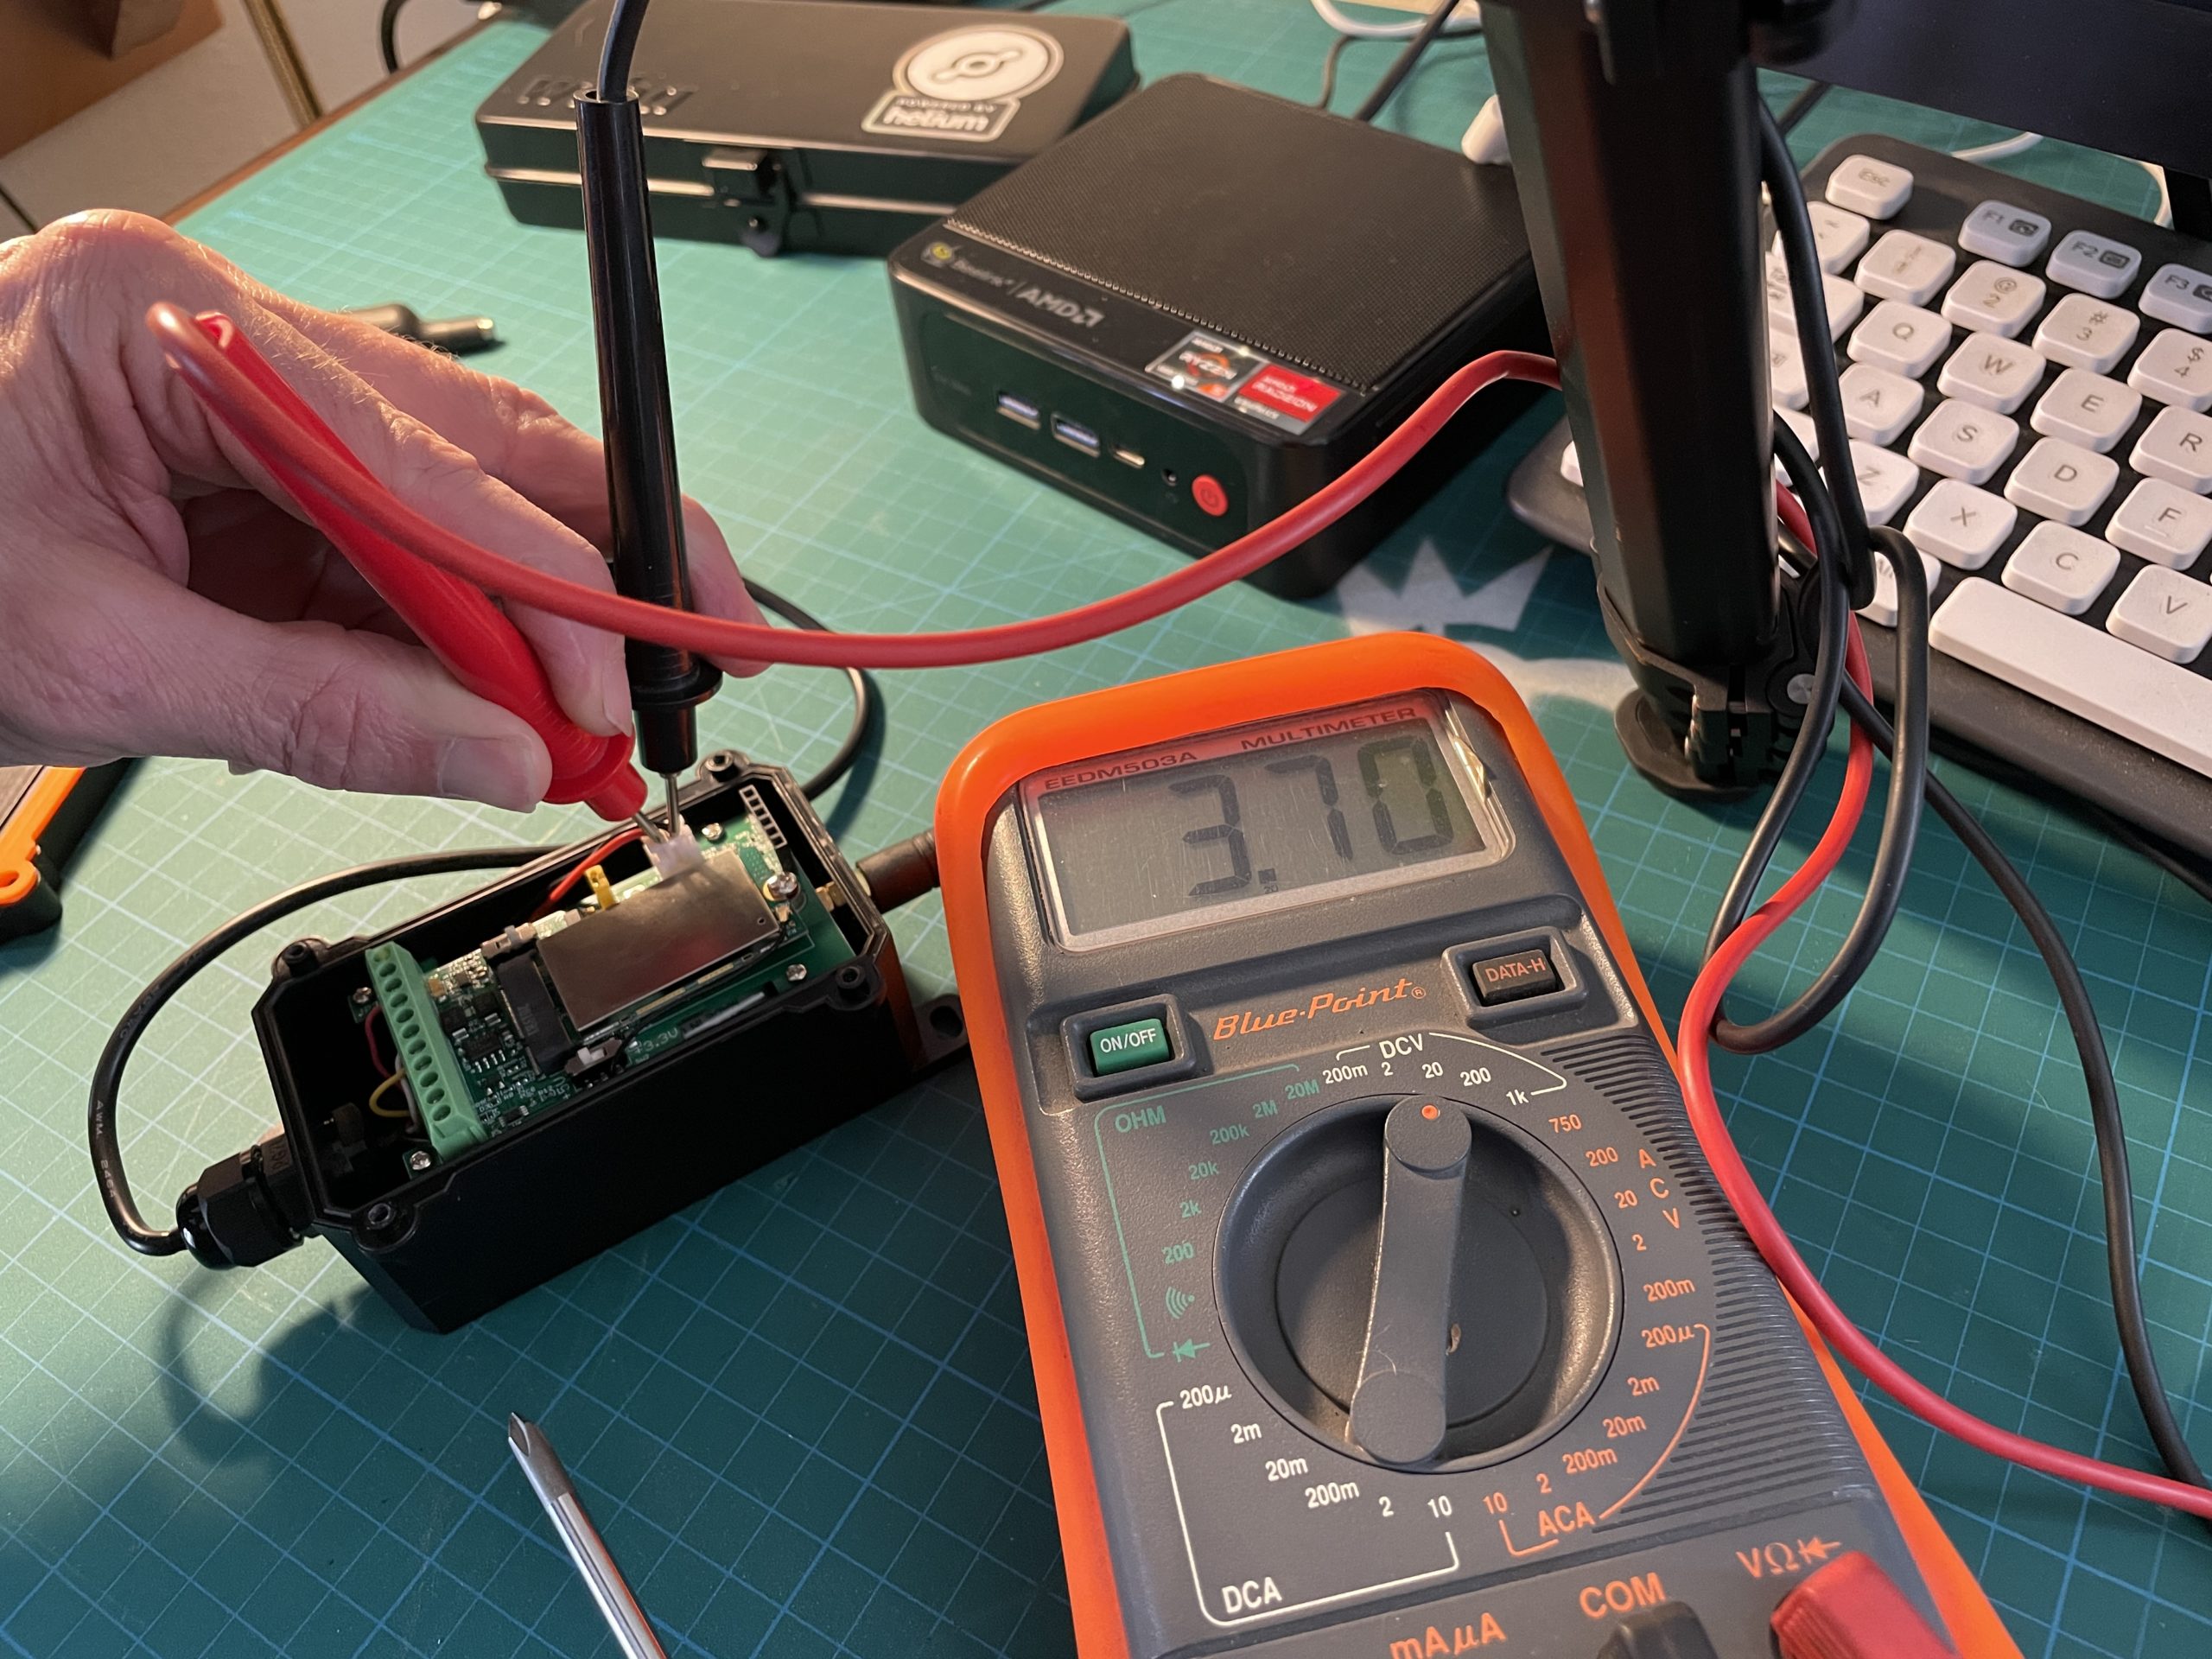
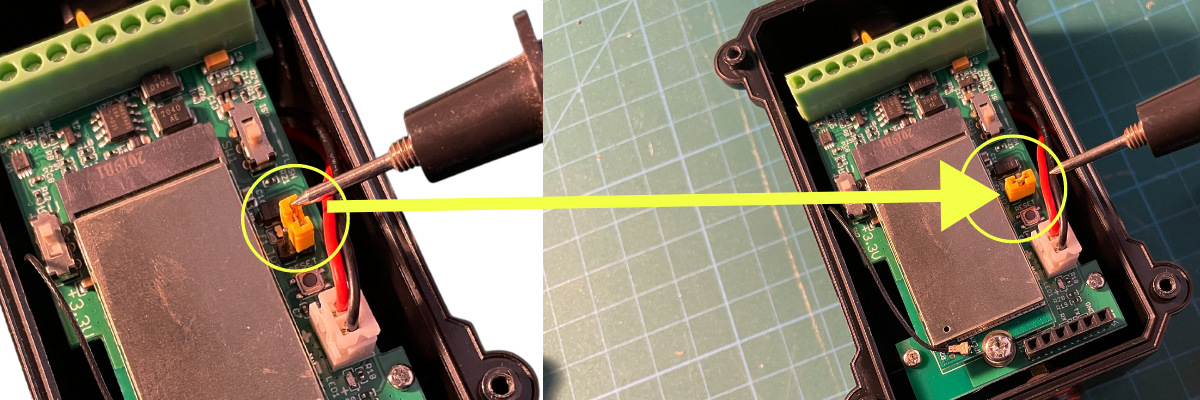
Then I realized you had to remove, rotate, and replace the yellow jumper in order to connect power to the device from the battery. That’s one of those things every hardware geek says, “Duh” to, but if you’ve never seen it before, a lot of this doesn’t make sense.
With the device added in Console and powered on, the next step is to set the parameters up so they match what you want. In my case, making sure I had it firing on a time interval that would be useful without wasting battery life.
To do this, you’ll need a few simple things that’ll open up a whole new world for you. First, a USB to TTL adapter, about $12 on Amazon. Second, a set of breadboard jumper wires, about $7. Finally, if you don’t already have them laying around from the million other projects you’ve done, spend $8 on breakaway pin headers.
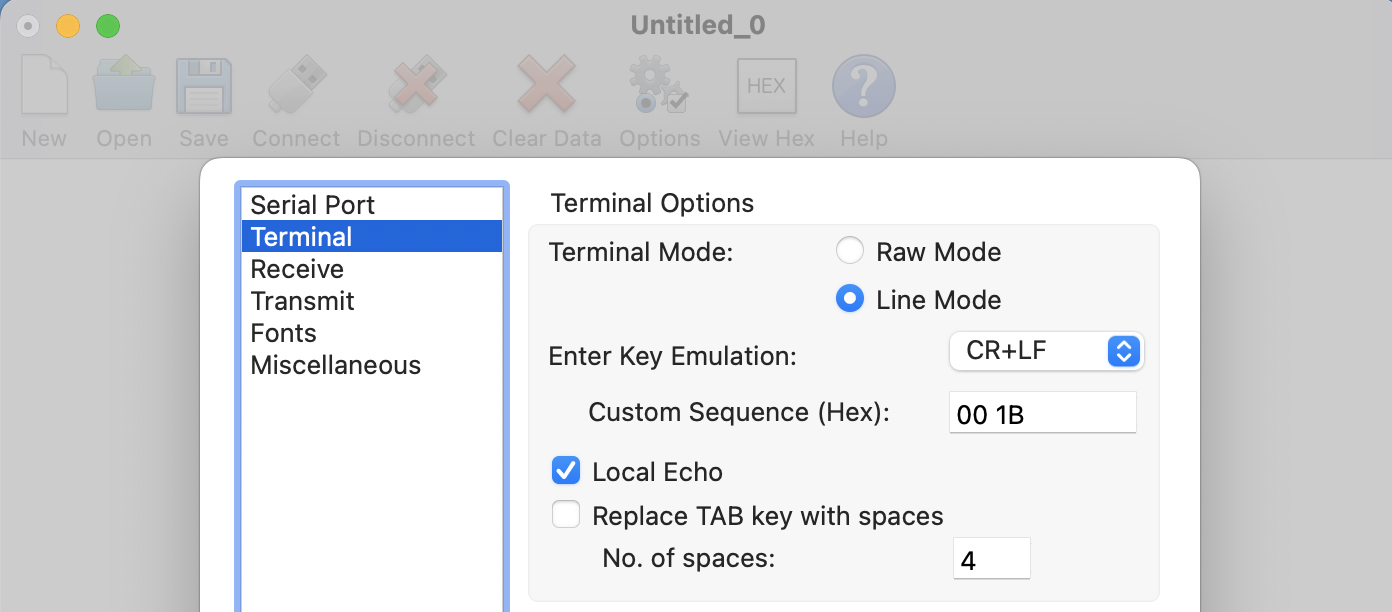
Once you have those, you can connect your device to your computer via USB and use a program called CoolTerm to change the settings on the device. Dragino has pretty good documentation on how to set all this up, but holler in the comments if you need help.
You’ll need to make a few changes in the Options on Coolterm. In the Serial Port menu, set the baudrate to 9600. Then, in the Terminal menu, change the Mode to Line Mode, use CR+LF Key Emulation, and turn on Local Echo.
For this, the first thing I did was get a readout of what the settings currently were, using AT+CFG. That’ll spit out all the current settings. In this case, I was looking for the TDC setting, which is the “transmit time”. I wanted to test this device on my fountain at home with a shorter interval just to see how it looked on Datacake, then set it to a longer interval later to preserve battery life. I started with a 5 minute interval, saved it, unplugged the device and fastened the cover back on for testing.
I headed into the garage to knock together a quick PVC frame to attach it to.
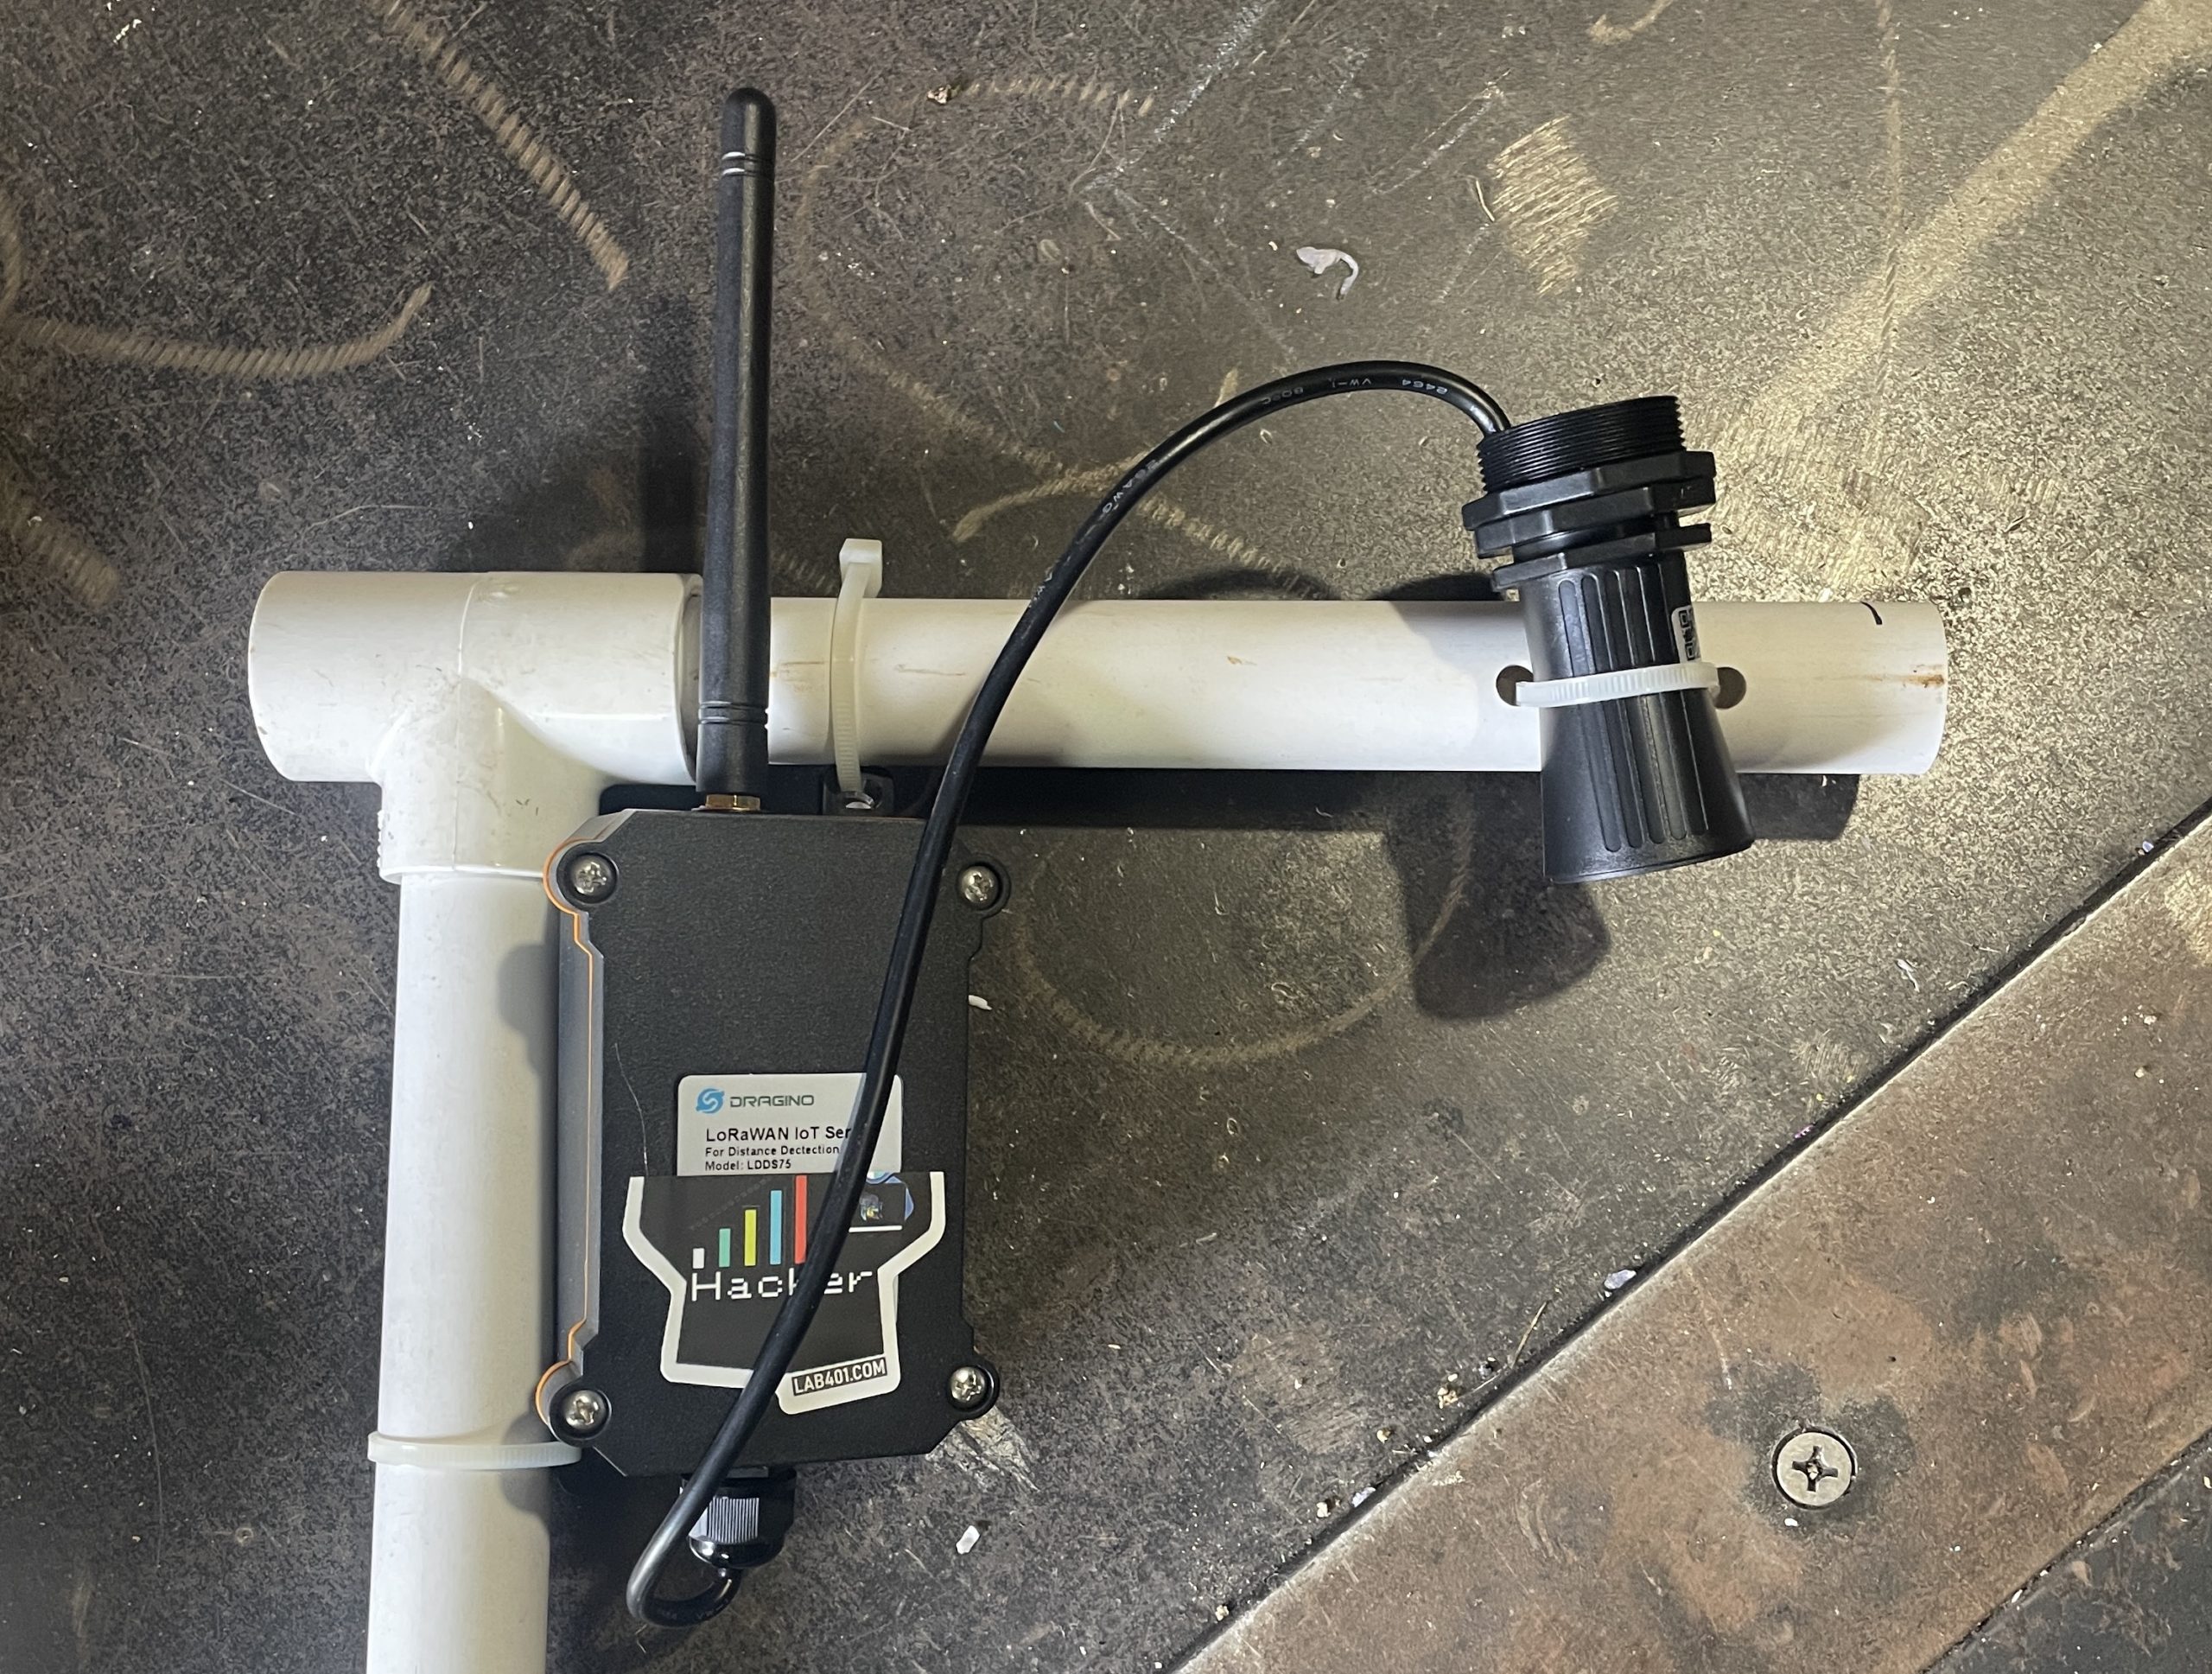
These first test rigs don’t have to be pretty, they just have to work. With that done, I set it up to monitor the liquid level in my fountain in the backyard.

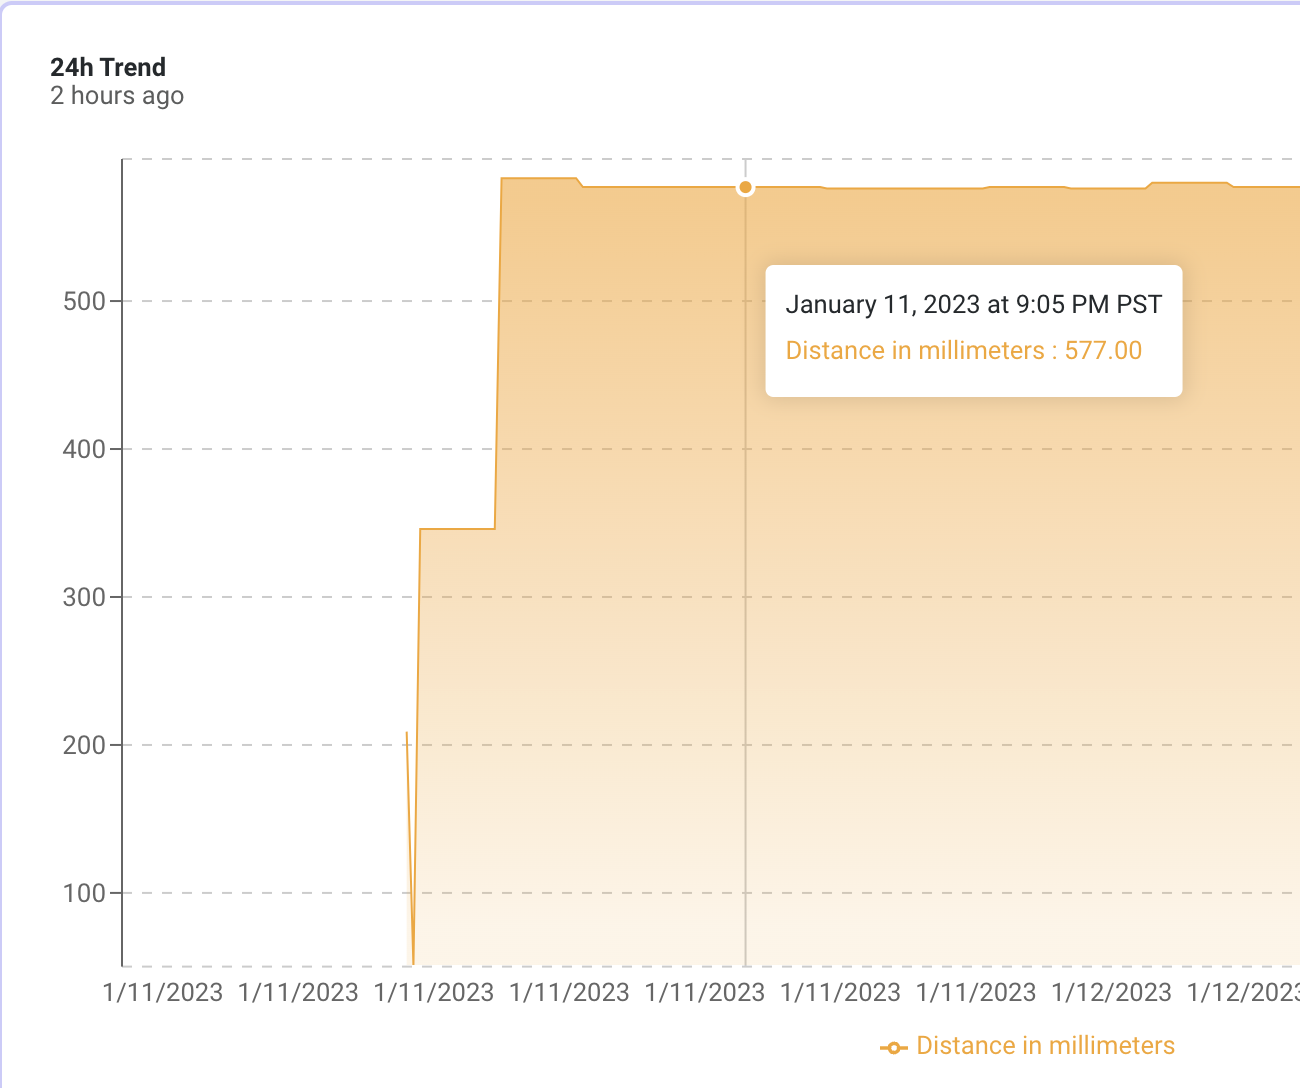
Here it is with 5 minute intervals:
Once I was confident it was working I took it all down, brought it back in, hooked it back up to my computer and set the time interval to an hour.
The next step is to find out from the client what they’re OK with as far as a mounting stand, assess the site, then build something that’ll work for his needs. Time for a hike in the mountains with a GLAMOS to check coverage. I’ll be back later this month with a follow up!
Leave a Reply