“Will this antenna work?” I get that question a lot, usually about some antenna that was discovered after hours of searching and sifting through Google results. Antennas are one of the most confusing parts of Helium, mostly because RF is fairly complicated and the average hotspot owner has as much experience with antenna design and theory as a warthog does with wearing Kiton tuxedos.

Hot tip up front: Antennas have very little to do with your earnings. Most of your earnings come from your placement, most of the rest comes from how high you can get in that placement, and the final little sliver comes from antenna choice. If you want to go deep into the best antenna for your Helium hotspot, read up on it here.
My recommendations for most instances is two-fold: If you have extra cash, try the HNTenna, either indoor or outdoor, for whatever setup you’ve got.
If you are deploying a fleet and have to watch costs, use any of the McGill antennas, the 6 dBi is a solid middle-ground applicable to almost all installs.
For those of you who don’t want to spend that much, here’s what to look for in a Helium hotspot antenna:
- Overall, you want an antenna with a fairly narrow range. What is a narrow range? Ideally, less than 30MHz of band (15 on either side of center). In the US, 915 is our center, and 902–928 is what usually I look for.
- In that same vein, Wide Band and Ultra Wide Band should be avoided. While they sound like they might be great because they “cover a wide band”, that’s like saying a Ford Falcon should fly because it has “Falcon” in the name.
- An antenna for Helium should be either vertically polarized or multi-polarized. I’ve written about antenna polarization in this post on antenna radiation patterns.
- Any antenna you buy should have a datasheet. That’s the thing that shows you its pattern from the top and sides. If it doesn’t, consider it experimental and usually a waste of money.
- If the antenna is high gain (say above 6 dBi), you want electrical downtilt of 1–3 degrees. This helps you to not overshoot nearby hotspots.
Ok, so that’s how to assess what you should buy. The next step is actually testing the thing. We’re going to go a little into geek land here, be ready. I’ll step up the cost slowly, from zero to, oh, more than you want to spend.
We’ve got 3 general things to check:
- Is it actually working in “the real world”?
- Does the antenna perform the way it’s supposed to?
- Is our hotspot actually putting out any RF energy?
Is It Working In The Real World? — Discovery Mode
- Equipment Needed: Hotspot and the Helium phone app
- Cost: 0. Well, it will eventually cost a few data credits, but if that’s a burden then you’ve got bigger problems than your antenna working.
- Usefulness: Reasonably useful. There’s no reason you shouldn’t do this.
The cheapest way to see if your antenna is working is to jump into Discovery Mode on the Helium app. You need to have a hotspot connected to a wallet you control for this step.
Here are good examples of what you might want to see. Keep in mind that the visuals may change over time, so you’re seeing some variation here. Yes, I’m choosing hotspots that have an unusual number of witnesses. 🙂
Here’s what you don’t want to see:
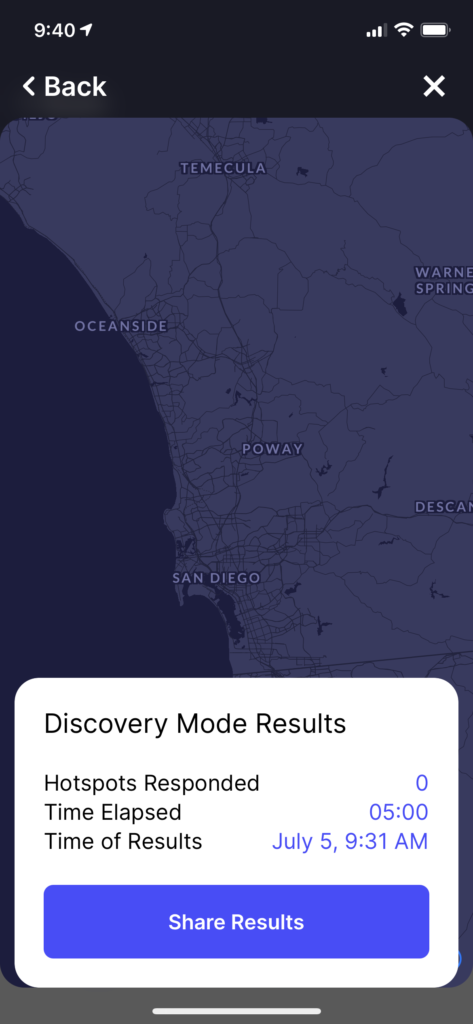
Obviously, if you see something like this, that’s an indication that something might be wrong with
- Your antenna
- The Helium app
- The chain itself.
You shouldn’t immediately freak out if you see that, but you should dive a little deeper.
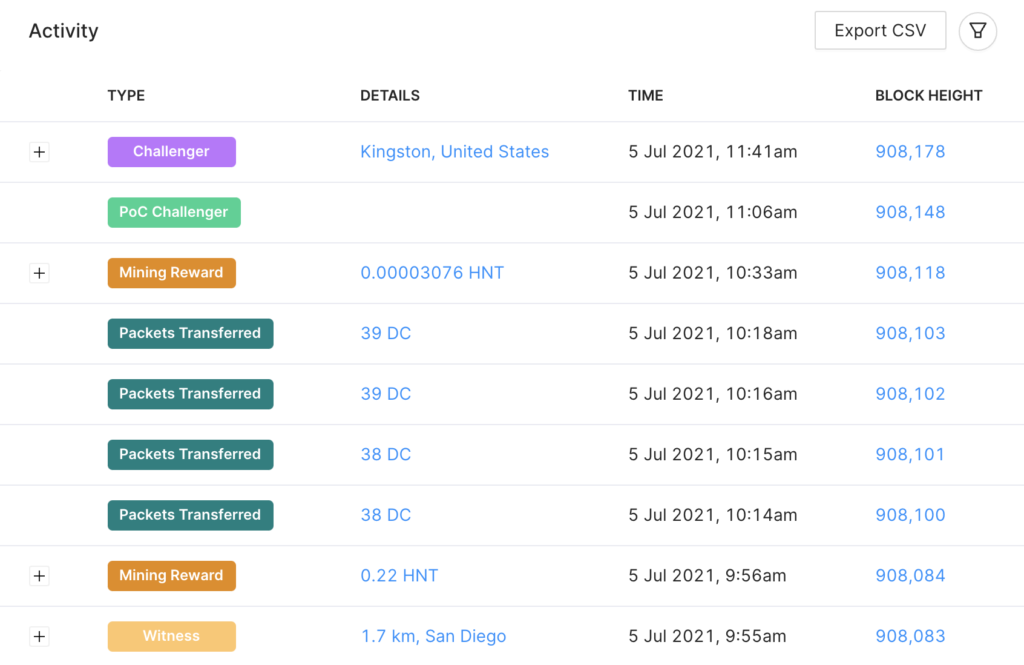
What do I mean by that? I’d check activity and rewards on either the app or Explorer. If those are recent (within the past 24 hours), you’re probably fine as far as your hotspot and antenna working. Here’s a screenshot from Explorer for the above Discovery (failed) attempt. This hotspot is doing fine, there was just something wonky with either Discovery or the chain.
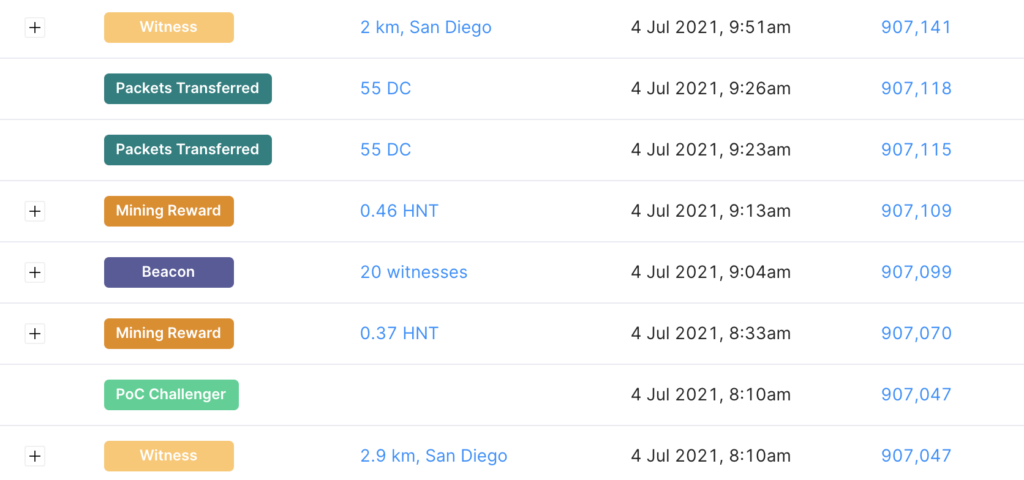
Of course, you might want to scroll back to your most recent beacon and make sure you’re being witnessed, although with all the beacons being witnessed in the above case, you’re probably fine. Antennas transmit & receive at the same “level”. I had to scroll back a day or so to see the most recent beacon, but there it was, complete with witnesses.
Let’s say your Explorer page doesn’t look like that, and you have zero witnesses on your beacon. There is the possibility that your hotspot is working fine BUT one of the witnesses was on a relay, so despite the beacon actually going out, it is reported as (basically) incorrect/not working as intended. Still, let’s not get too far into the weeds on that. Let’s stick with antennas for now. How do you test your antenna?
Is The Antenna Performing The Way It’s Supposed To?
- Equipment Needed: Vector Impedance Analyzer or NanoVNA
- Cost: $70–150
- Usefulness: Very useful for making sure your antenna is good. This is more important if you’re buying an antenna from less reputable sources. Mostly this is useful for mid-level geeks who just want to know what’s going on.
In the image below, the VIA is the little black box between the long grey antenna (a Nebra) and the short white one (an eBay special.) The black antenna on the top is the HNTenna, my go-to for most deployments. A VIA is used to test the efficiency of an antenna. If you’re seeing a low VSWR at your frequency, you’ve probably got a great antenna. More on that in the Spiess video below.
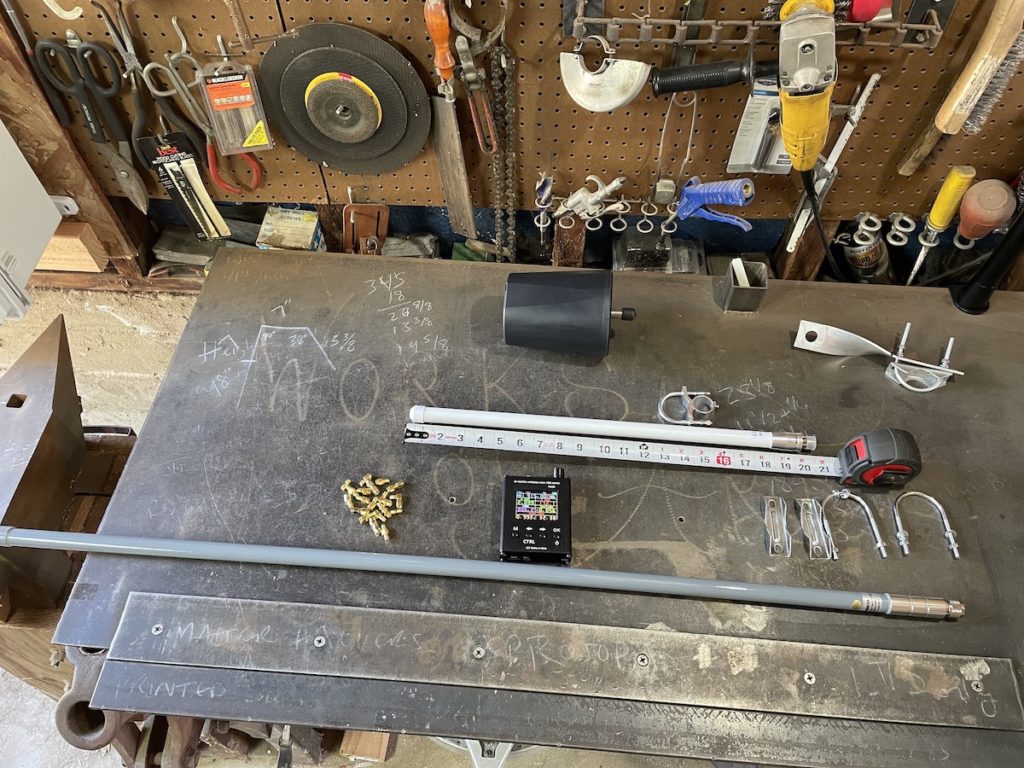
I bought my VIA from Banggood, you can get ’em on Amazon. Those links aren’t exactly what I bought, there seem to be 4 or 5 variations of this thing that are all similar enough to work for you. You’ll need to get a pack of adaptors as well, pick those up on A‑zon.
Pro-tip: Make a “connector saver” cable that attaches to the connector of the VNA. That way, when you’re attaching your antennas you don’t risk damaging the connector directly on the VIA.
So far most of the antennas do just fine, although I have seen a few duds.
Andreas Spiess has a great video on how to use this VIA, check it out starting at 7:30.
I use one to test any antenna that comes through the shop. You may find some RF snobs that turn their nose up at it. Yes, it’s not the highest end device, but I don’t see a reason for everyone with a Helium hotspot to buy (and learn how to use) far fancier equipment. This is a great quick and easy check.
Is The Hotspot Putting Out The Correct Amount Of Energy?
- Equipment Needed: Bird Model 43 RF Wattmeter
- Cost: $300–500
- Usefulness: Almost totally useless for the average Helium Hotspot owner, but a very cool piece of kit, and it reassures you that your hotspot IS actually beaconing.
When I went out to visit the HNTenna folks a few weeks back, Adam pulled out a device so well designed that it hasn’t been changed since the 1950s! It’s a Bird Model 43P Wattmeter, and it tells you how much energy is being pushed out from a device (your hotspot) and into an antenna. I’m kind of a sucker for old school badass things, so I immediately bought one on eBay. I’ll tell you right now: You don’t need to. They are SUPER cool, but so far into geek-land that for 99% of Helium peeps it’s just not the right fit. Still, I bring it up in case you want to see what’s one layer deeper when it comes to RF investigations.
Here’s what it looks like in use. You plug the hotspot into the left side, the antenna into the right, then fire up Discovery mode so the hotspot beacons. When it does, you can measure the energy of that beacon. For US hotspots, it should hit 1 watt. Using the bottom scale and dividing by 10 gives you the 1 watt. Yes, I know, different scales, dividing by ten…that’s just standard RF geekery. This thing is doing what it’s supposed to do.
But, But, But…What Else Can I Test?
I’ll leave you with what you should do if all that HNT is just burning a hole in your pocket and you’re desperate to know even more about the RF waves all around you. Here’s the HNtenna crew walking me through testing the Helium Tab using a device called a Handheld Microwave Analyzer.
See that little spike every time we press the button on the Tab? Yep, it’s working. No, you don’t want to know how much that HMA costs. Or maybe you do.
In any event, we can see the Tab working it’s tiny little electronic but off to push out signals. Magic!
So now you know way more about how to choose and test an antenna for Helium.
If you’d like further help with Helium, whether it’s understanding the network or optimizing your placement, consider hiring me or taking the Helium Basic Course, which you can find here.
Rock on!


Leave a Reply