I’ve been watching Wingbits for a while now. They’re a new DePIN rewarding you for tracking commercial and private planes, and some parts of the project remind me of the early days of Helium, back when I wrote the original Rough Guide for Helium. Wingbits is a project that allows you to choose your hardware and that rewards you for providing “better” service. In the early days of Helium I gained a significant advantage by trying to provide the absolute best service over just sticking a Hotspot in a window. I *think* the same kind of thinking will be useful for Wingbits.
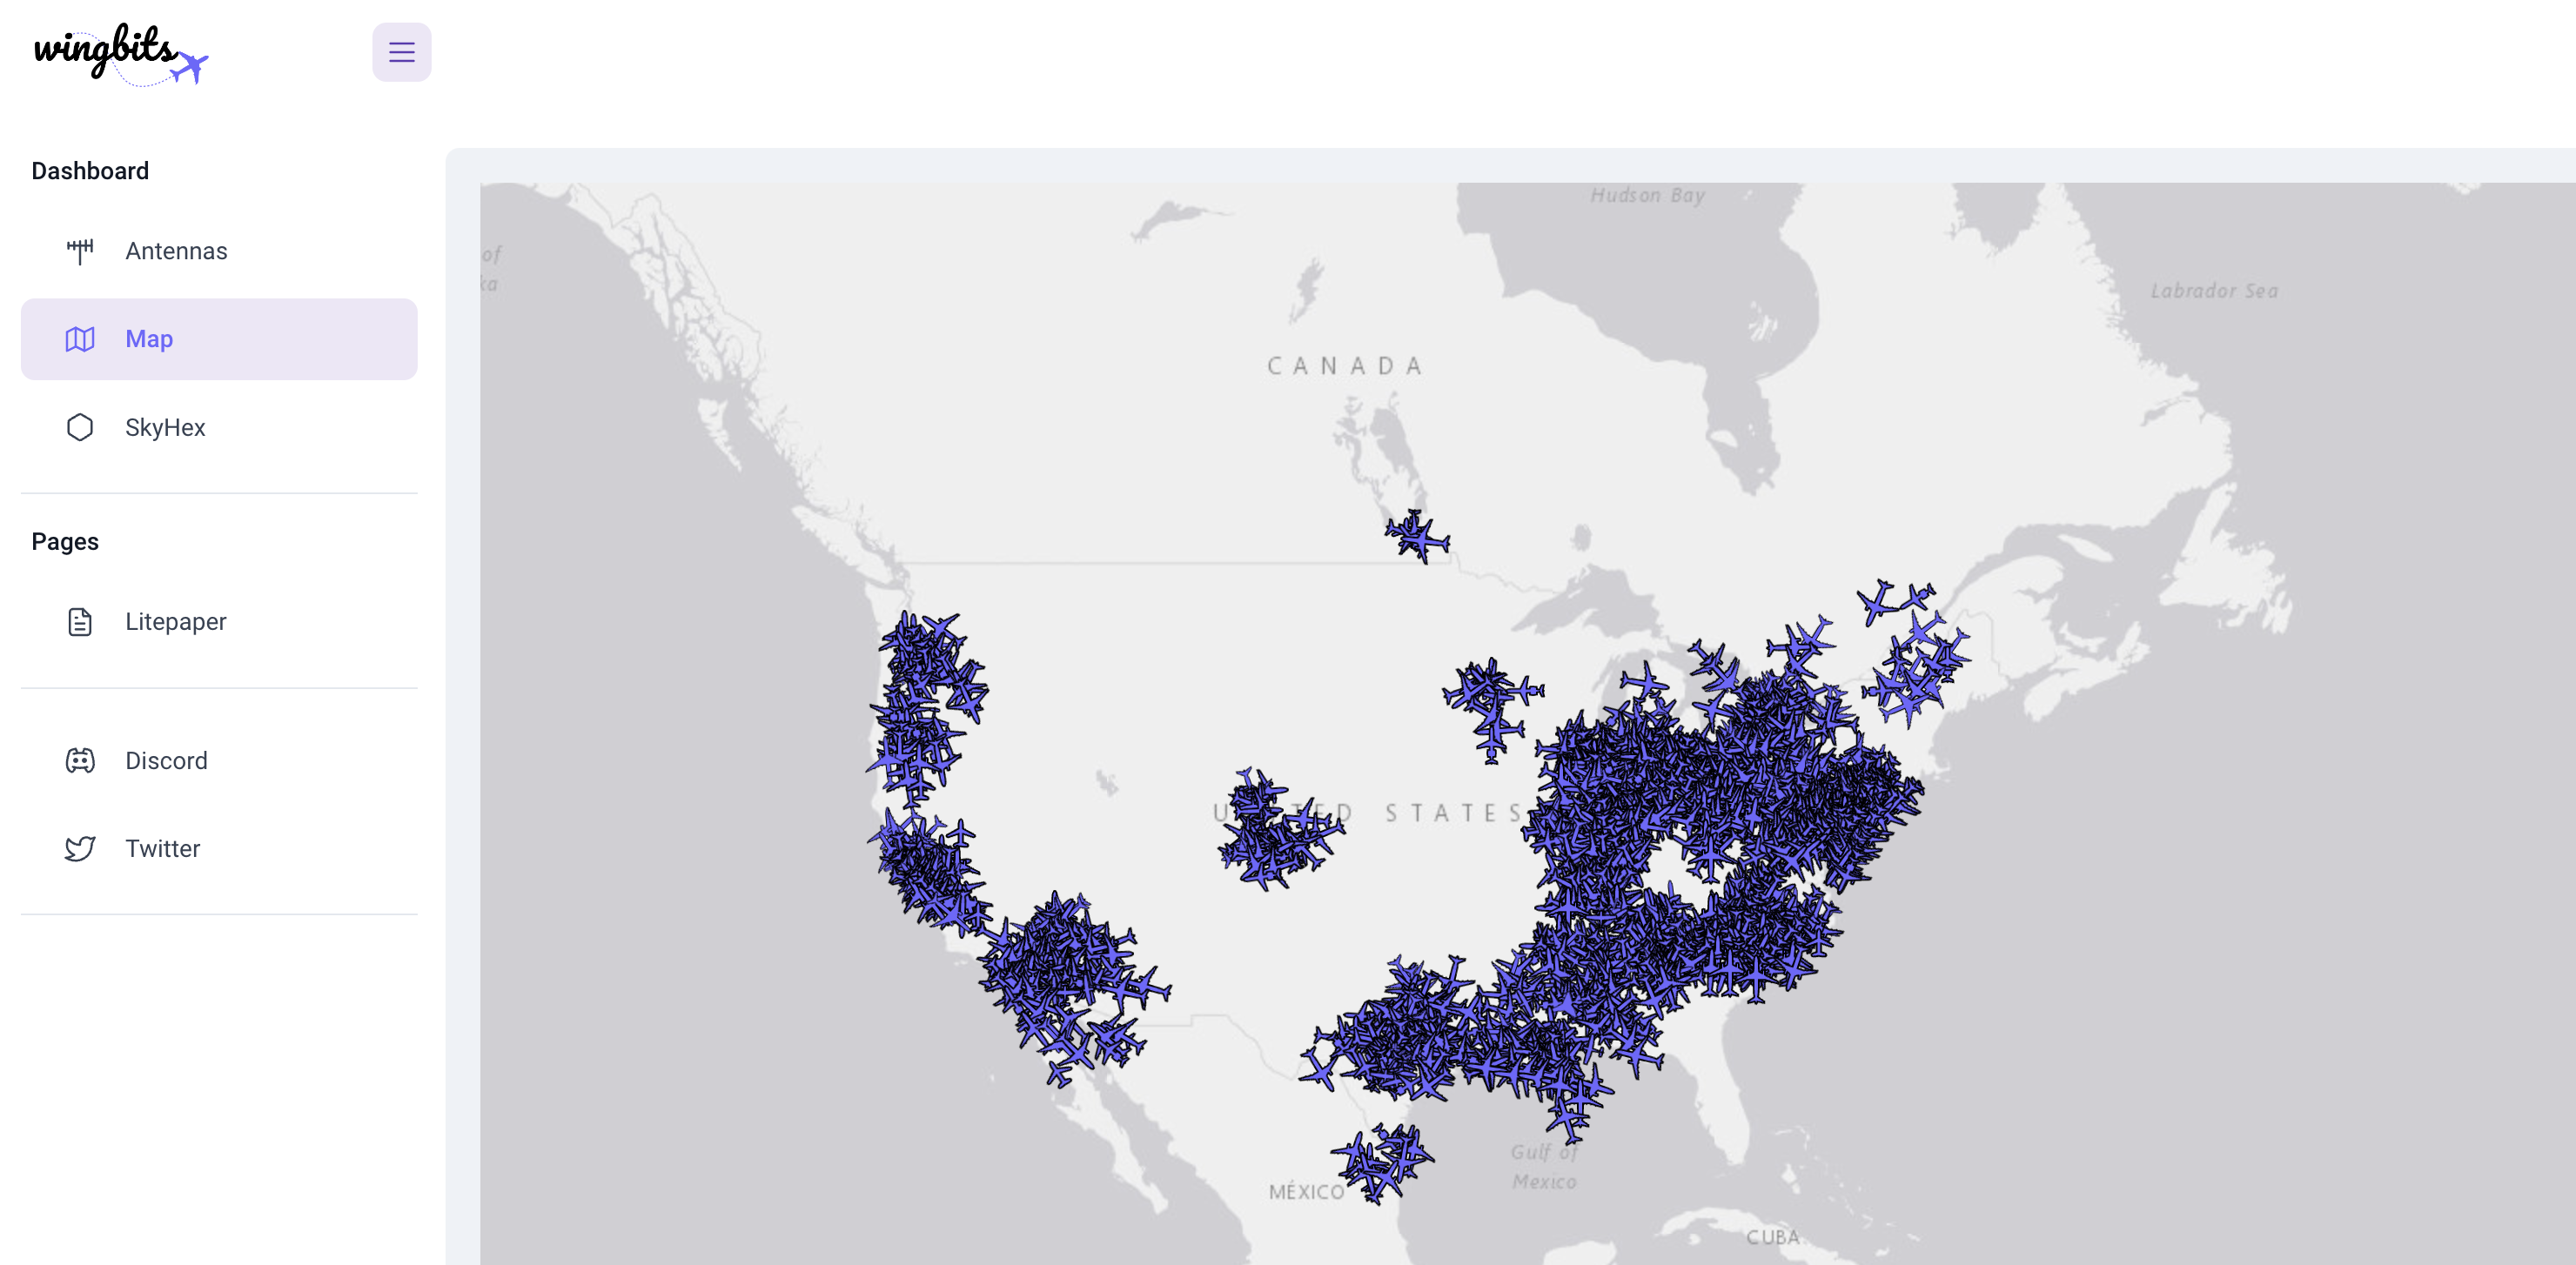
First, let’s go through what Wingbits is. Wingbits rewards you for placing hardware (a small computer like a Raspberry Pi connected to a radio receiver and an antenna) and receiving automatic transmissions from most commercial aircraft regarding where they are and how fast they’re going. If you want to fast forward and just buy the gear now because you’re all excited, skip ahead here. Just remember to come back here and keep reading.
The transmissions you’ll capture are called ADS‑B, or Automatic Dependent Surveillance — Broadcast. They provide the GPS location, altitude, ground speed, and other information about an aircraft. This transmission is public, and can be received by anyone. It is more accurate than radar, and is required for most aircraft in the US.
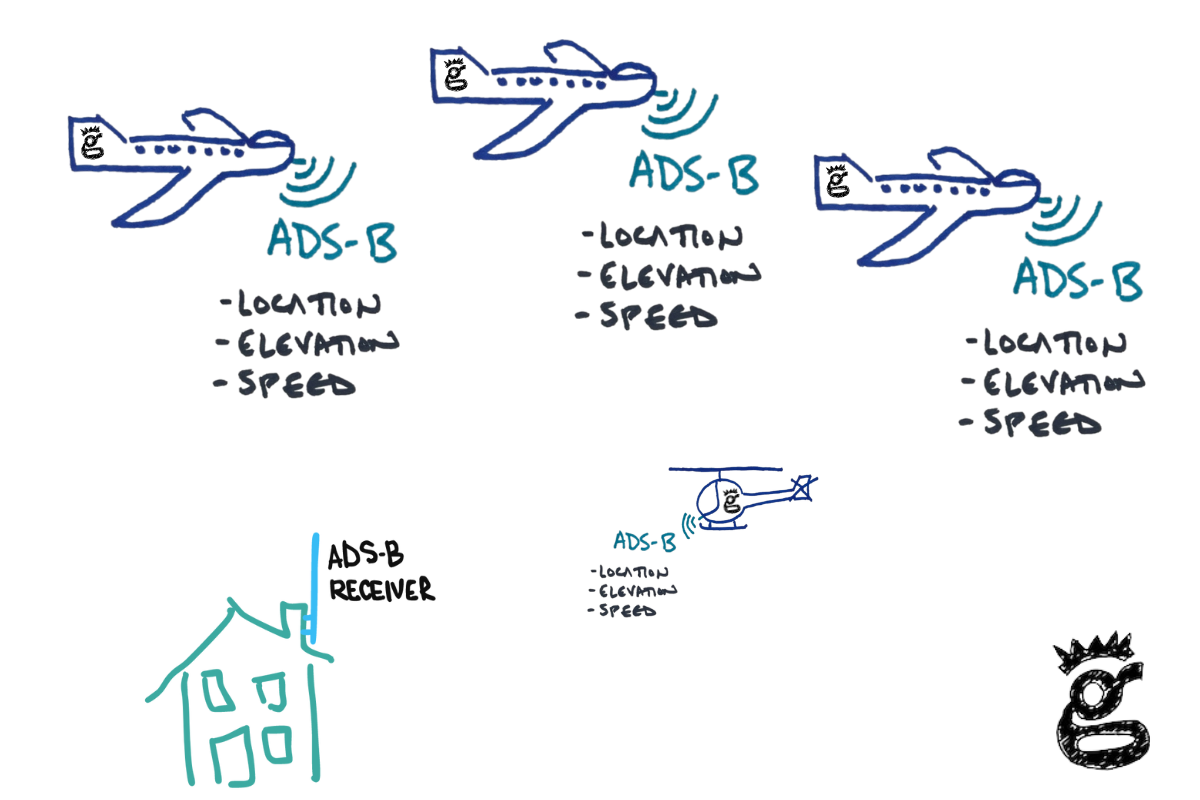
Basically, ADS‑B is a way for an aircraft to say, “Hey, I’m here, I’m going this fast, at this altitude; DON’T HIT ME!”
Like all DePINs, in return for you setting up the hardware and passing data, in this case ADS‑B data through Wingbits, you receive tokens. Those tokens can be traded for other currency.
Ok, so why has Wingbits particularly caught my attention? Because unlike many other DePIN projects, you can build your own hardware, you can make that hardware better, and better hardware means potentially more tokens.
Now, NONE OF THIS IS FINANCIAL ADVICE, so don’t go spending money just because you read about it on some guy’s blog on the internet. Do your own research before jumping in.
For me, Wingbits represents three opportunities: First, the challenge of building something in the radio world. Second, the chance to learn about something new. Third, the ability to write about this and share it with folks. All of those are super fun for me. Take careful note that earning tokens is NOT in my top three reasons for doing this. Yes, it’s fun and a way to keep score, but for me that’s about where it ends.
Before we get to how to build a rad ADS‑B set up for Wingbits, let’s talk about why this particular DePIN exists.
ADS‑B data has traditionally been gathered and supplied by volunteer hobbyists. These are the kinds of nerds who just like finding things out and sharing what they know. For years, these hobbyists have provided the data they collect to a company called ADS‑B Exchange for free; the company made it easy to see all the other information provided, and most hobbyists were satisfied with that arrangement.
Then, in January of 2023, ADS‑B Exchange sold to JetNet for a reported $20,000,000. All of a sudden, the hobbyists who’d been providing free info realized that what they’d been doing had value. They just didn’t know how to capture it. Enter Wingbits, an attempt to capture the value provided by hobbyists and return some of it to them for their contributions, using the DePIN model.
Ok, so HOW do you make the best possible setup? Let’s approach this from two angles: What the network “wants”, and how best to provide that.
Originally, the Wingbits teams licensed out hexes. If you bought one, you could earn from it; if you didn’t, you couldn’t. As the project grew, they decided to change that. I think I’ve scrubbed out references to “buying hexes” below, but keep in mind that at the end of the day, the person who provides the “best” coverage in a hex is likely to earn the most tokens.
Let’s start with the size you’ll have to cover. In the Wingbits Litepaper (a rough sketch of what the project is about), the rewards system is set up around hexagons from the Uber H3 system. The hex sizes are res 3, or about 4,600 square miles of area and about 73 miles between parallel edges. In the below view you can see those hexes.
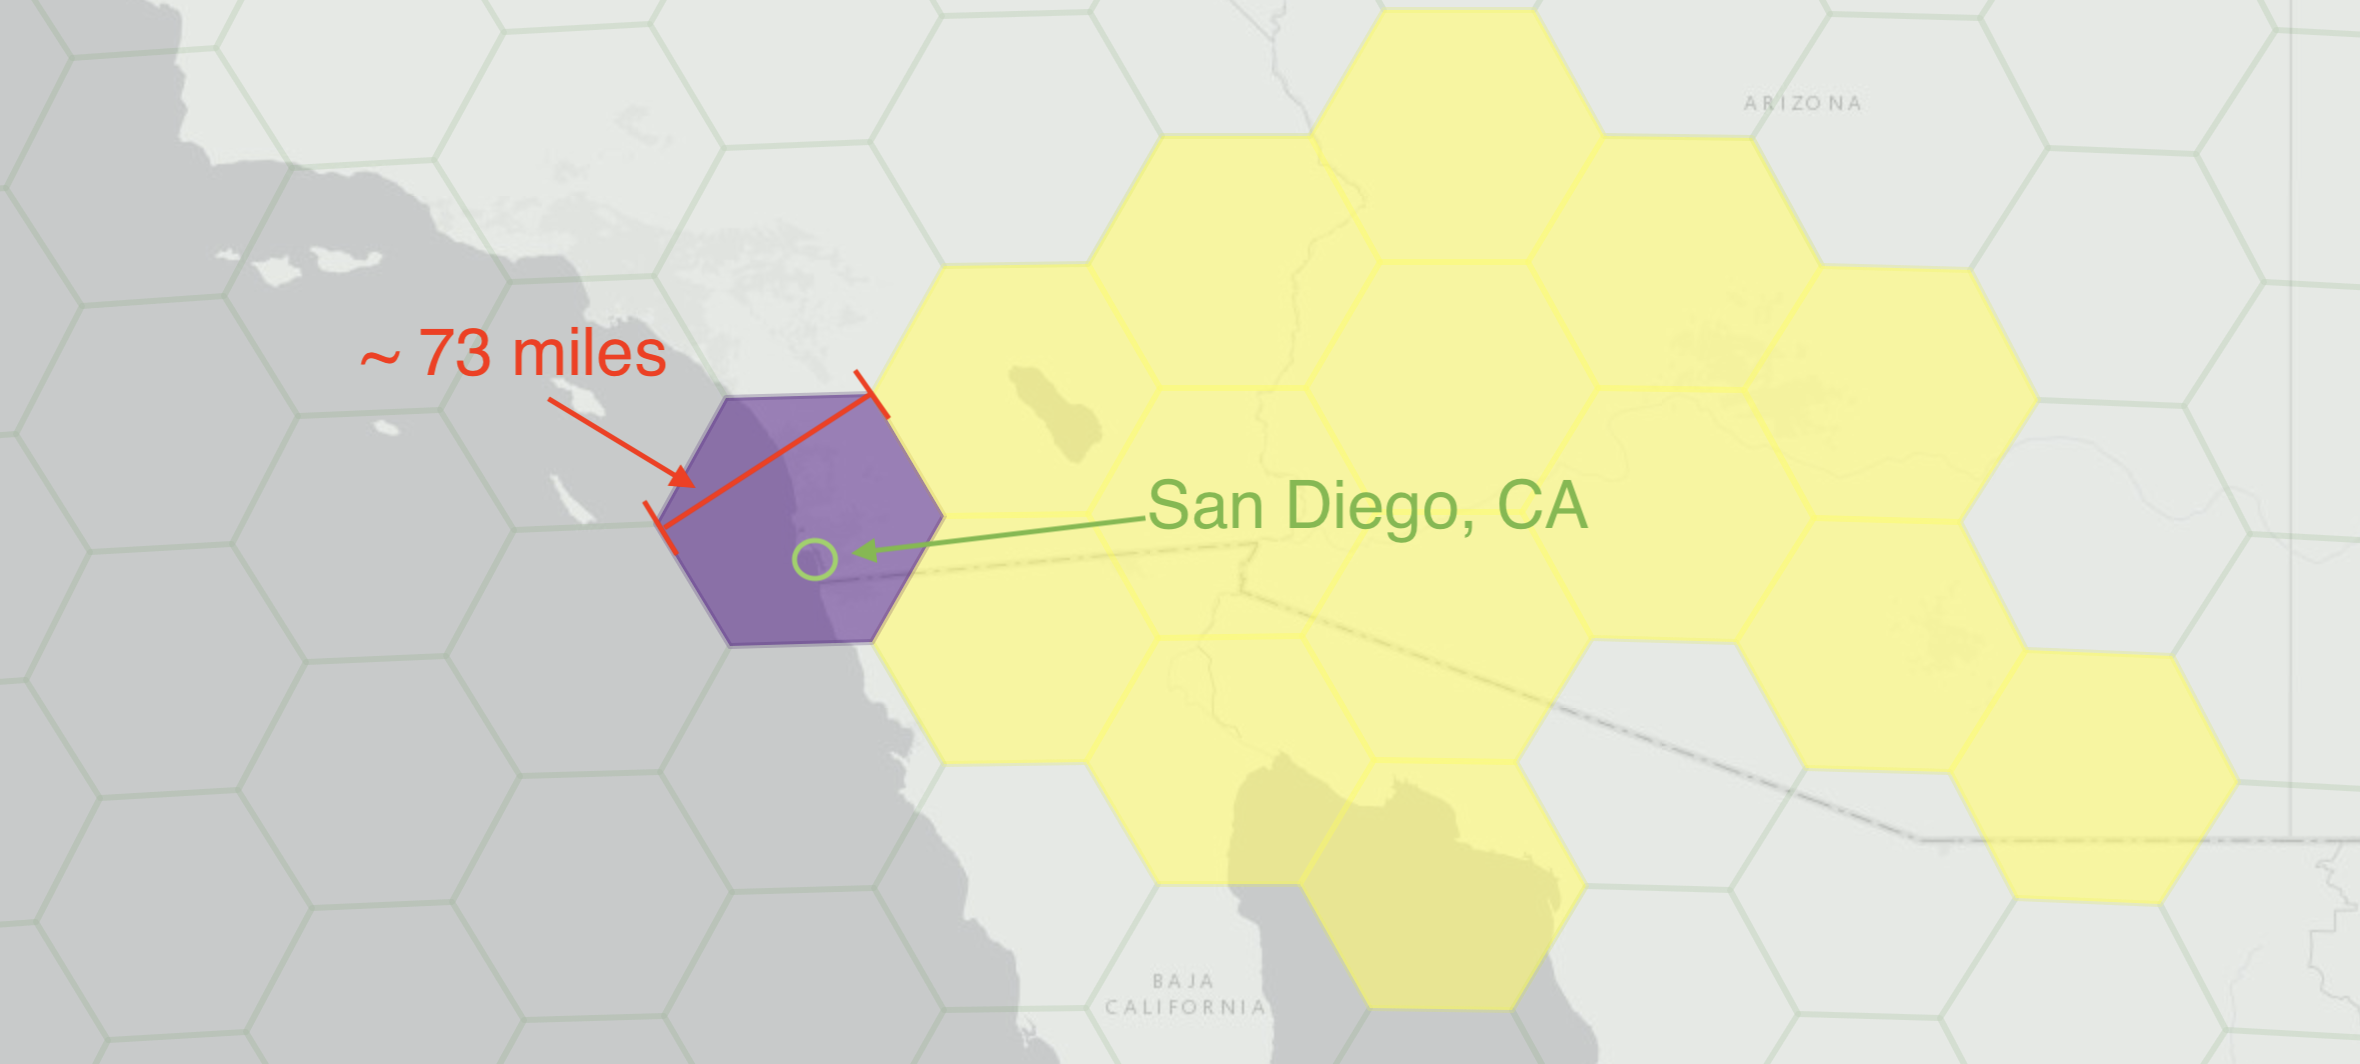
There are 41,162 res3 hexes in the world, most of which are in the ocean and probably can’t be covered. That leaves us earth-dwellers with about 15k hexes to populate. Each hexagon has a fixed amount of Wings tokens assigned to it daily. As of 08June2024, that number is 24.
Rewards in this system are directly tied to the quantity and quality of uploaded telemetry data
Wingbits SkyHex Medium article
These rewards may change over time. Please refer to Wingbits documentation for the latest.
Ok, what does that mean for you? Wingbits wants you to RELIABLY capture LOTS of HIGH QUALITY data. The better you do at any of those, the more you’ll be rewarded.
So, let’s do a couple of examples.
Wings Tokens Earning Example 1
You’re out in Montana, all alone in your hex and you’ve deployed 1 antenna. Let’s say you’re trying to be awesome and keep this thing on all the time, for 100% uptime.
You’ll earn: 100% uptime x 100% of data (you’re the only antenna) x 24 Wings = 24 Wings/day.
Wings Tokens Earning Example 2
For this one let’s imagine you’re also in the hex I am, here in San Diego. You’re committed to excellence (like me) but you’ve got janky internet, so you’re not up all the time. Still, you’re in a great location, so you actually capture 70% of the data to my 30%.
You’ll earn: 70% of data x 24 Wings = 16.8 Wings/day.
Wings Tokens Earning Example 3
Worst case scenario here: You’re in San Francisco. Aside from the excellent food and being in the heart of technological innovation, you’ve got some serious downsides; namely the number of people competing with you.
You’re only capturing 15% of the unique data; the other antennas are just outcompeting you.
Available Wings: 15% x 24 = 3.6 Wings/day.
Important to Note: You Don’t Need To Be Deployed In Your Hex
You just need to provide coverage for the hex you bought. You could live outside of it, or on the edge of it way up on a mountain, not actually have you antenna deployed inside the physical hex, and still be providing excellent coverage.
Now, HOW you capture that data is where I think the fun part comes in. Remember, you want to RELIABLY capture LOTS of HIGH QUALITY data.
RELIABLE means you’ve got a strong and fast internet connection so your hardware doesn’t go down. I know some of you are going to use the WiFi side of the Raspberry Pi, and to be honest, that’ll probably work fine. I’ll be using an ethernet cable. I’m aiming to win, yo.
LOTS of data will depend on where you are as far as your “sightlines” to aircraft and where you place your antenna. I know, I know, it’s easy to put it inside near your window and call it good. Just remember, if there’s one person like me anywhere near you, they’ll be putting that antenna up high where it has clear lines of sight everywhere, and they’ll crush you. This is a contest, after all.
The other thing to remember with LOTS of data is where YOU are vs where your antenna will cover. In many cases you”ll have a range of over 100 miles, so even if you’re in the middle of a hex (and you buy the one you live in) you could reasonably buy surrounding hexes and pick up traffic there.
HIGH QUALITY data is where we start to venture into the black magic of radio. You’ll want to be capture exactly the right signal, and you’ll want that signal to be clean and strong. Getting that combination will require an antenna tuned to the ADS‑B frequencies. There are 2, the main one is 1090 MHz and the other one, much less used, is 978 MHz. I’ll roll with one of each just to see what happens, although my focus is on 1090.
Just for clarity on that, the 1090 is the worldwide standard. 978 is US only, and really for smaller craft. I’ll go after 978 because it’s fun and I’m in the US. Most folks should focus on 1090.
The next part of high quality data, once you get a signal on a tuned antenna, is filtering out the “trash” around it. For that, you can use any number of filters. I’ve linked one that is fine below. If you want to go batshit crazy and get the custom-made pure glory, DM me. It probably doesn’t make a difference, but I like nice stuff, so I bought one.
Third is an LNA, or Low Noise Amplifier. This is built into the gear linked below, so as long as you get that you don’t need to worry much about it.
Now, I’m POSITIVE some radio-nerd will read this and point out how I could read the ADS‑B off the UFOs on the backside of the moon if I just did [insert your favorite radio hack here]. That’s what makes this fun; there’s all kinds of stuff you can do to level up your game. Remember, this is just the Rough Guide. It’ll get ya 80% there, and probably 95% if you buy everything below.
Gear List
You’ll need at a minimum a small computer (Raspberry Pi), an SDR (radio receiver) and an antenna. Separate the Raspberry Pi from the SDR with a USB extension.
You may want to invest in nicer gear, although I’d caution against that unless you know what you’re doing. I’ll cover optimization in a later post; the first big step here is to use gear specific to 1090. I know, I know, you have some old Helium antennas laying around. It’s true that they work, but it’s like bringing a knife to a gun fight. You want to win, right?
If you want to support the Gristle King enterprise and say thanks for writing this blog, use the following Amazon referral links to get a basic set up.
[ninja_tables id=“6525”]If you want to spend more money for possibly better results, you can use this gear list:
[ninja_tables id=“6685”]Keep in mind that while the gear in the second table is “better” that may not help enough to offset the extra cost. I like doing things well, so I’ve basically used the second version, but it IS more expensive.
Build It
Build instructions are straightforward. I used Simeononsecurity’s DeFli dual guide setup the first time. Then I cut out the DeFLI setup part and focused on Wingbits for mine. If you don’t mind me assuming you know a bit about the Pi, here’s what to do:
Start by “Registering an antenna” on your Wingbits account.

The ID will be the station name, something like “super-secret-scorpion”.
Next, we’ll turn to your Raspberry Pi.
- Set up your Raspberry Pi, connecting your SDR Navflight stick to the Pi using the USB extension cable, then the SDR to your antenna. If you bought the filter, put that between the SDR stick and the Pi. It’ll look like this, from the top: Antenna, filter, SDR stick, USB extension, Raspberry Pi.
- Flash an SD card with RaspOS Lite. Use the Gear settings to enable SSH, set the hostname, and timezone. Fancy.
- Insert the SD card in the Pi and power it up.
- SSH in and run the command found in your Wingbits dashboard, something like this:
curl -sL https://gitlab.com/wingbits/config/-/raw/master/download.sh | sudo bashYou’ll probably find that the first time you run this code you’ll get an error at the end, something like
vector is active. ?
readsb is inactive. Waiting 5 seconds...
readsb is still inactive.
Just reboot and install again. Yeah, I know, a little janky. Hopefully you won’t have to do this, but as of November 5th 2023, that’s what I had to do. By the way, I was able to get mine working on PoE with a splitter that was 5V and 2.5A.
You’ll be asked for your “antenna ID” once that finishes. You got the antenna ID in the first step, remember? It was something like super-secret-scorpion. Make sure you include the dashes!
- Set up your location using YOUR coordinates, not the 33/-115 ones below. You can use Google Earth or latlong.net to find yours.
sudo readsb-set-location 33.67854 -115.12356You CAN set autogain if you’d like, but I’d recommend against it.
Troubleshooting isn’t particularly easy or clear, and I’ve found that most times if you just check your connections (Pi-Dongle-antenna) and then reboot a few times, it all works.
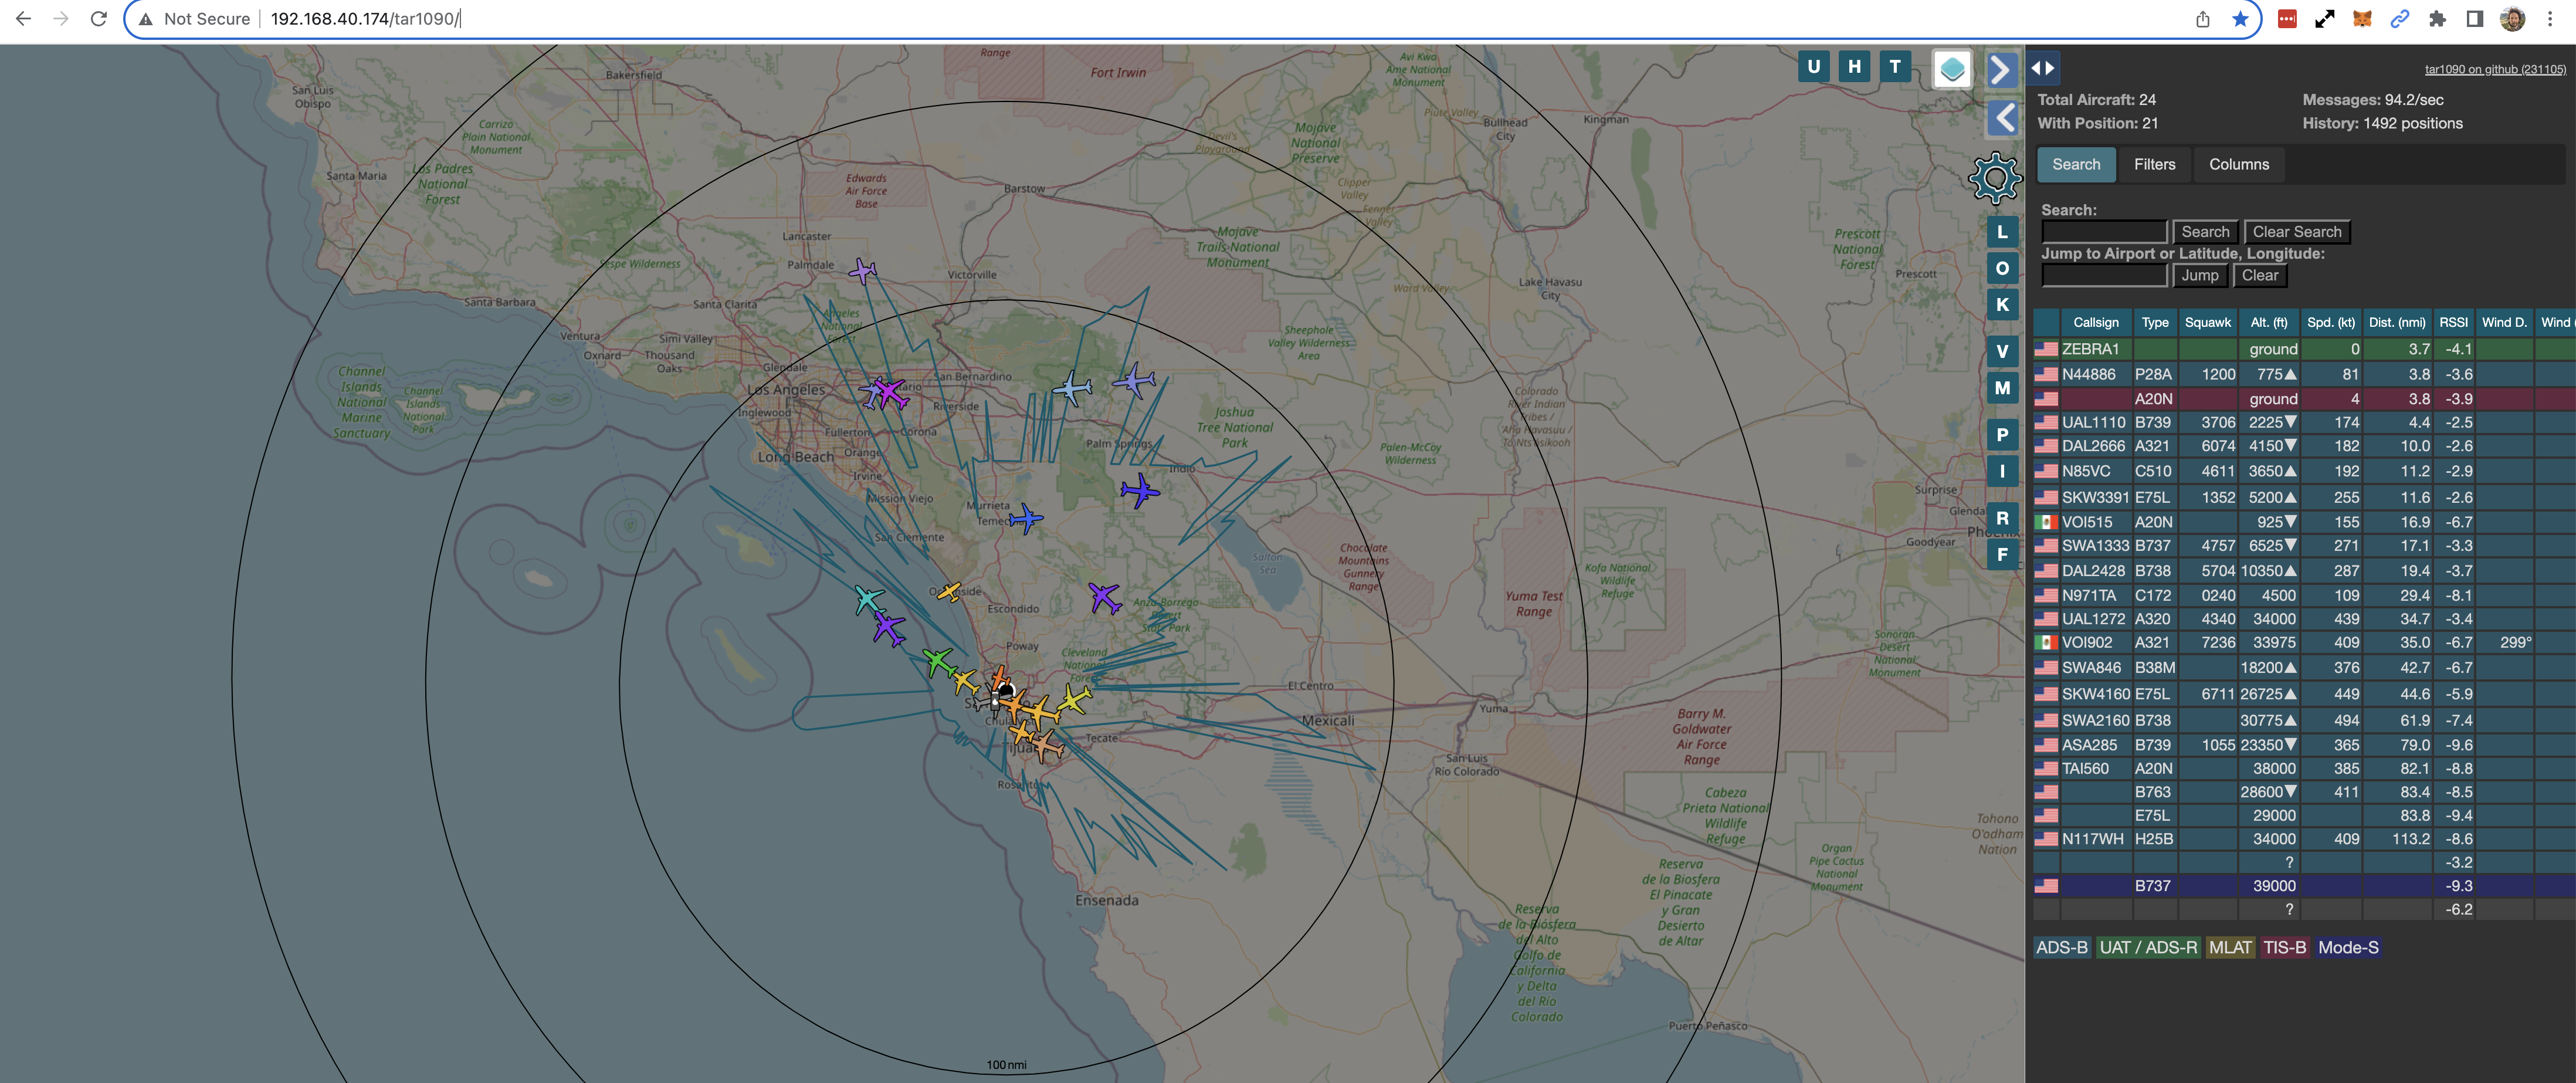
Weidehopfs Tar1090 and Graphs1090 are included, so you can see what’s working by going to http://192.168.x.yy/tar1090 and http://192.168.x.yy/graphs1090 making sure to replace the .x.yy with whatever your appropriate details are.
The Tar1090 is a cool local (hosted on your Pi or whatever computer you use) interface to see what flights are being tracked. It’s fun to watch. It looks like this:
I’ve written up a tutorial on how to get a little more out of Tar1090 than just the basic install, if you want to do that, go here.
Graphs1090 gives you some more stats to geek out on. If you want to go deeper into it, check out this article.
I expect within the next few months we’ll significant improvements in both of these regarding testing antennas and setups and how it effects token earnings. Here you can see where I went offline for a few hours as I moved from a test rig inside on my desk up to the roof, with an accompanying bump in stats.
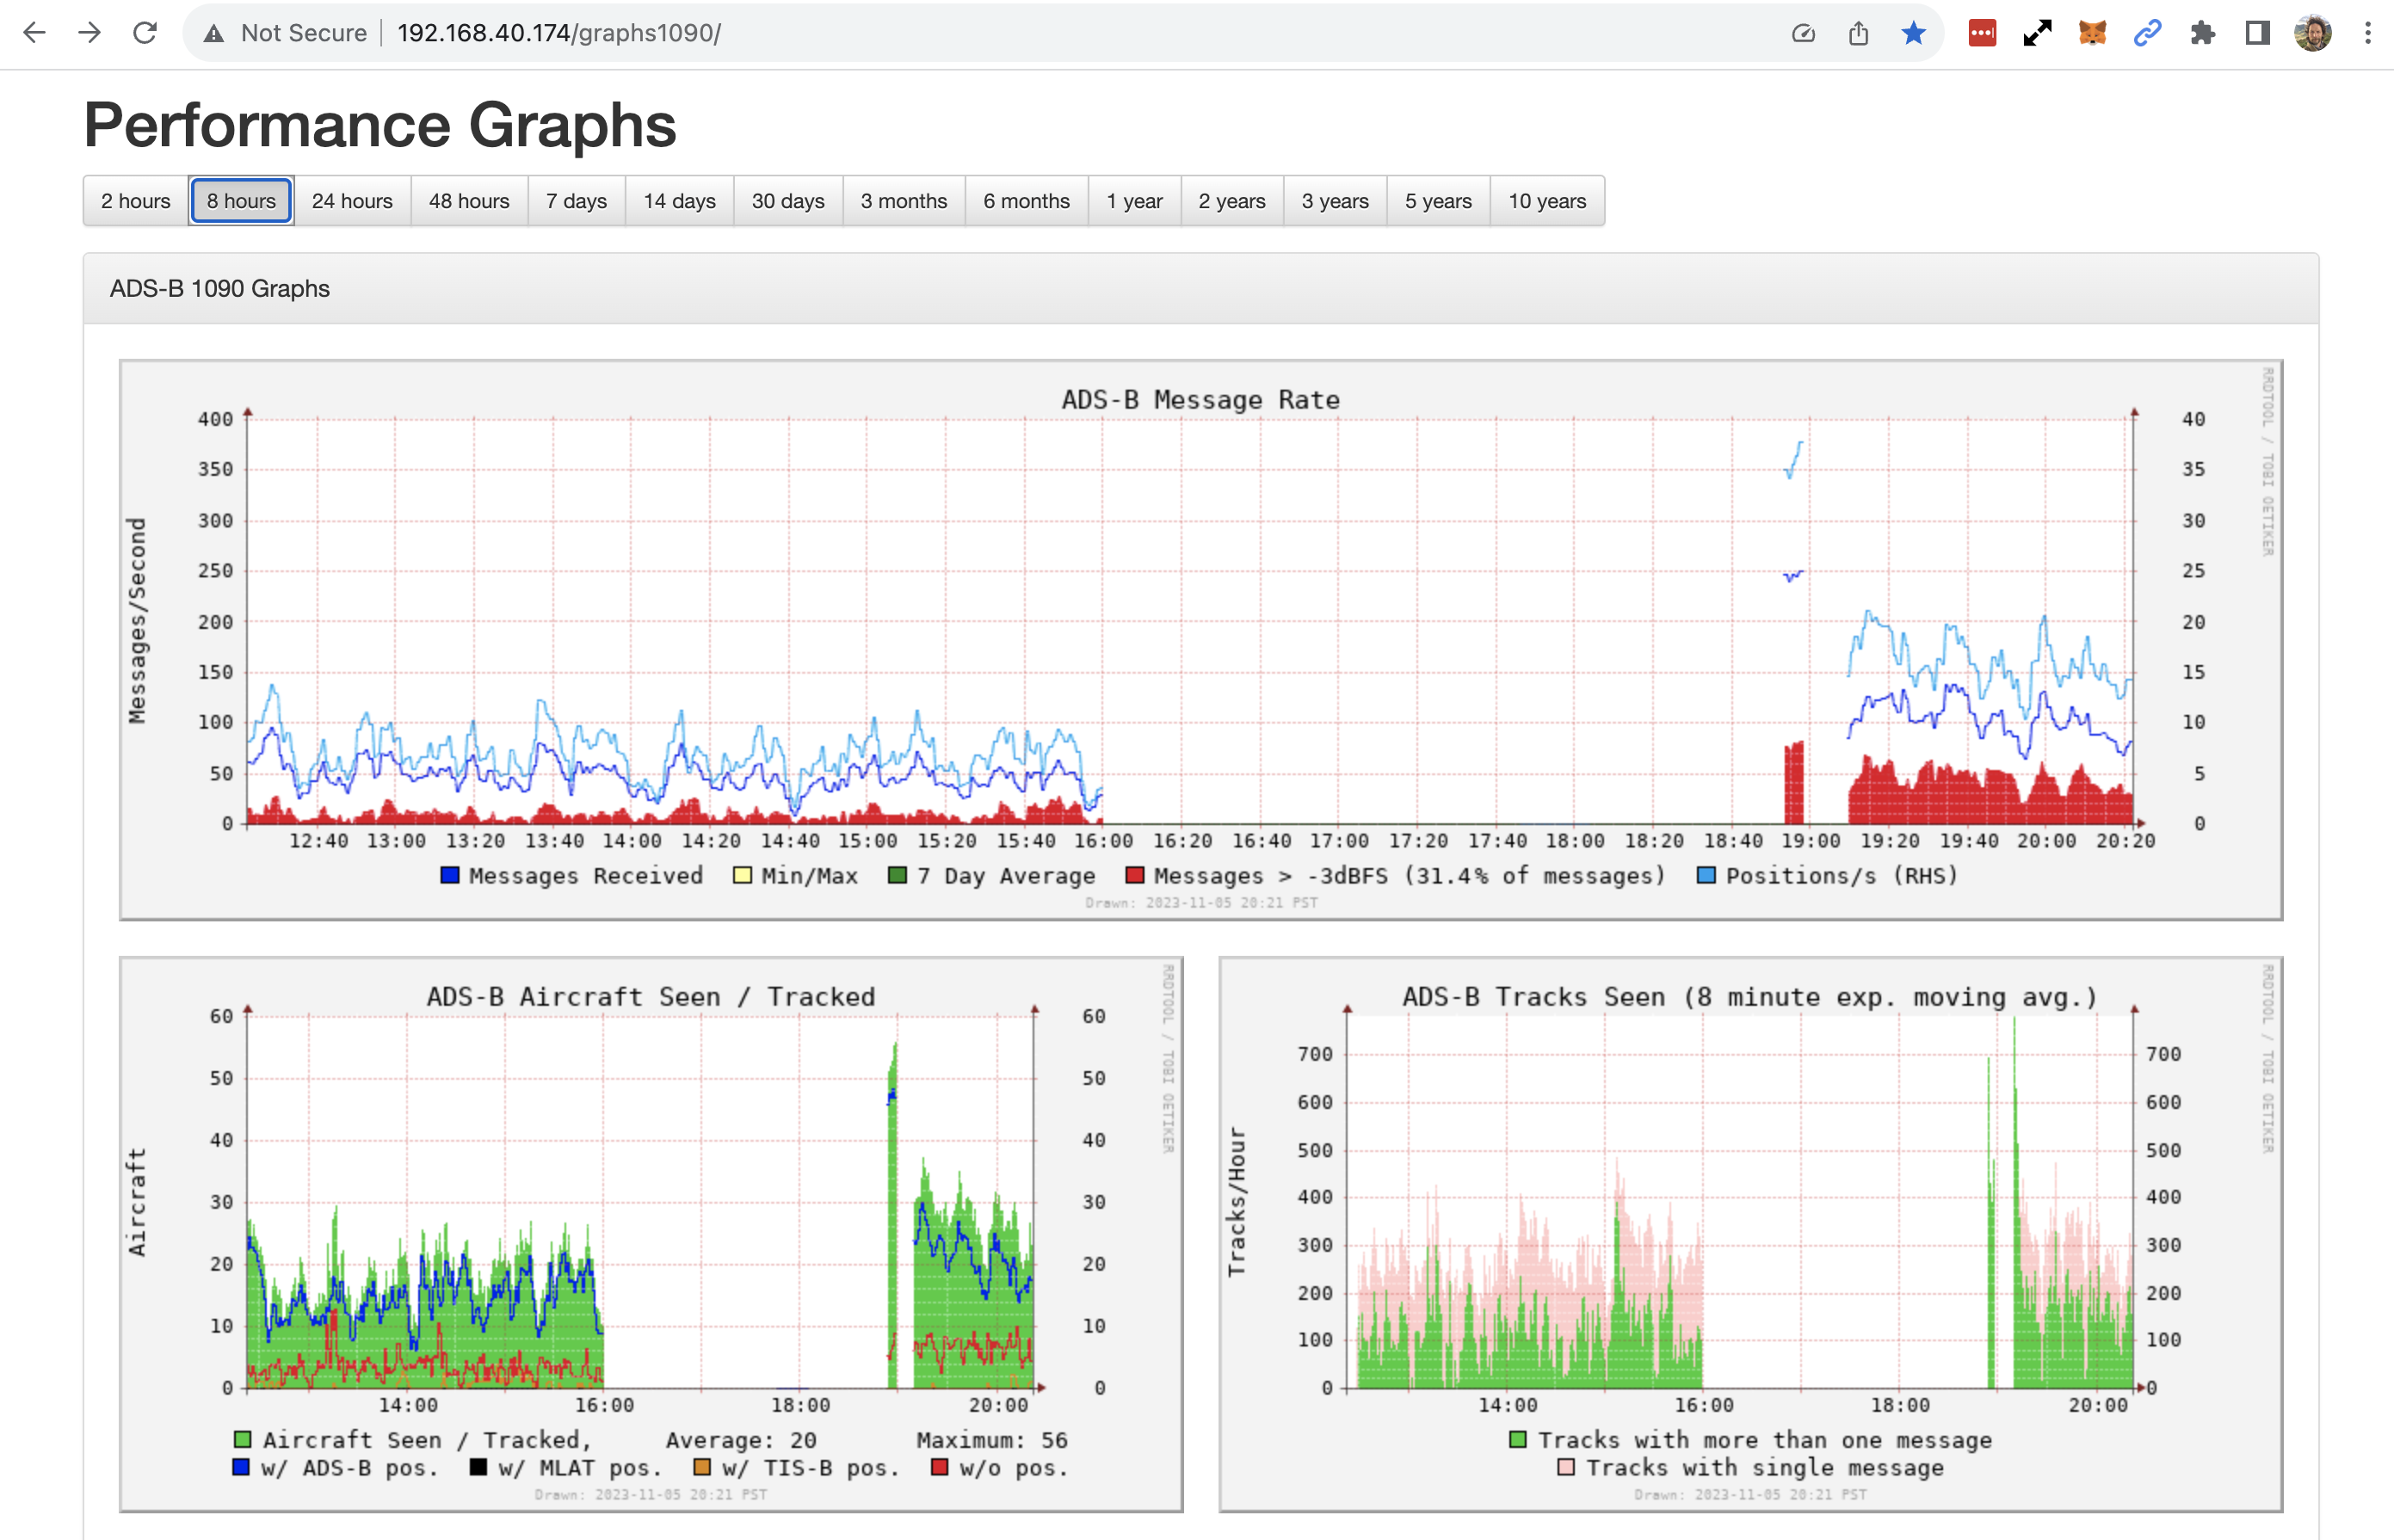
Ok, that should do it! As a teaser, I’ve heard that these things use 40–60 GB a month, so an off-grid setup might be something fun to explore, although as a long-lasting solution it’s probably not the best move with current tokenomics if your goal is to maximize earnings.
In the meantime I’d strongly recommend joining the Wingbits Discord to learn more and stay up to date, please say “Hi” when you come in (I’m @gristleking in there). Huge thanks to @!simeononsecurity, @acci, and @gwosty on the Wingbits Discord for all their help with this. Now let’s track some aircraft!
Extra Credit for the Nerds
Airspace is broken up into several classes; you can think of them as areas where there is more or less control by “the tower”. Class A is the most restricted, generally beginning at 18,000′ above mean sea level and up to 60,000′. This is where commercial airlines, cargo operators like FedEx, and high performance aircraft fly.
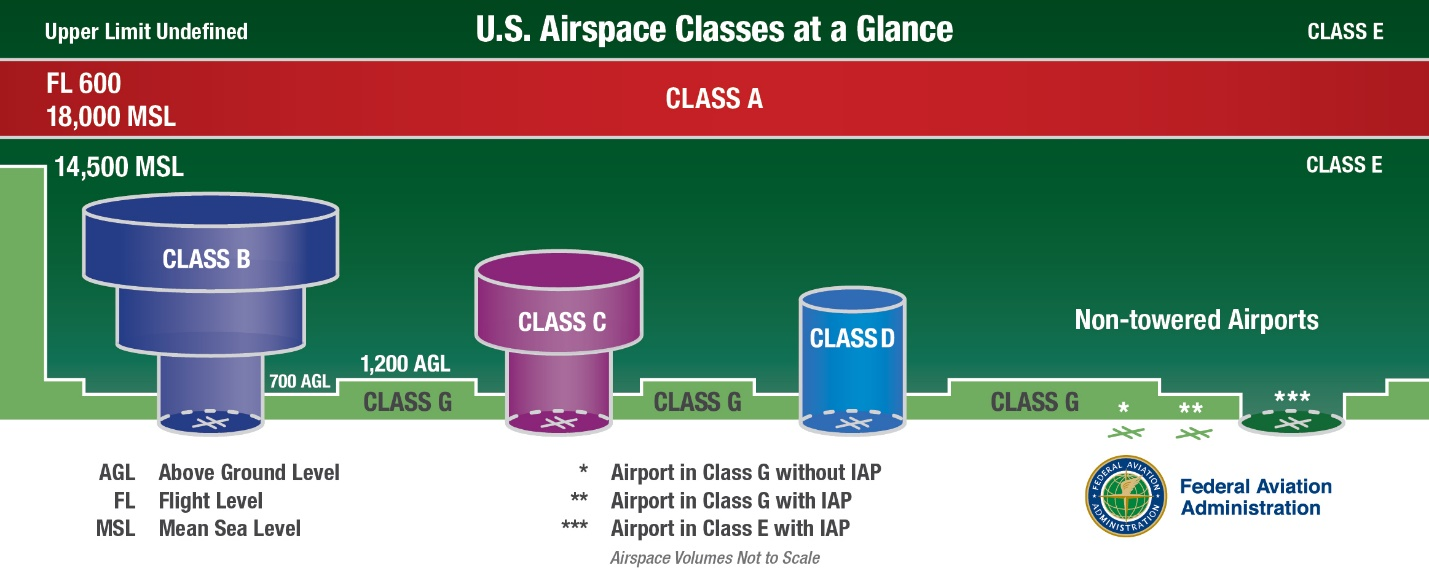
ADS‑B is also required in Class B airspace (all around your busy airports) and Class C airspace (less busy airports).

Leave a Reply